Bank Reconciliation & Statement Import
Auto-Matching Video Tutorial
The auto-matching feature saves significant time by automatically suggesting matches between your bank transactions and accounting records. Watch this video tutorial for a complete walkthrough:
Auto-Matching Configuration and Review Process
Overview
Bank reconciliation is the process of matching transactions between your accounting records and bank statements to:
- Ensure cash records are accurate
- Detect fraud or errors
- Maintain proper financial controls
Starting the Reconciliation Process
1. Access Reconciliation List
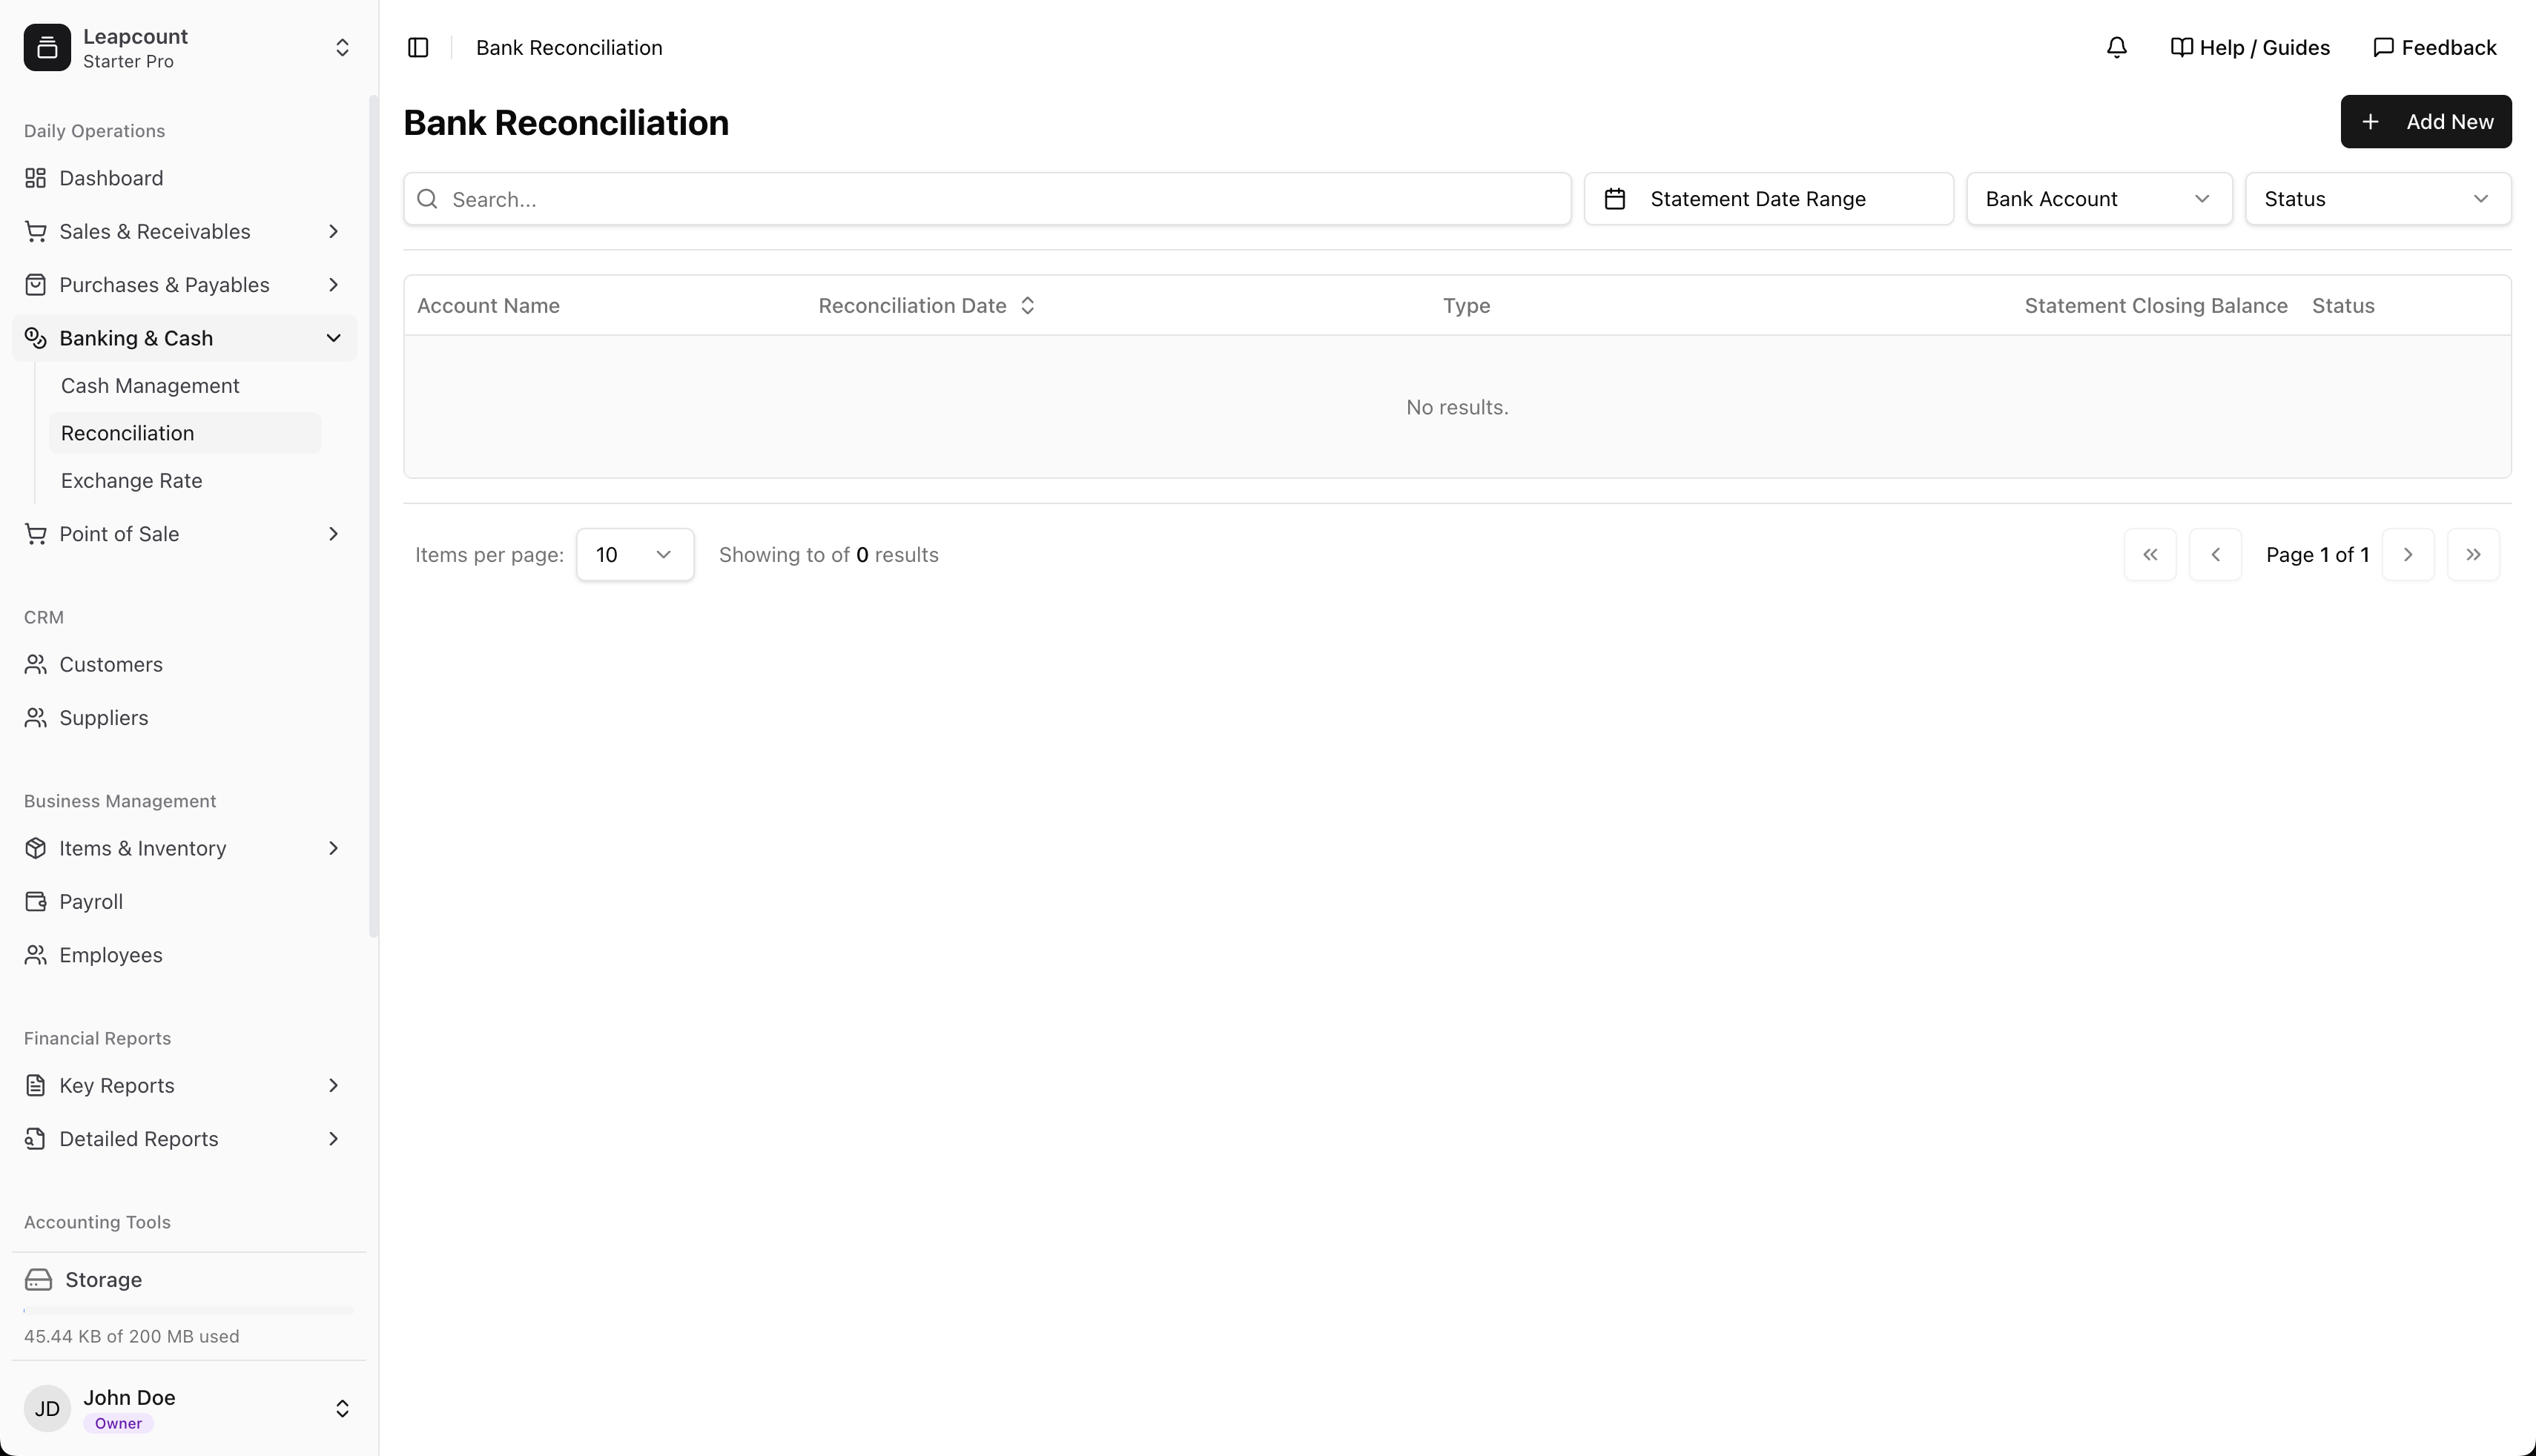
- Navigate to Banking & Cash → Reconciliation
- View existing reconciliations
- Click New Reconciliation to begin
2. Choose Reconciliation Method
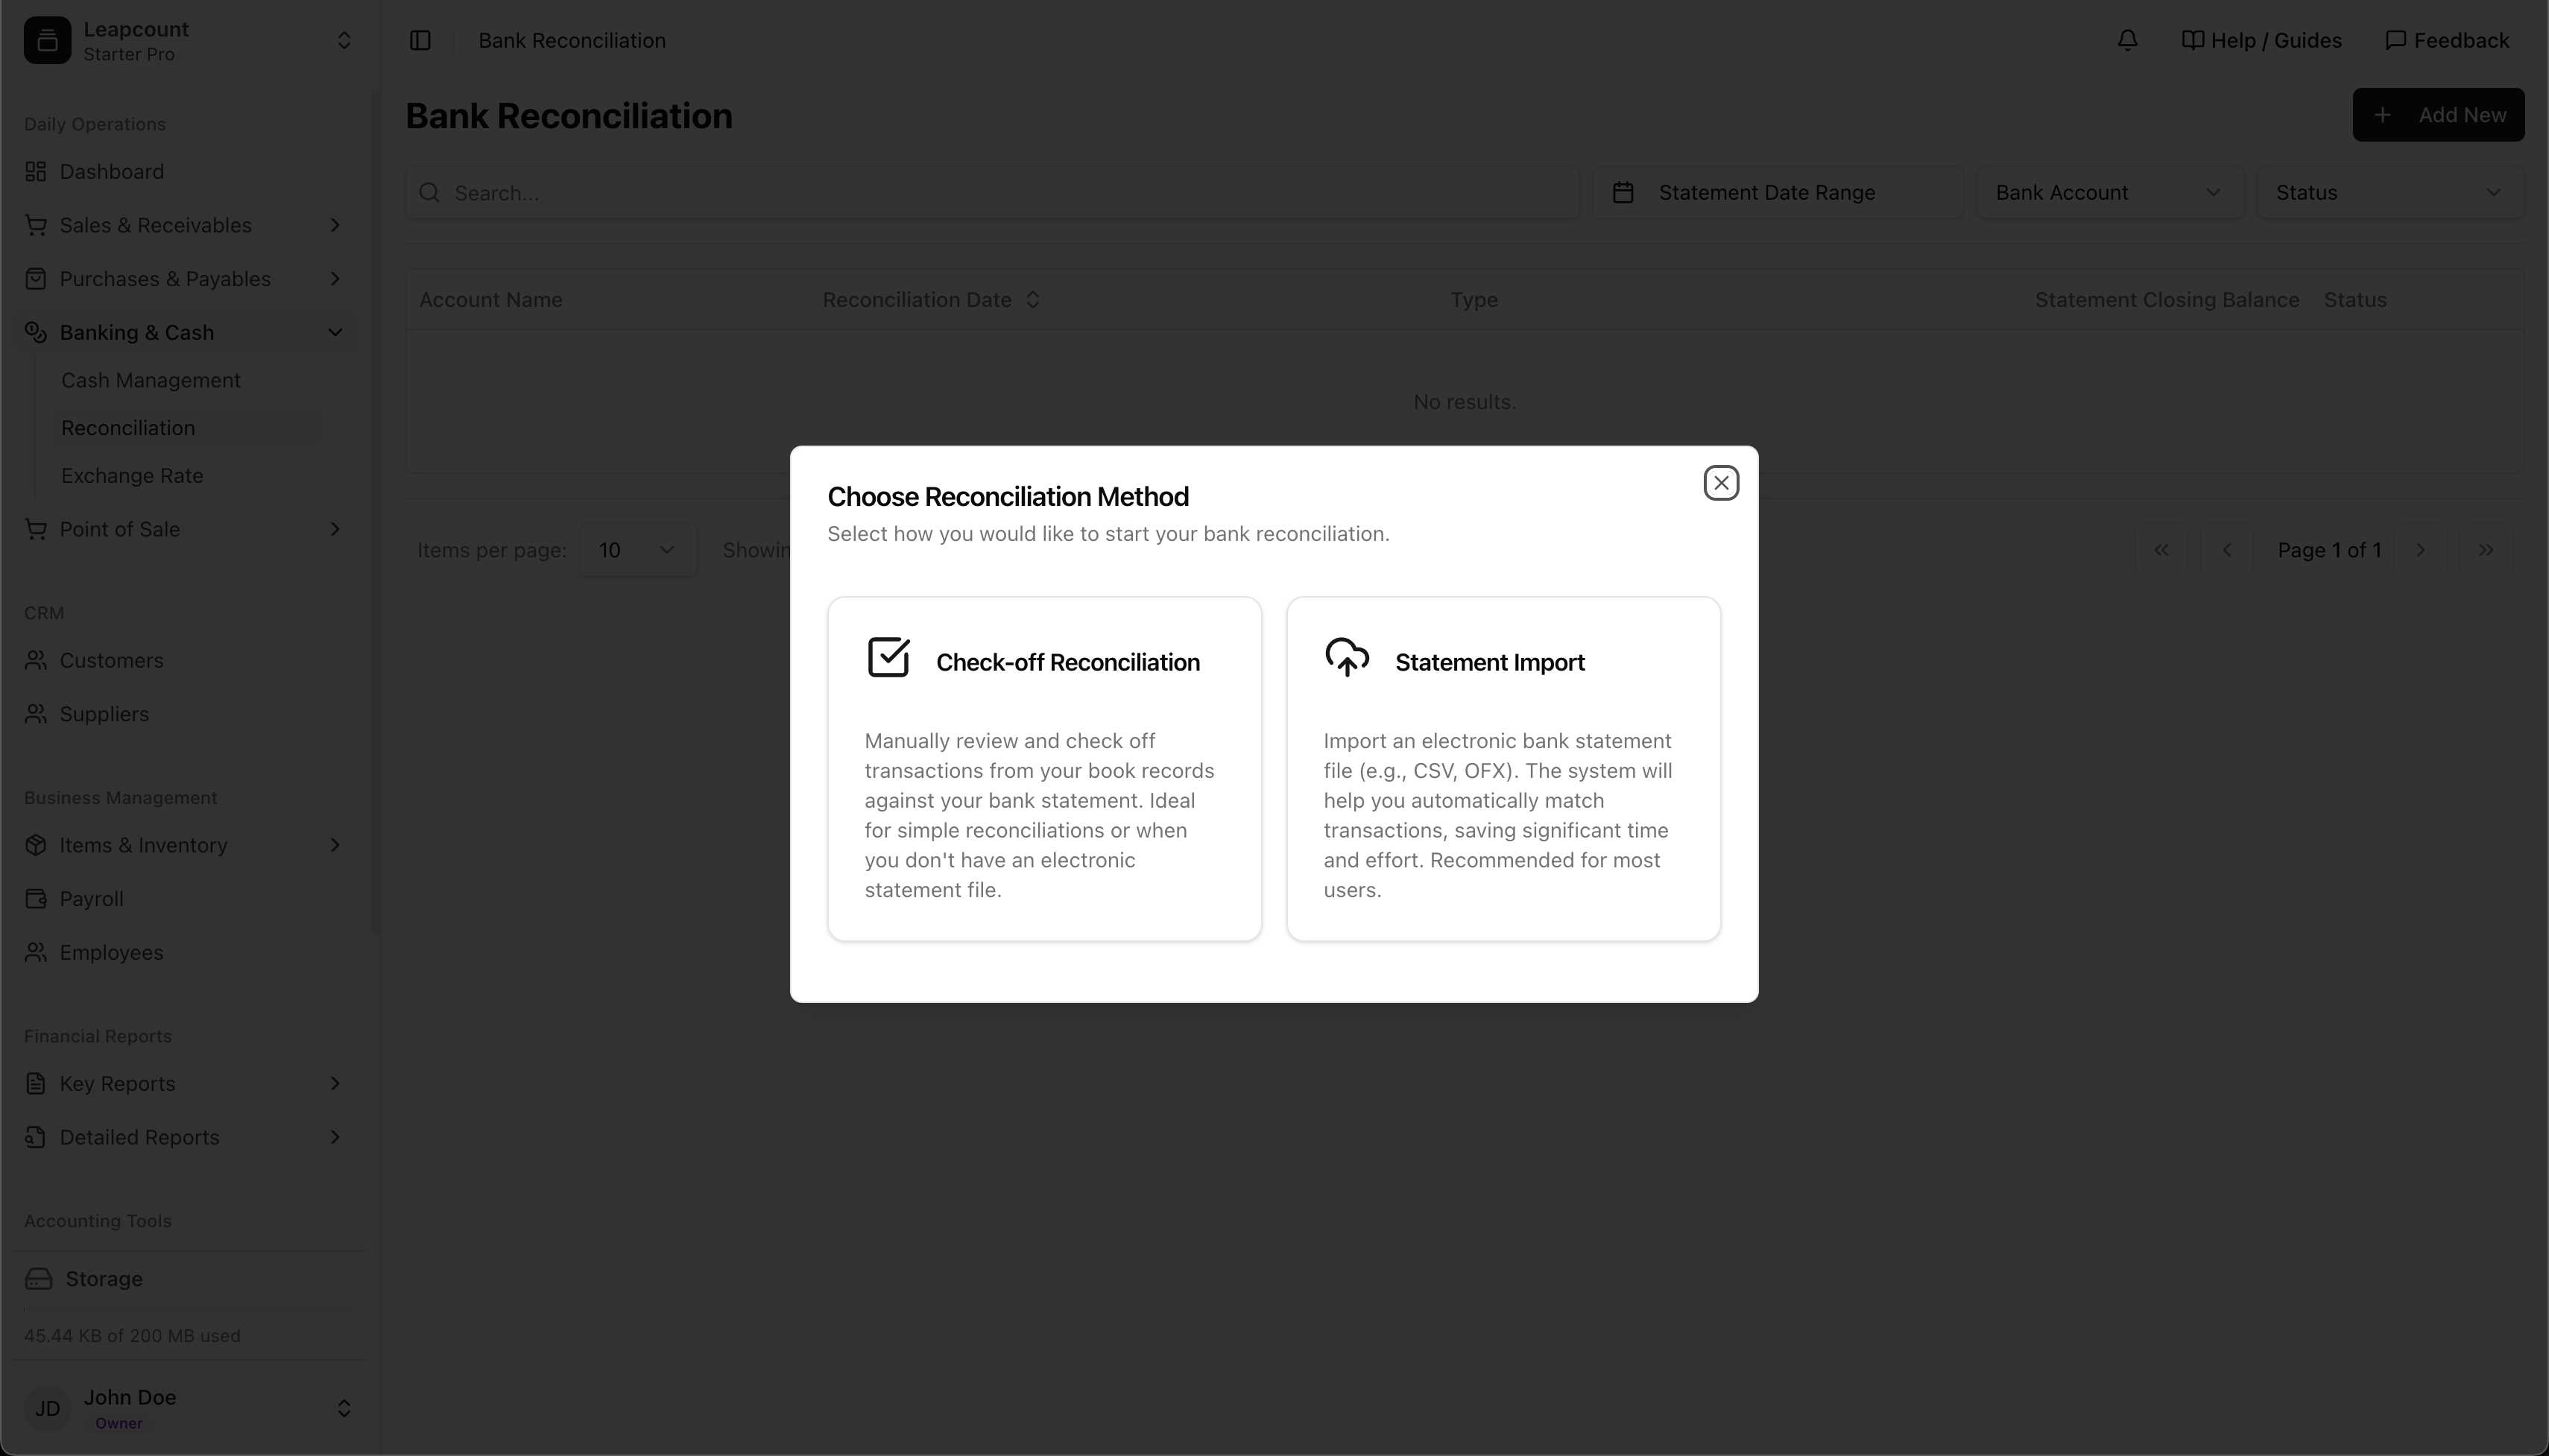
Select your preferred method:
-
Check-off Reconciliation
- Manual matching of transactions
- Ideal for simple reconciliations
-
Statement Import
- Automated matching with electronic statements
- Recommended for most users
Method 1: Check-off Reconciliation
3. Select Bank Account
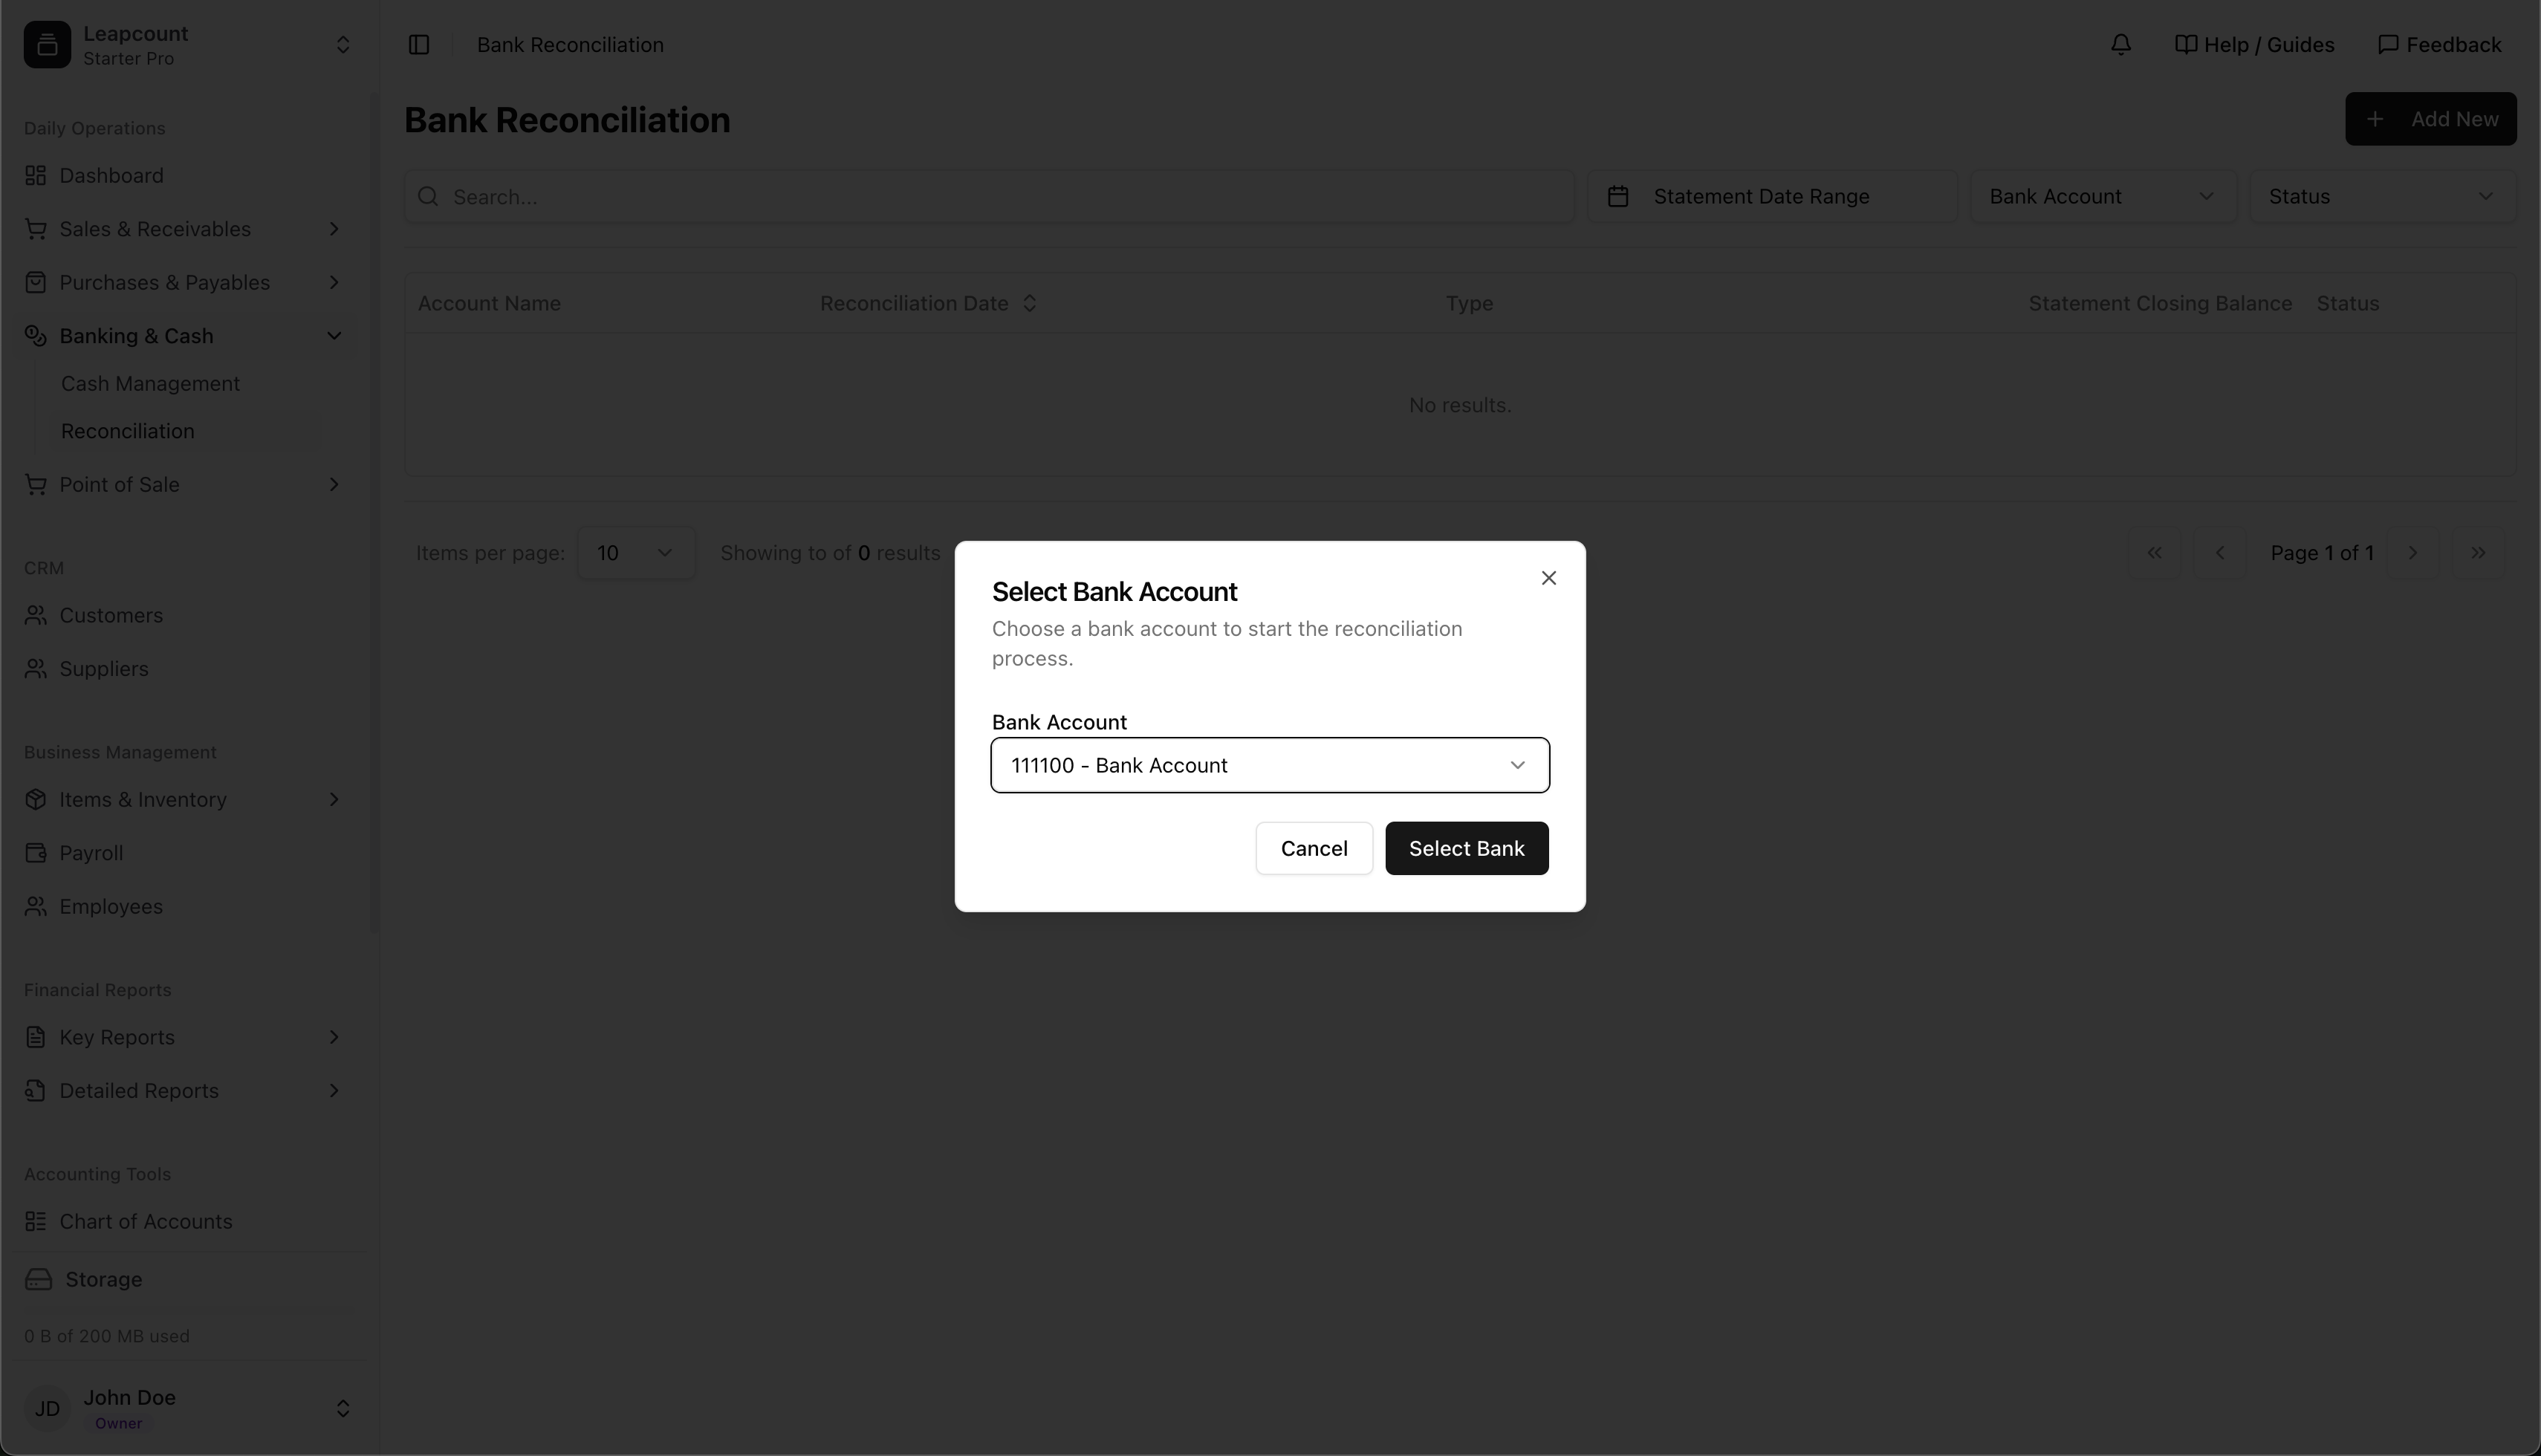
- Choose bank account (e.g., "111100 - Bank Account")
- Click Select Bank to proceed
4. Manual Transaction Matching
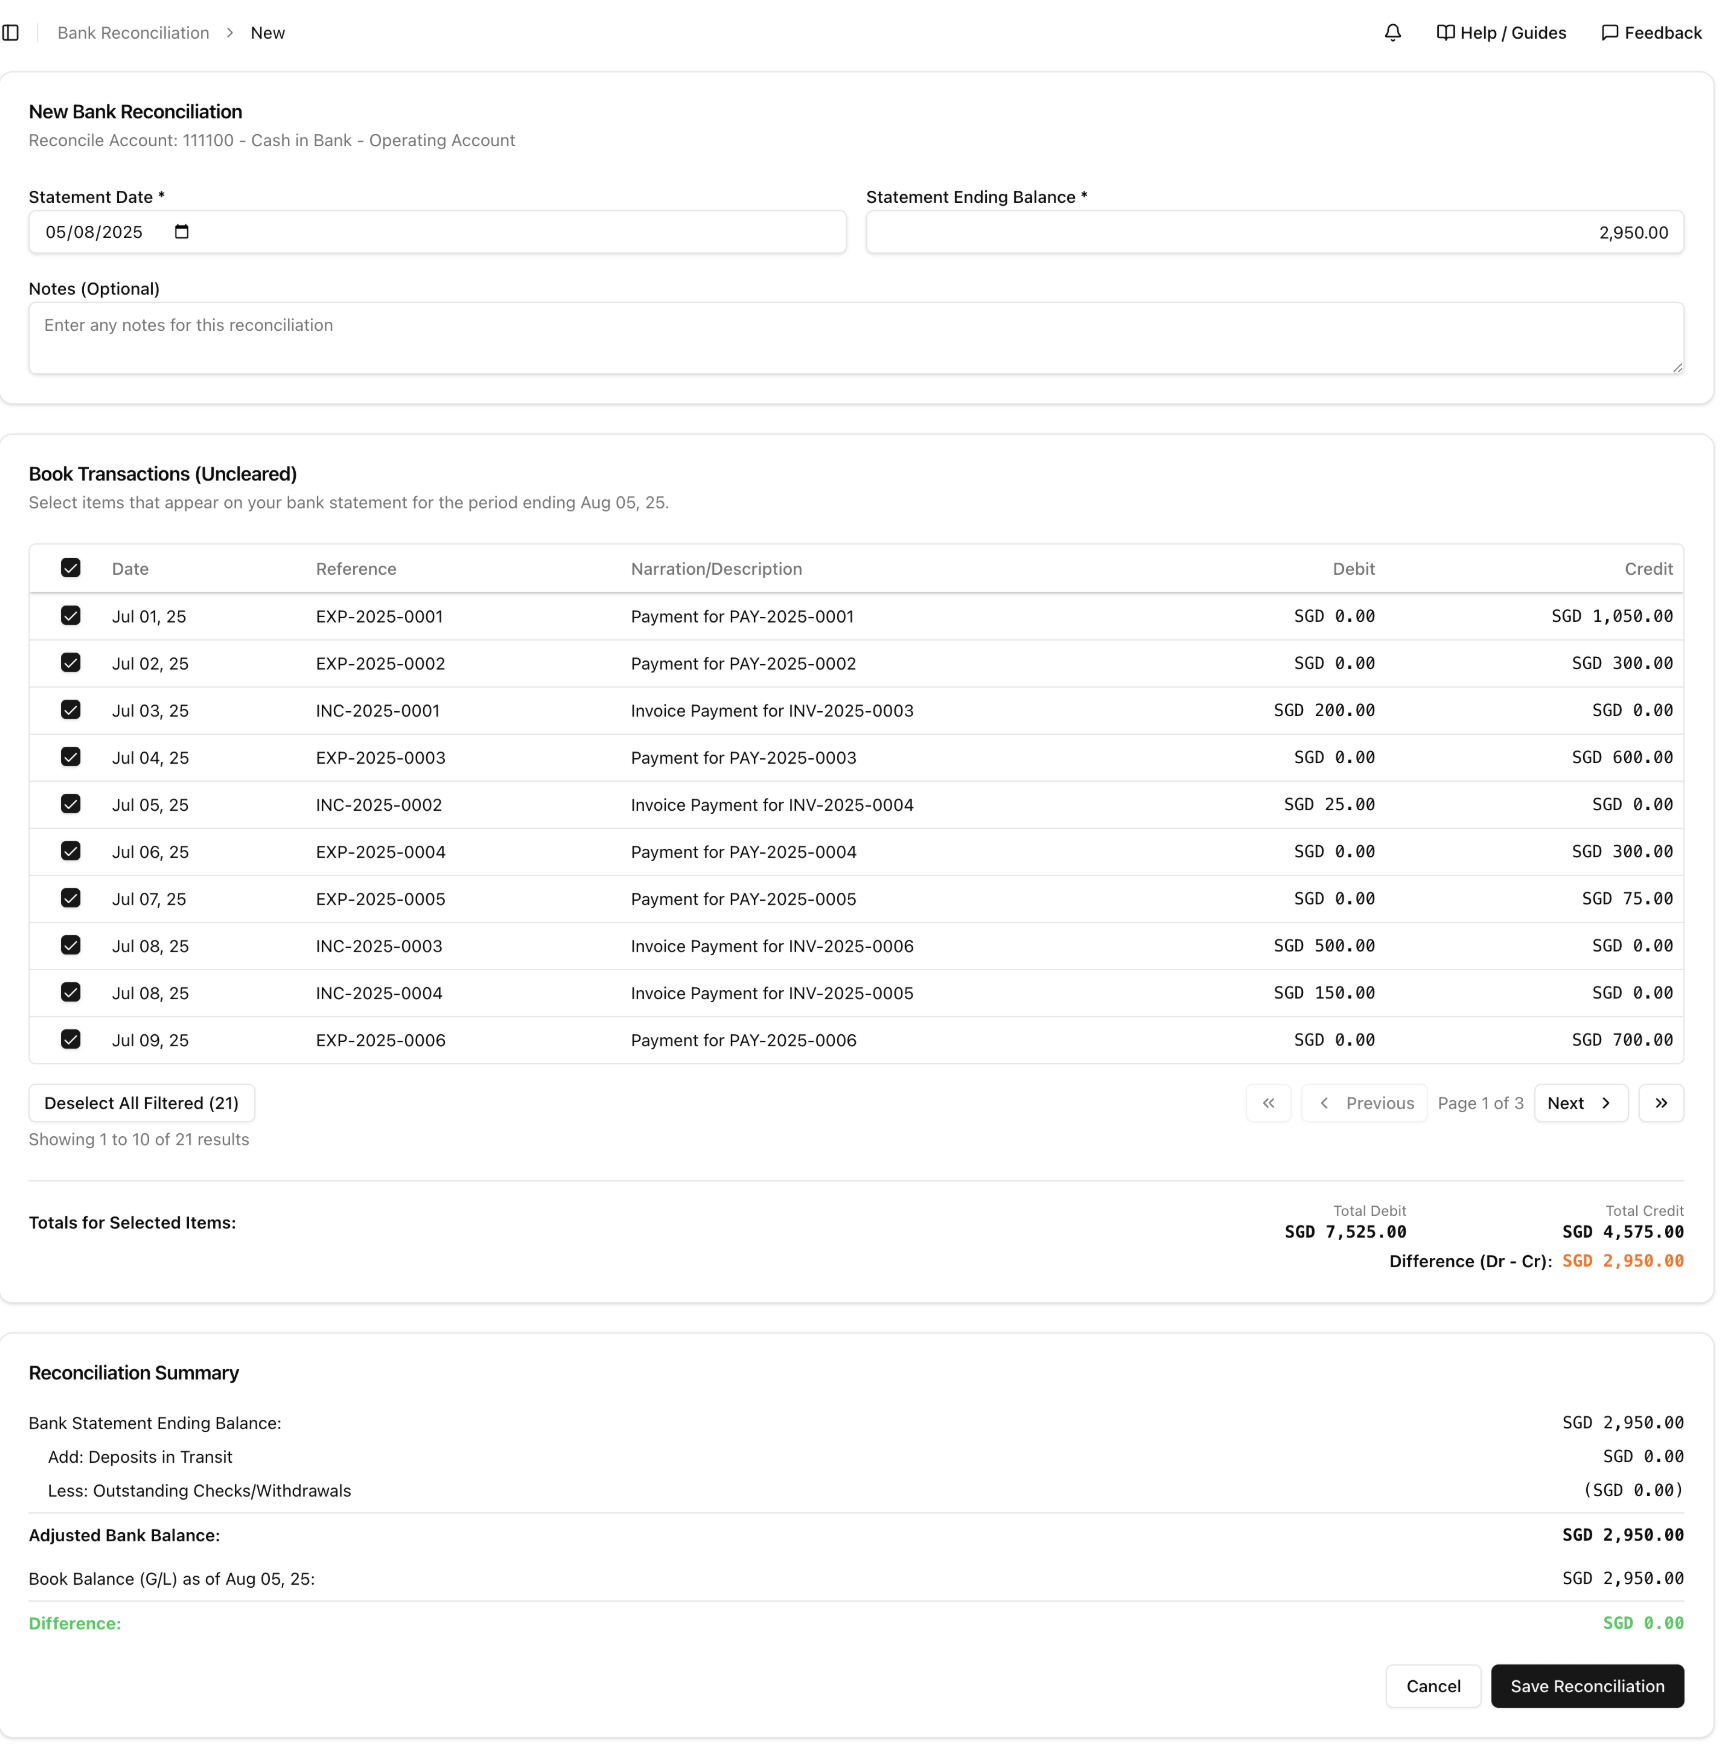
- Enter statement date (e.g., 10/08/2025)
- Review uncleared transactions:
- Check boxes for items appearing on bank statement
- Example: "NC-2025-0002 - Test - SGD 180.00"
- Verify totals match (Difference: SGD 0.00)
Method 2: Statement Import Reconciliation
2. Import Bank Statement
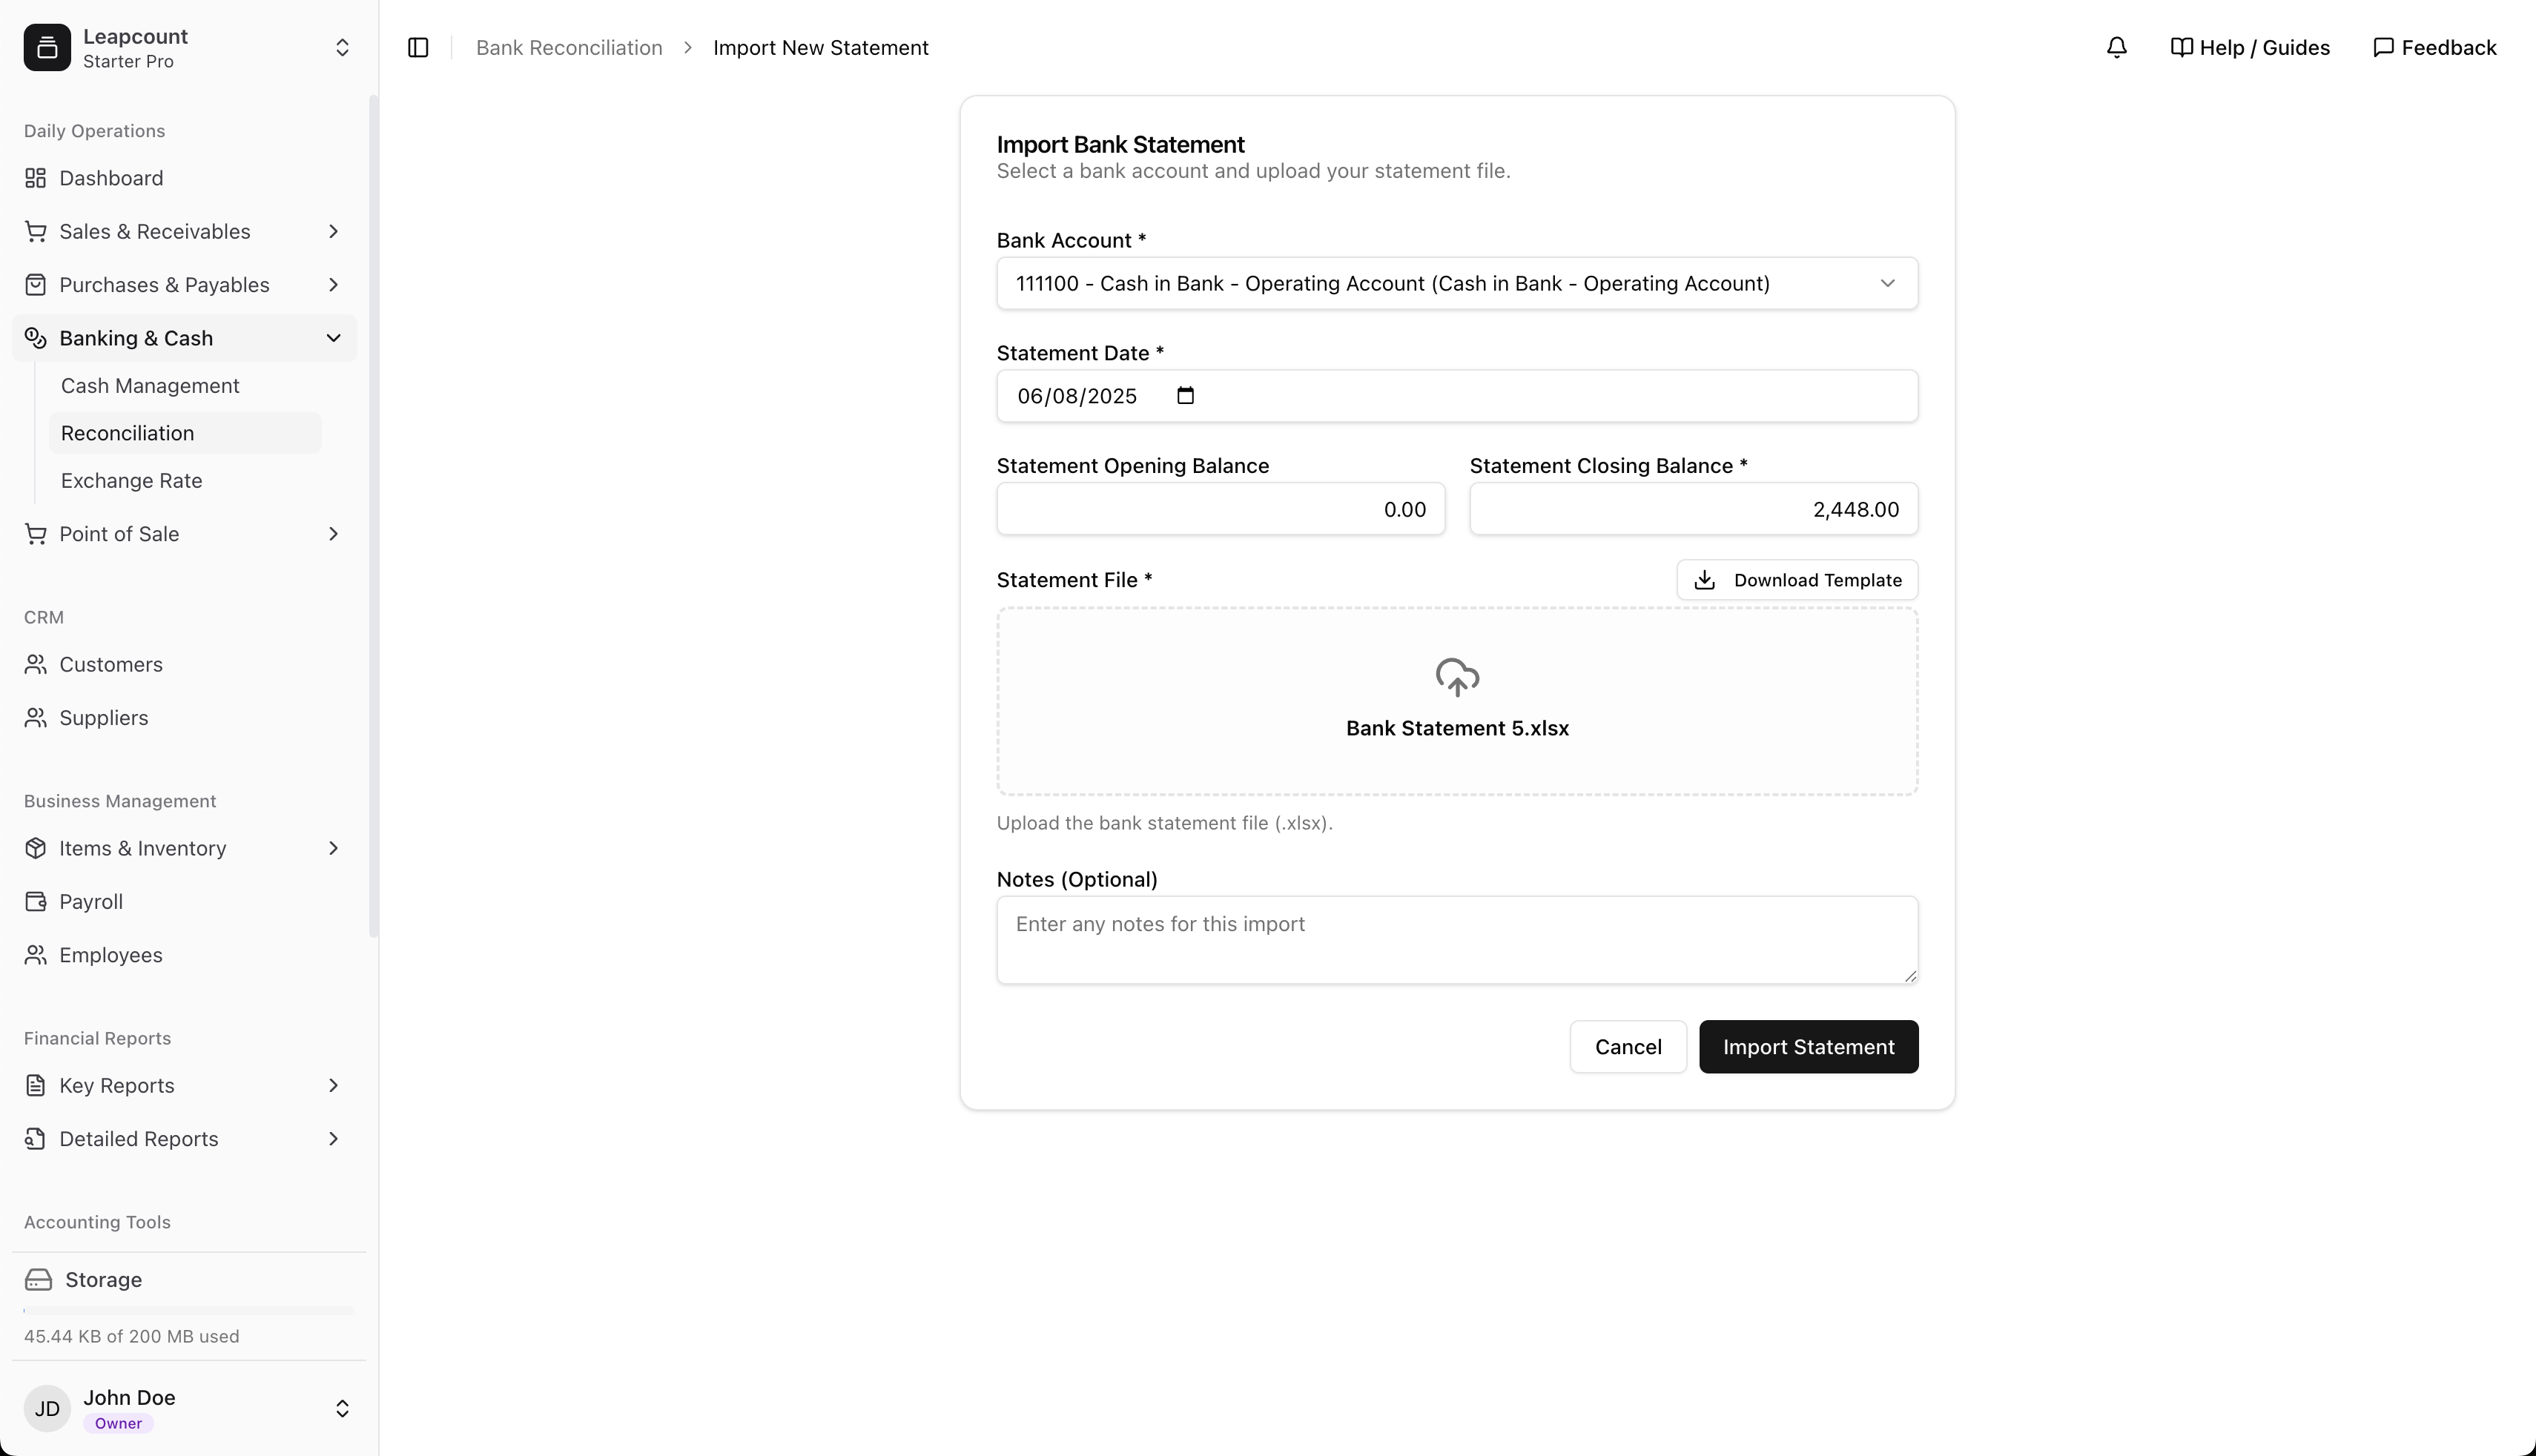
- Select bank account (e.g., "111100 - Cash in Bank")
- Enter statement details:
- Date (06/08/2025)
- Opening balance (0.00)
- Closing balance (2,448.00)
- Upload statement file (.Jinx format)
- Click Import
3. Review Imported Transactions
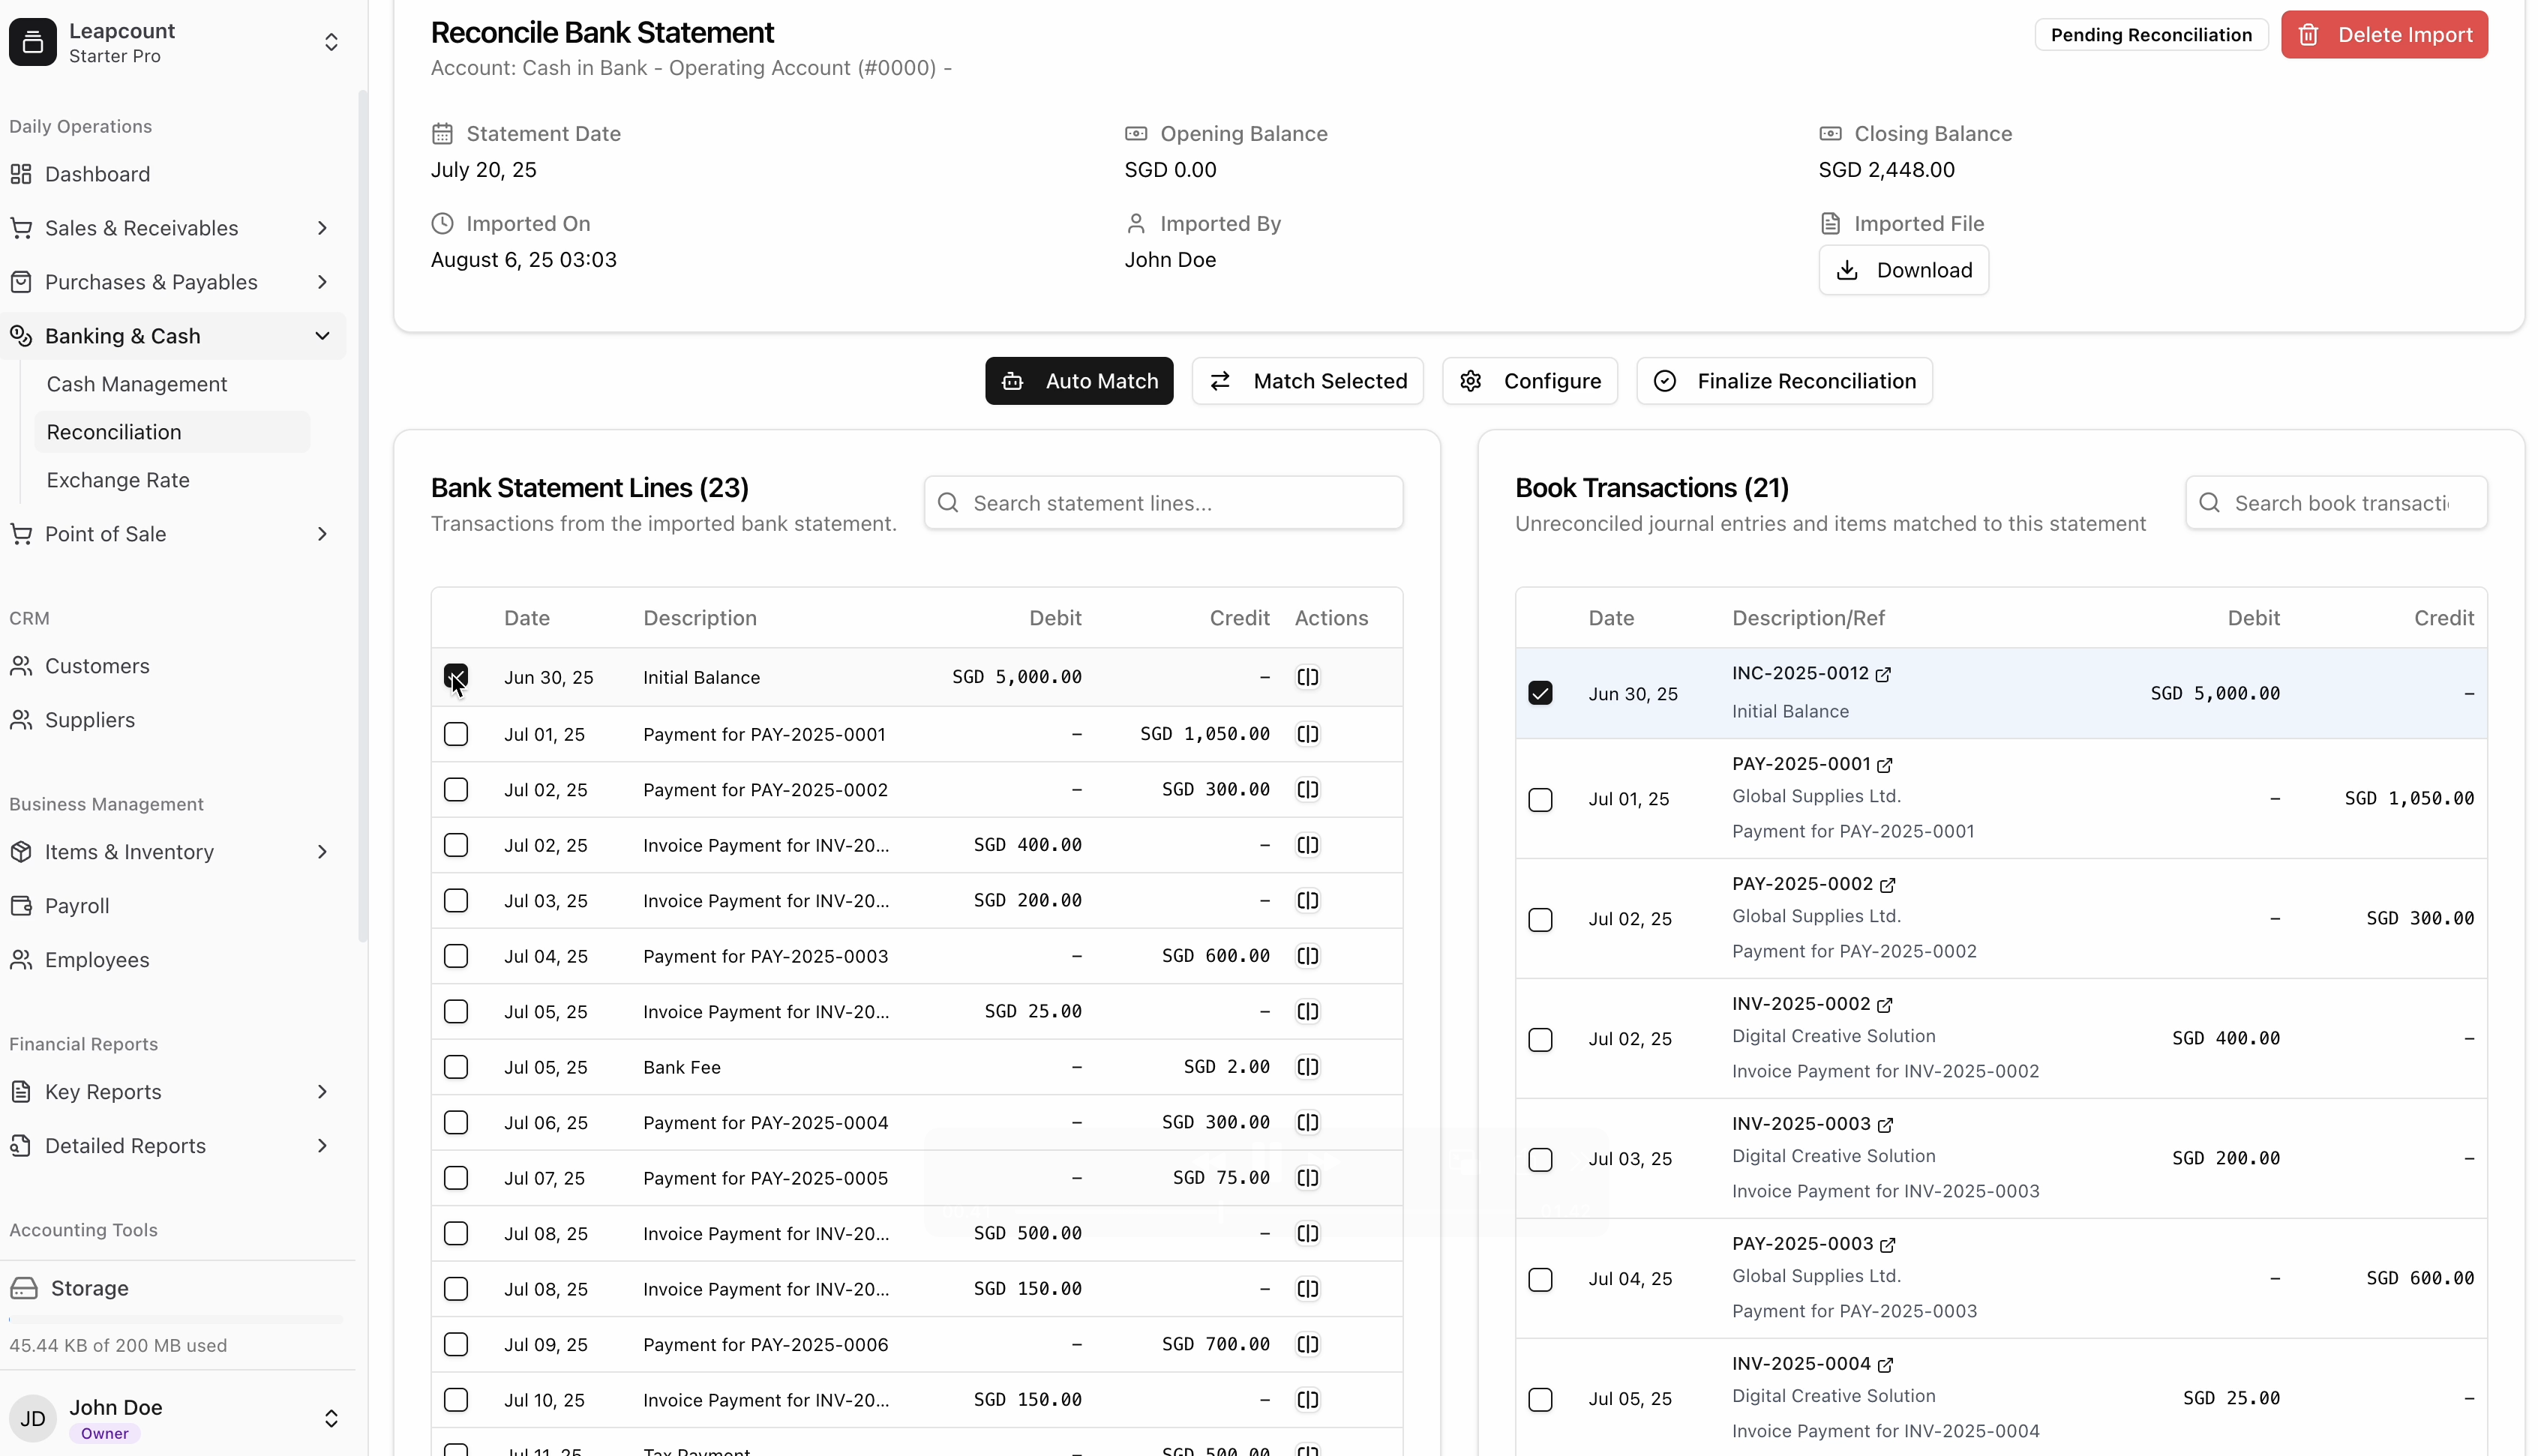
- View all imported transactions
- Options for each transaction:
- Match manually
- Auto-match (see below)
- Split transaction (see below)
4. Configure Auto-Matching (Optional)
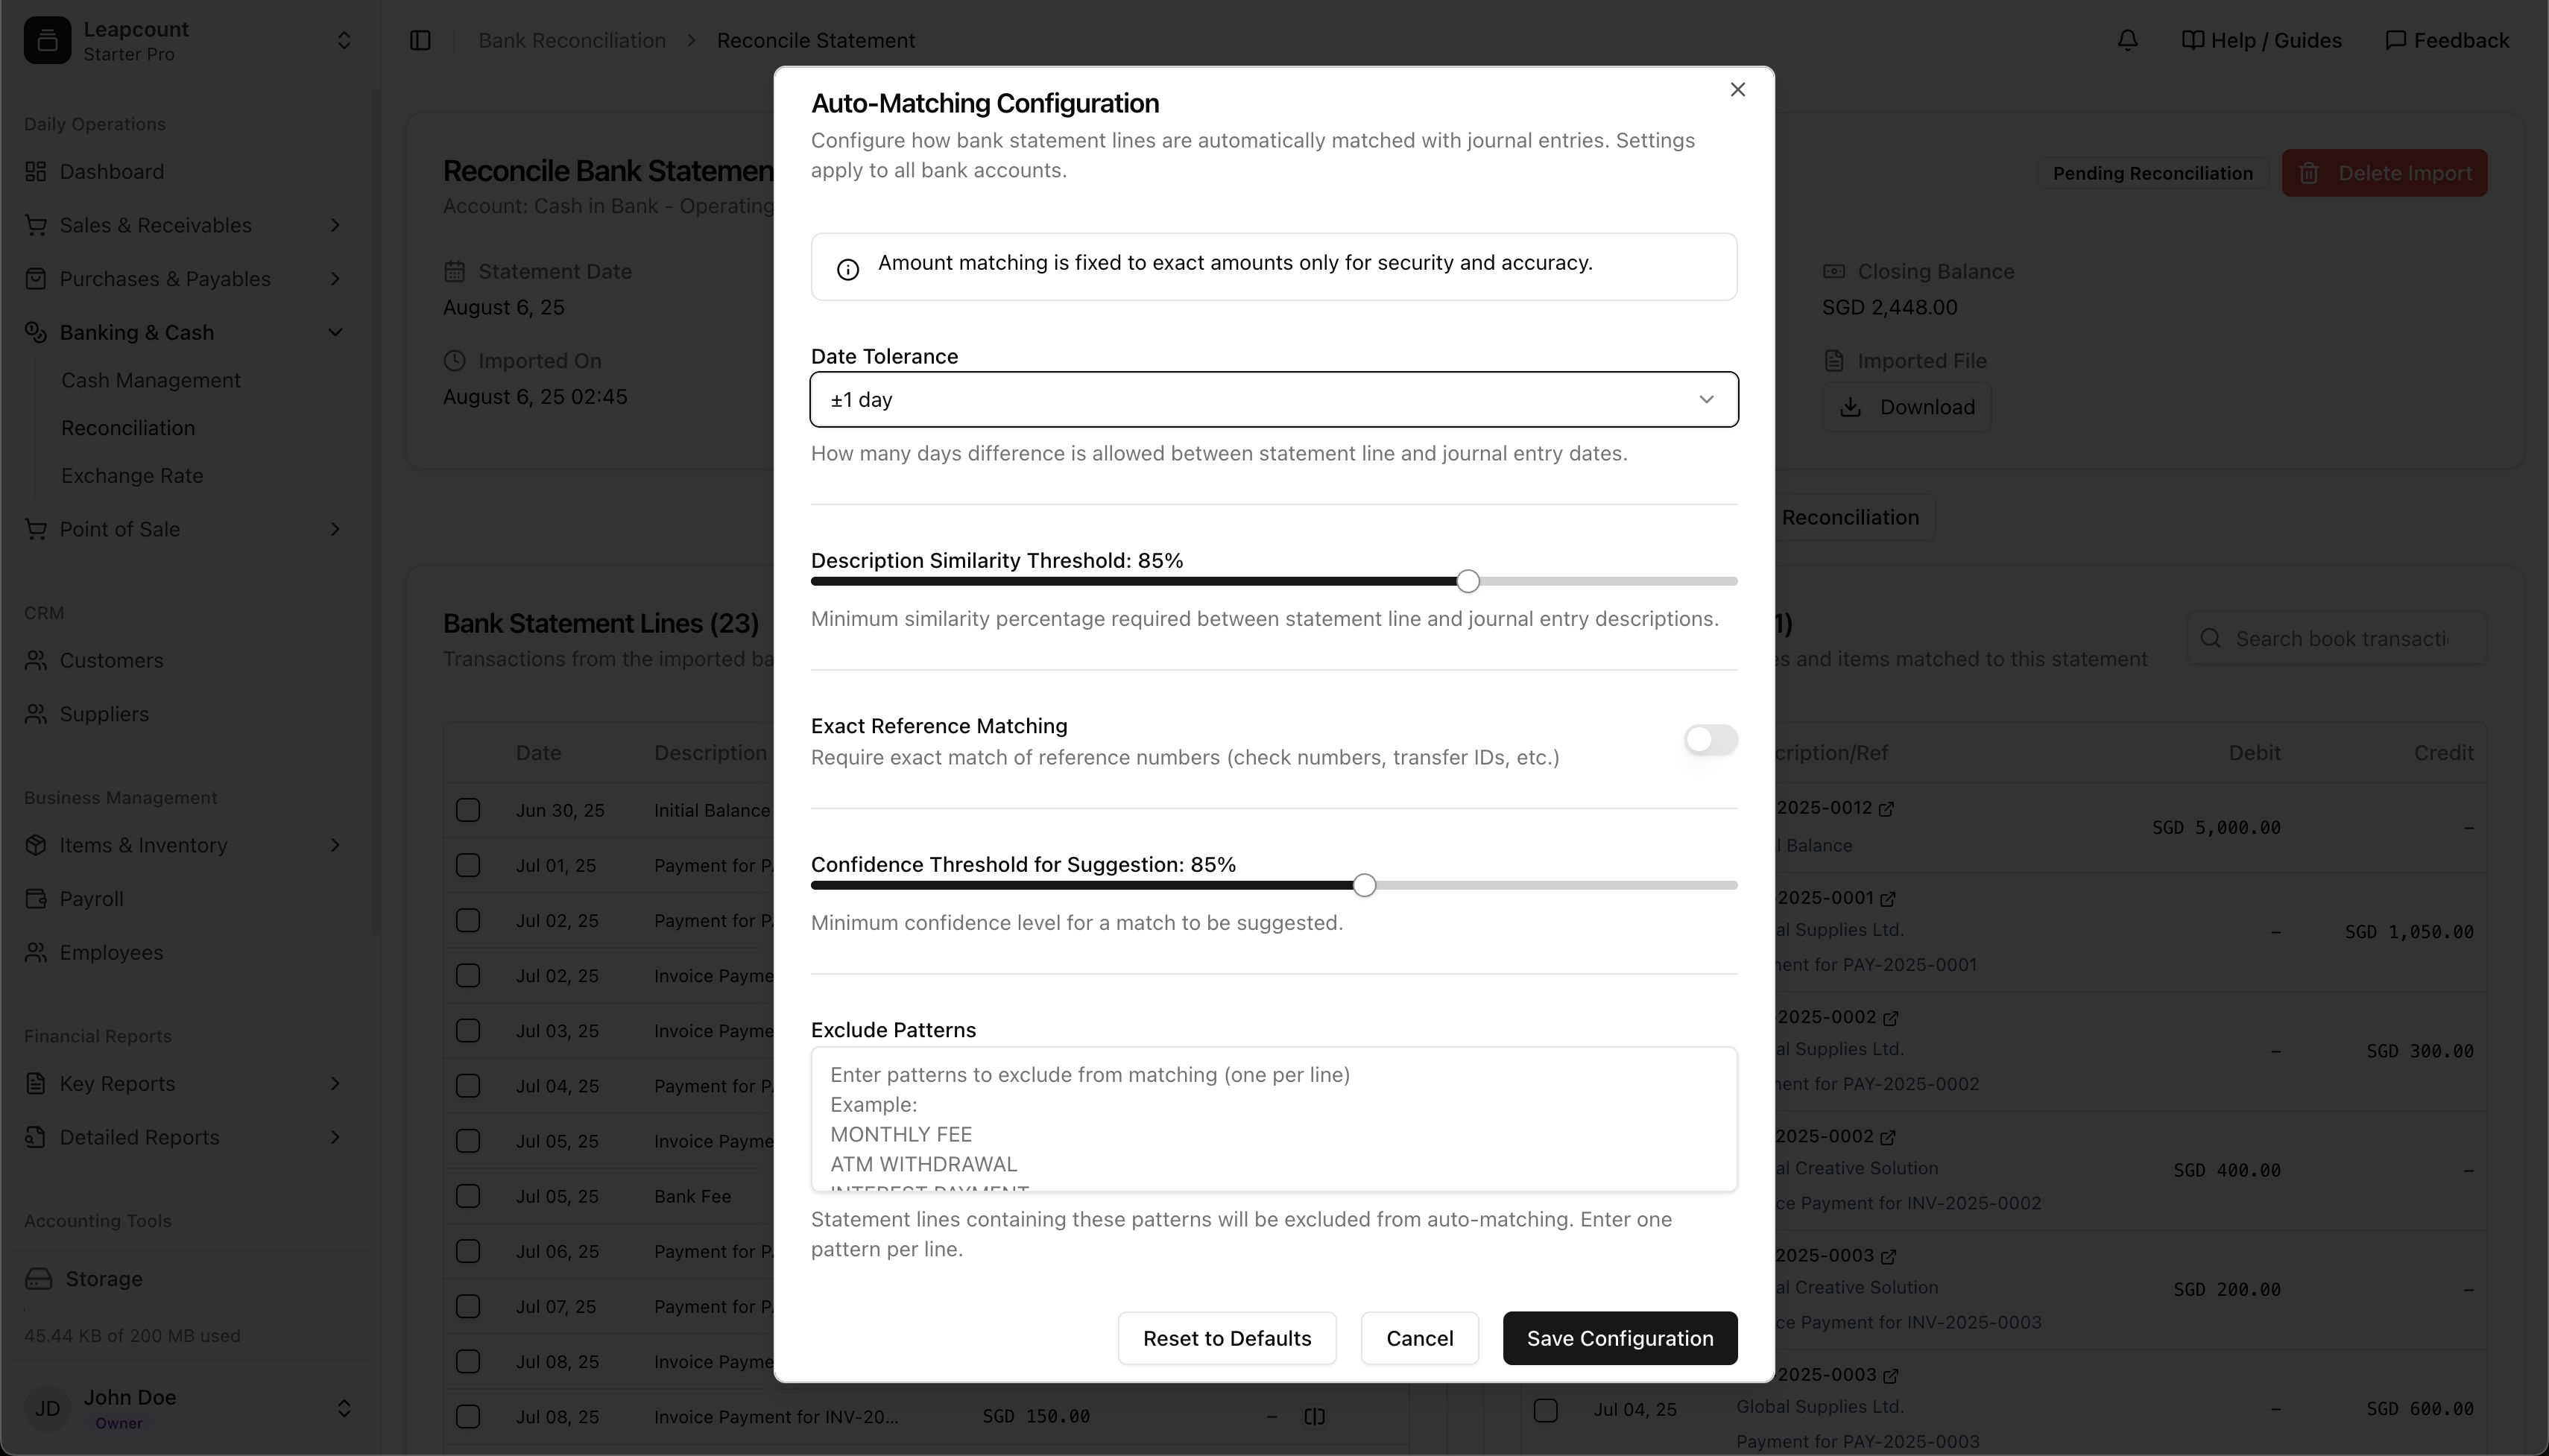
- Set matching rules:
- Date tolerance (1 day)
- Description similarity (85%)
- Confidence threshold (85%)
- Add exclusion patterns (e.g., "ATM WITHDRAWAL")
- Save configuration
5. Run Auto-Match Review
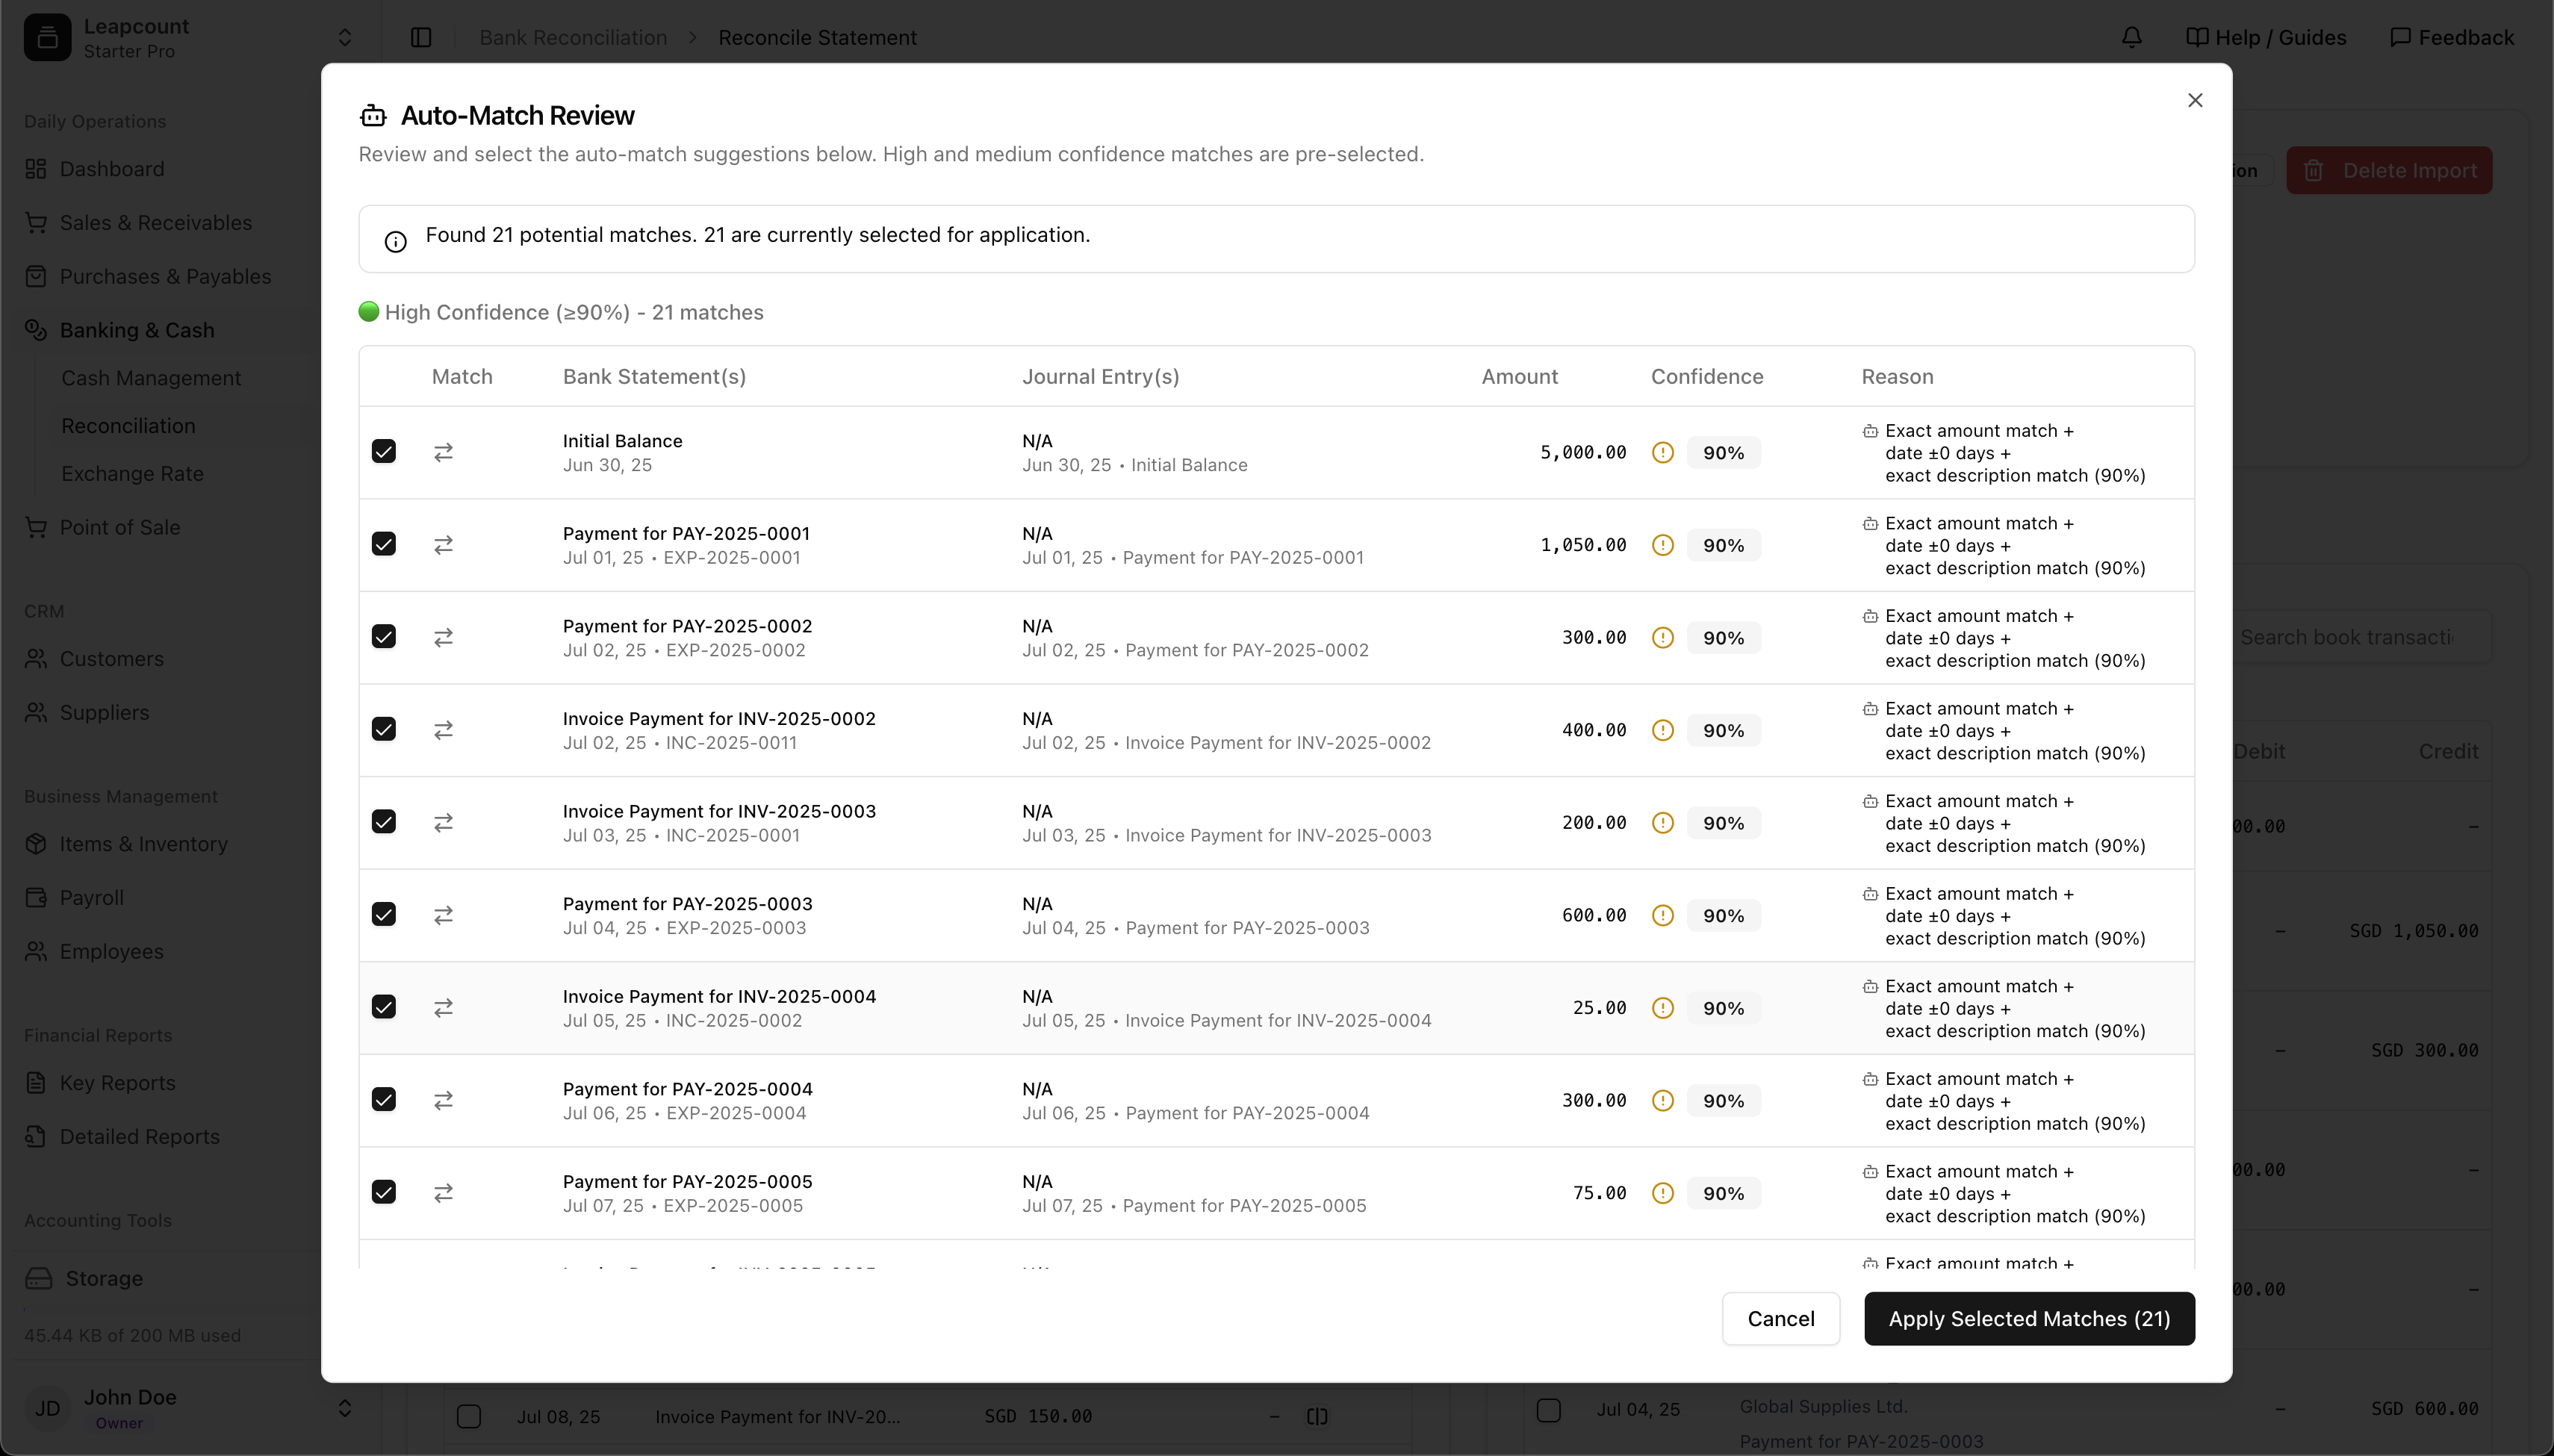
- System displays potential matches (e.g., 21 matches)
- Review confidence levels:
- ≥90% (High - pre-selected)
- 80-89% (Medium - review recommended)
- Click Apply Selected Matches
6. Handle Unmatched Transactions
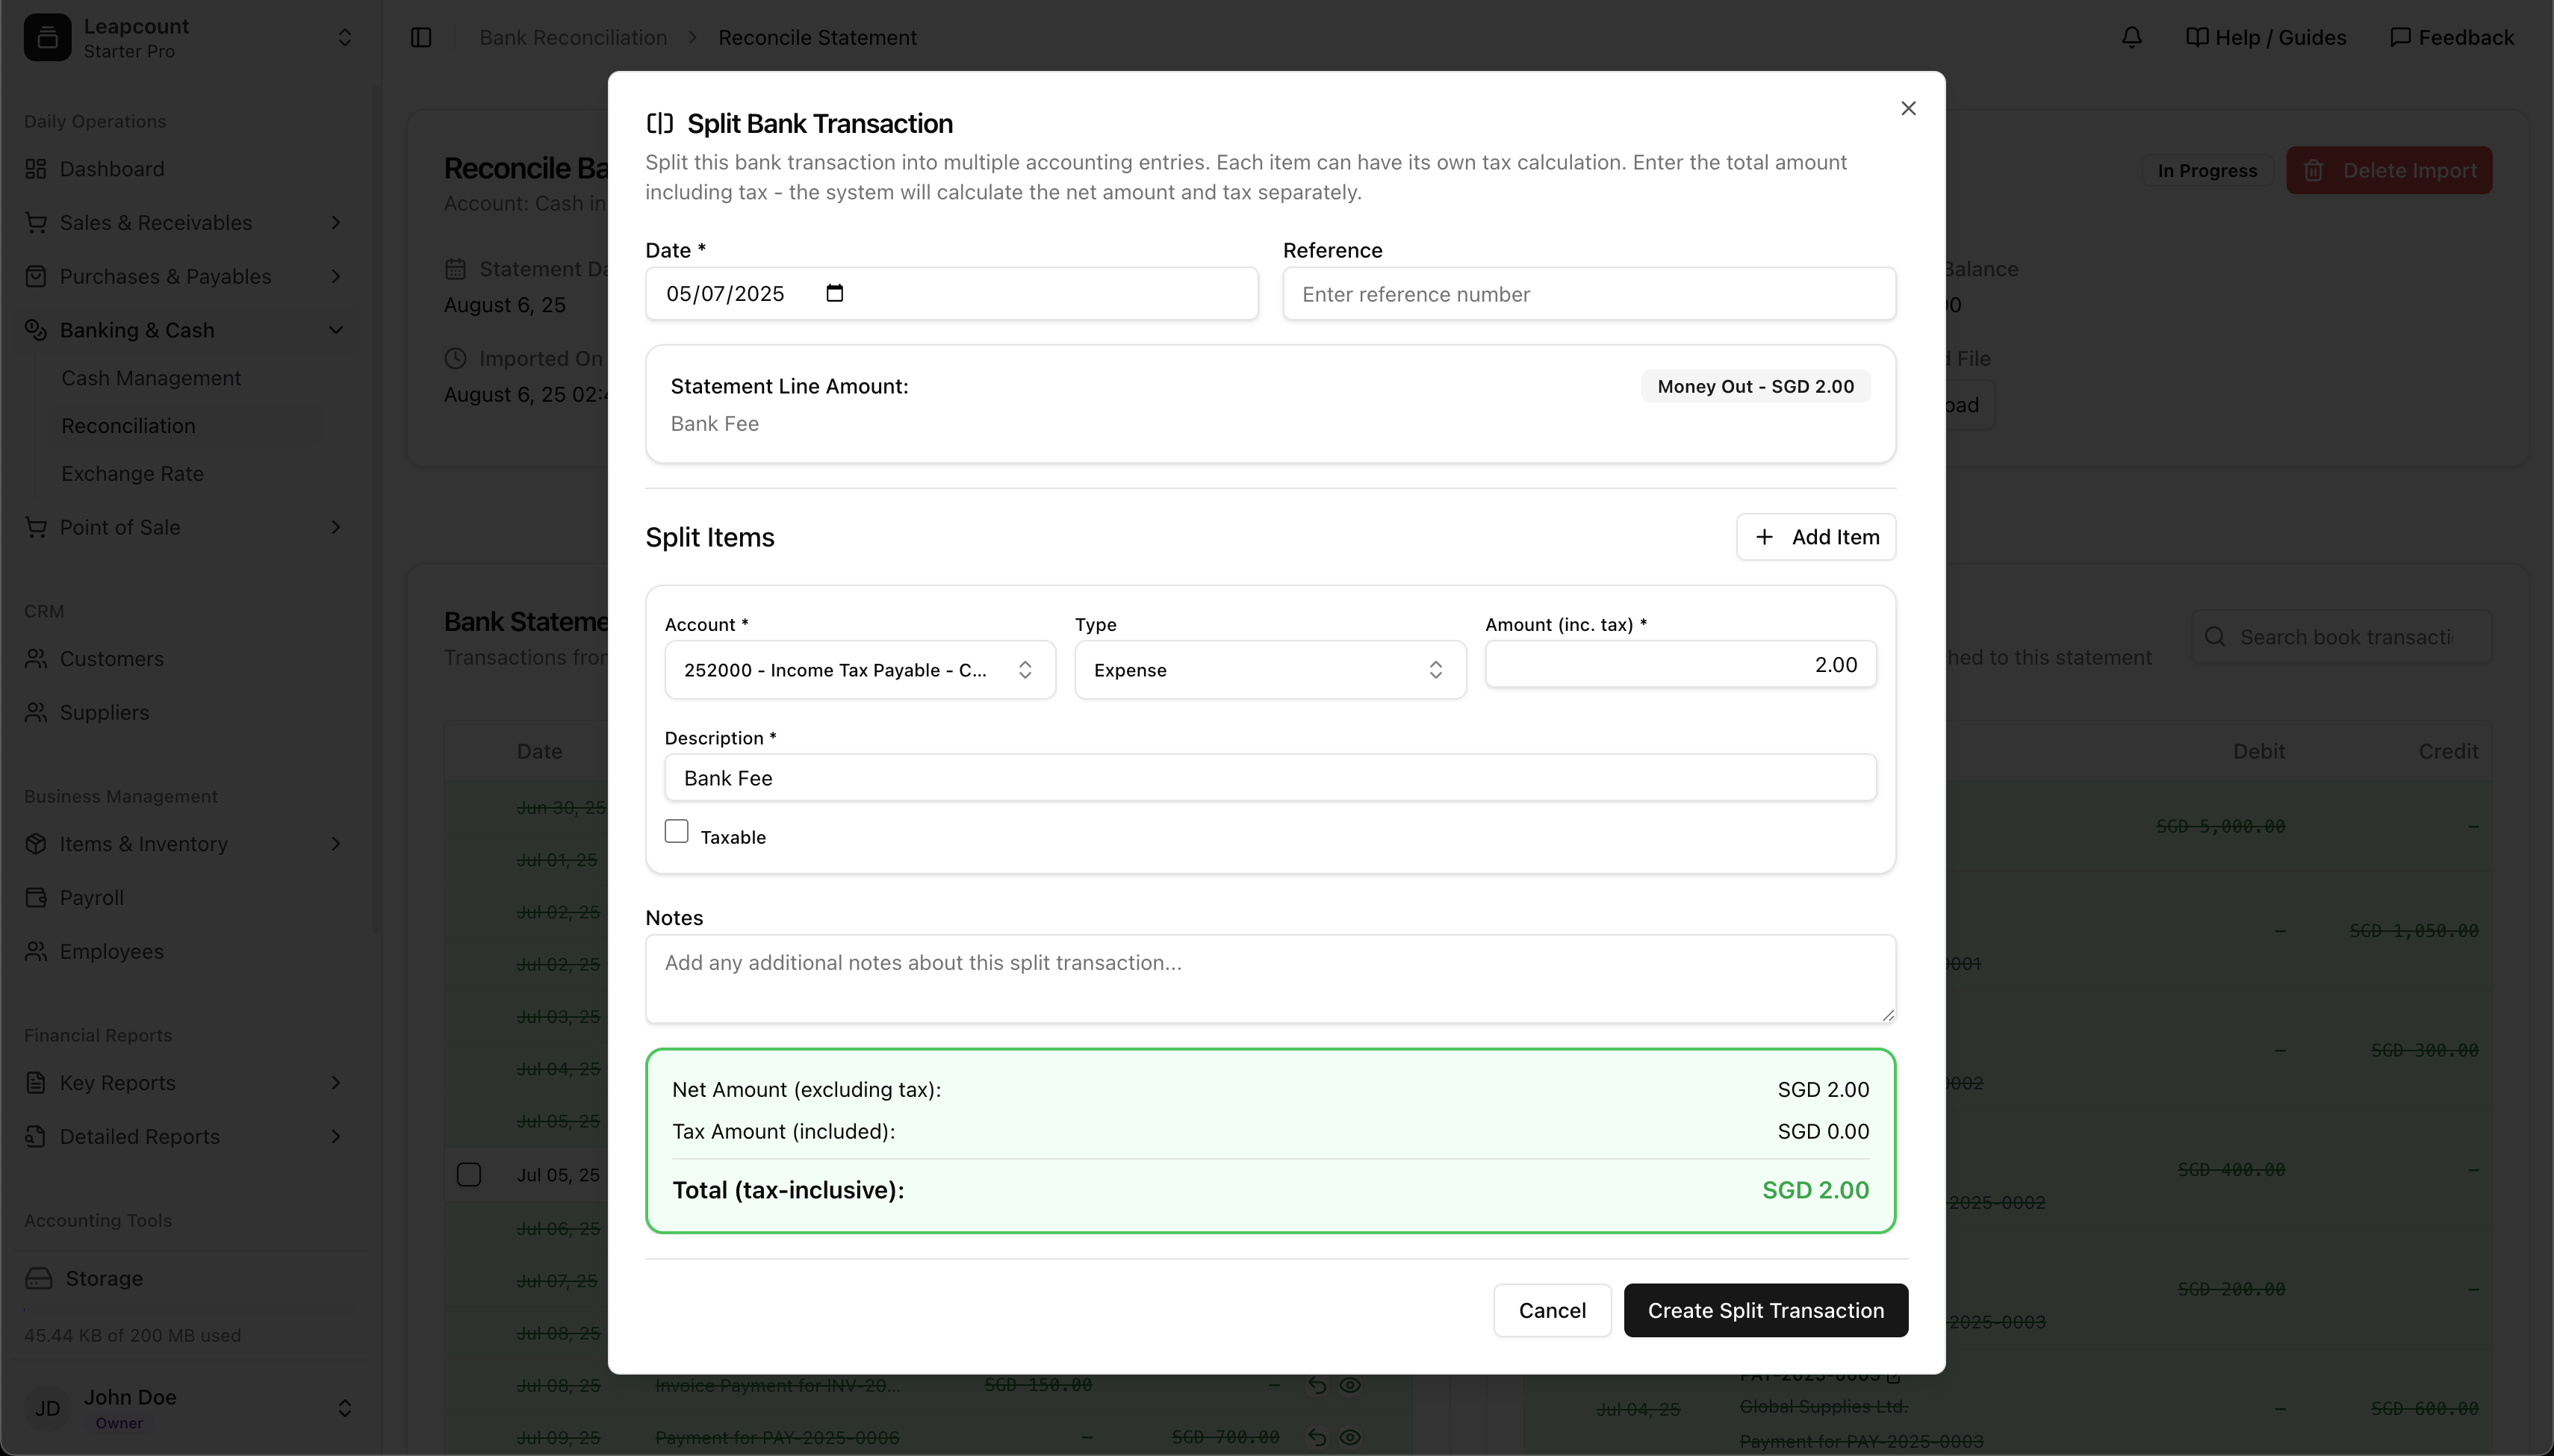
For transactions without matches:
- Click [|] split button
- Create journal entries:
- Select accounts
- Enter amounts
- Add descriptions
- Example: Bank fee of SGD 2.00 to "Income Tax Payable"
Finalizing Reconciliation
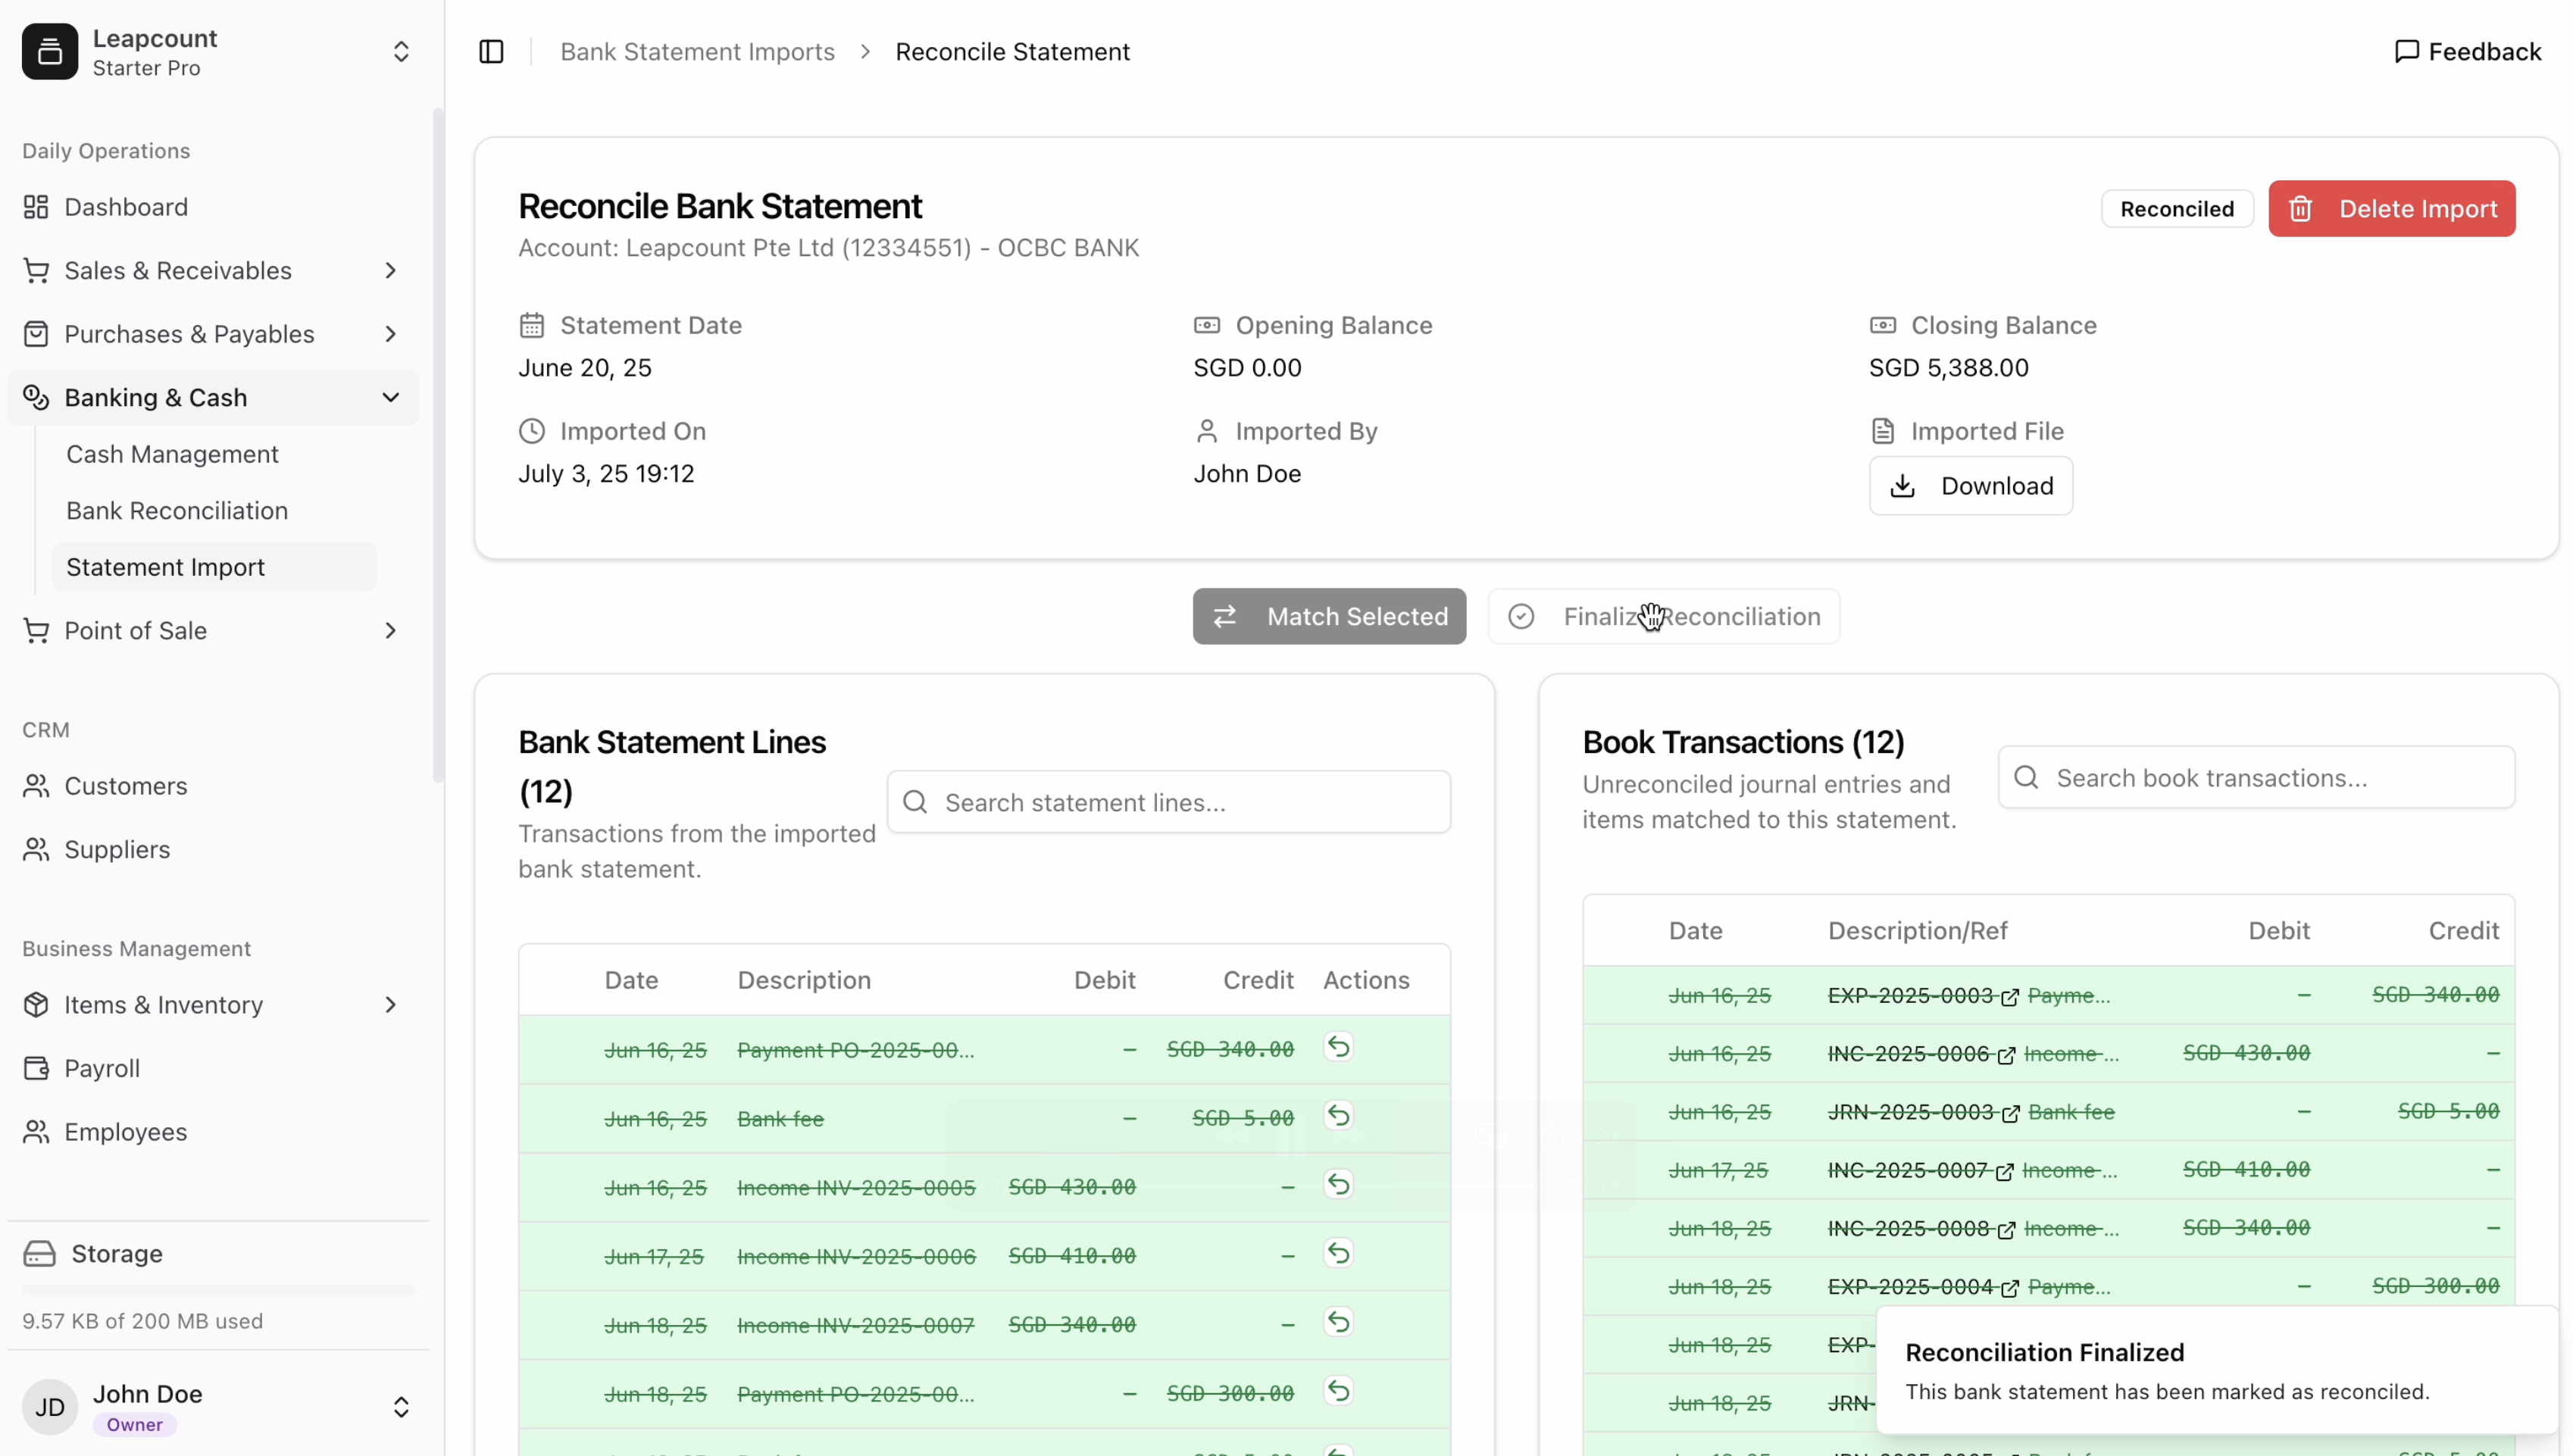
- Verify reconciliation summary:
- Bank balance: SGD 2,950.00
- Book balance: SGD 2,950.00
- Difference: SGD 0.00
- Review all transactions
- Click Finalize Reconciliation to:
- Lock the period
- Generate report
- Update balances
Best Practices
- Reconcile frequently: Weekly or daily for active accounts
- Use splits transaction: When one transaction covers multiple items or can just for create one journal entry
- Document clearly: Add notes explaining splits
- Verify amounts: Double-check tax calculations
- Standardize: Use consistent references