Creating Sales Invoices
Leapcount’s invoicing system is designed to be powerful yet intuitive, allowing you to bill clients accurately and manage your receivables efficiently. This guide covers the entire process, from creating a draft to handling multi-currency transactions and finalizing the invoice for your accounting records.
The Invoice Creation Workflow
The lifecycle of an invoice follows a clear path to ensure financial accuracy and control:
- Draft: The initial creation stage. The invoice has no financial impact and can be fully edited.
- Accepted: Once accepted, the invoice becomes a formal document. It is posted to the General Ledger, recorded in Accounts Receivable.
- Paid: When payment is received, the invoice is marked as paid, and the cash account is updated accordingly.
- Partially Paid: If a partial payment is made, the invoice reflects the outstanding balance until fully settled.
Step-by-Step: Creating a New Invoice
The invoice form is broken down into logical sections to streamline data entry.

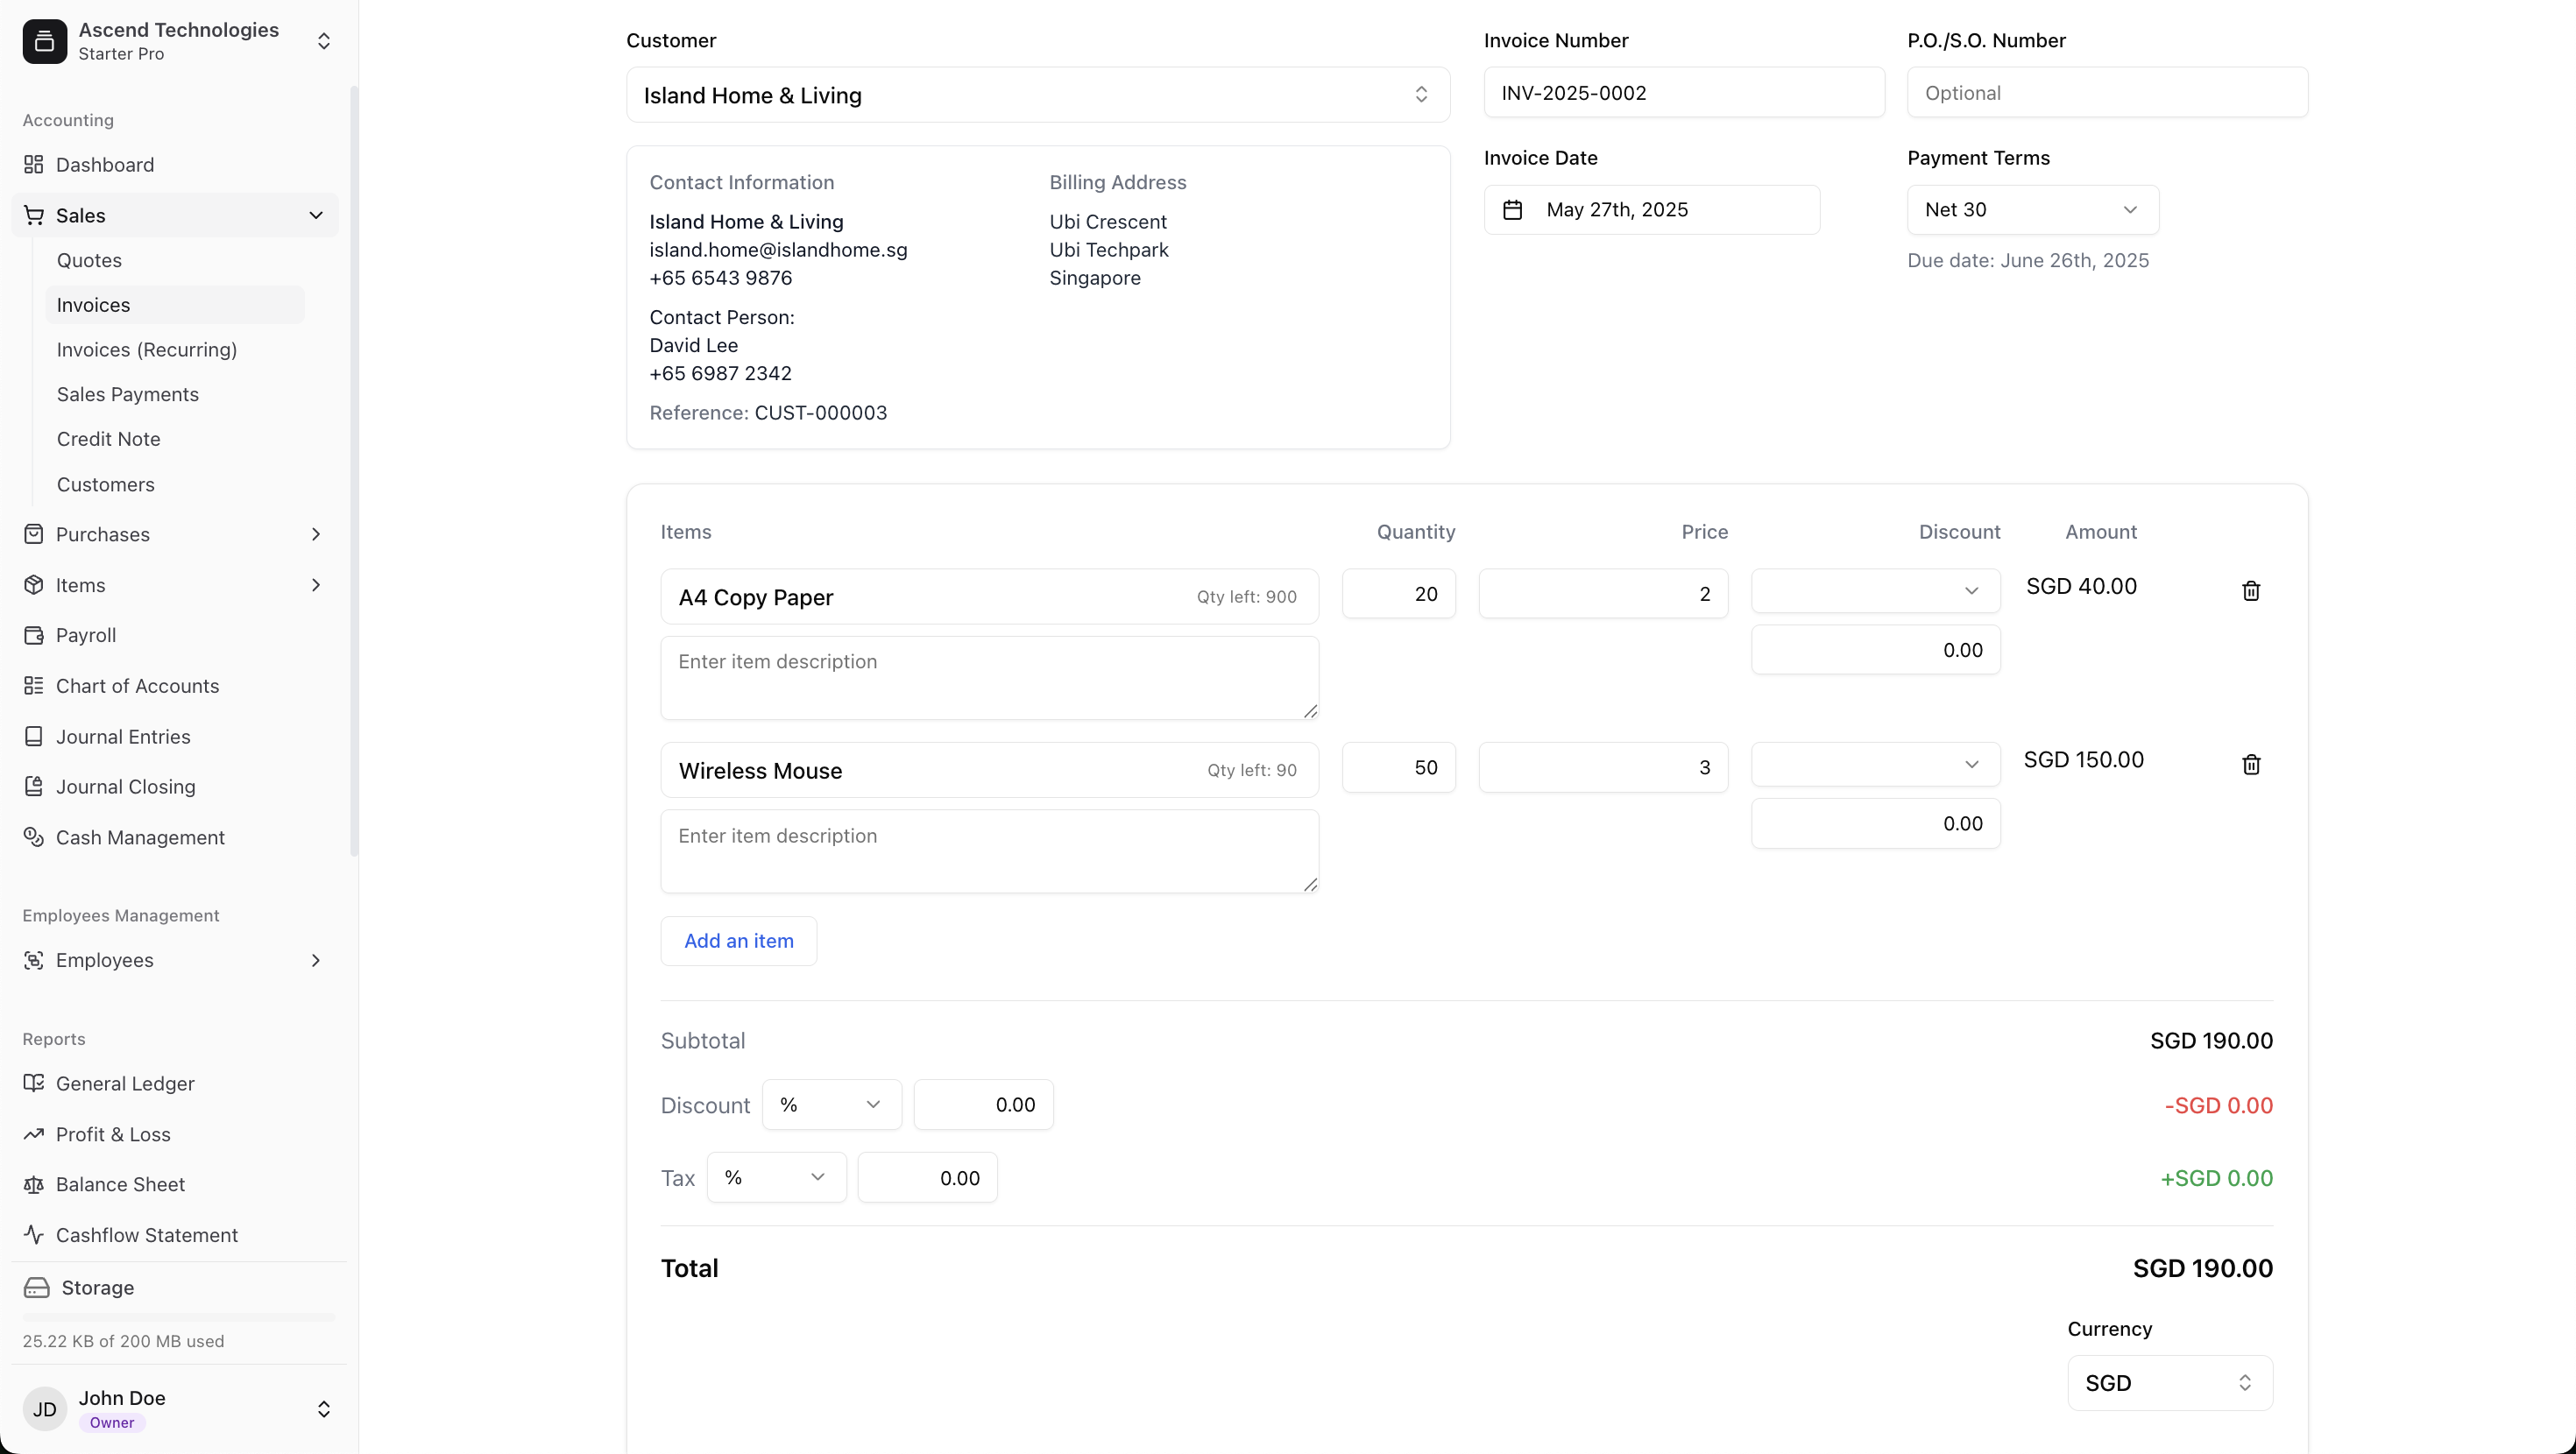
1. Customer and Invoice Details
This top section contains the core information about the transaction.
- Customer: Select an existing customer from the dropdown list. Their billing address and contact information will be automatically populated.
- Payment Terms: Choose the terms of payment (e.g., Net 30, Due on Receipt). This is crucial as it automatically calculates the Due Date.
- Invoice Date: Defaults to the current date, August 26, 2025, but can be changed. This date determines the posting period for the transaction.
- Invoice Number: Can be auto-generated sequentially by the system to prevent duplicates or entered manually based on your company's policy.
2. Adding Line Items
This is where you list the products or services you are billing for.
- Click Add an Item to create a new line.
- Select from your predefined list of products/services, or enter them manually.
- For each line, specify the Quantity, Unit Price, Discount (as a percentage or fixed amount), and applicable Tax Rate.
- The system automatically calculates the subtotal, total discount, taxes, and the final Grand Total, minimizing manual errors.
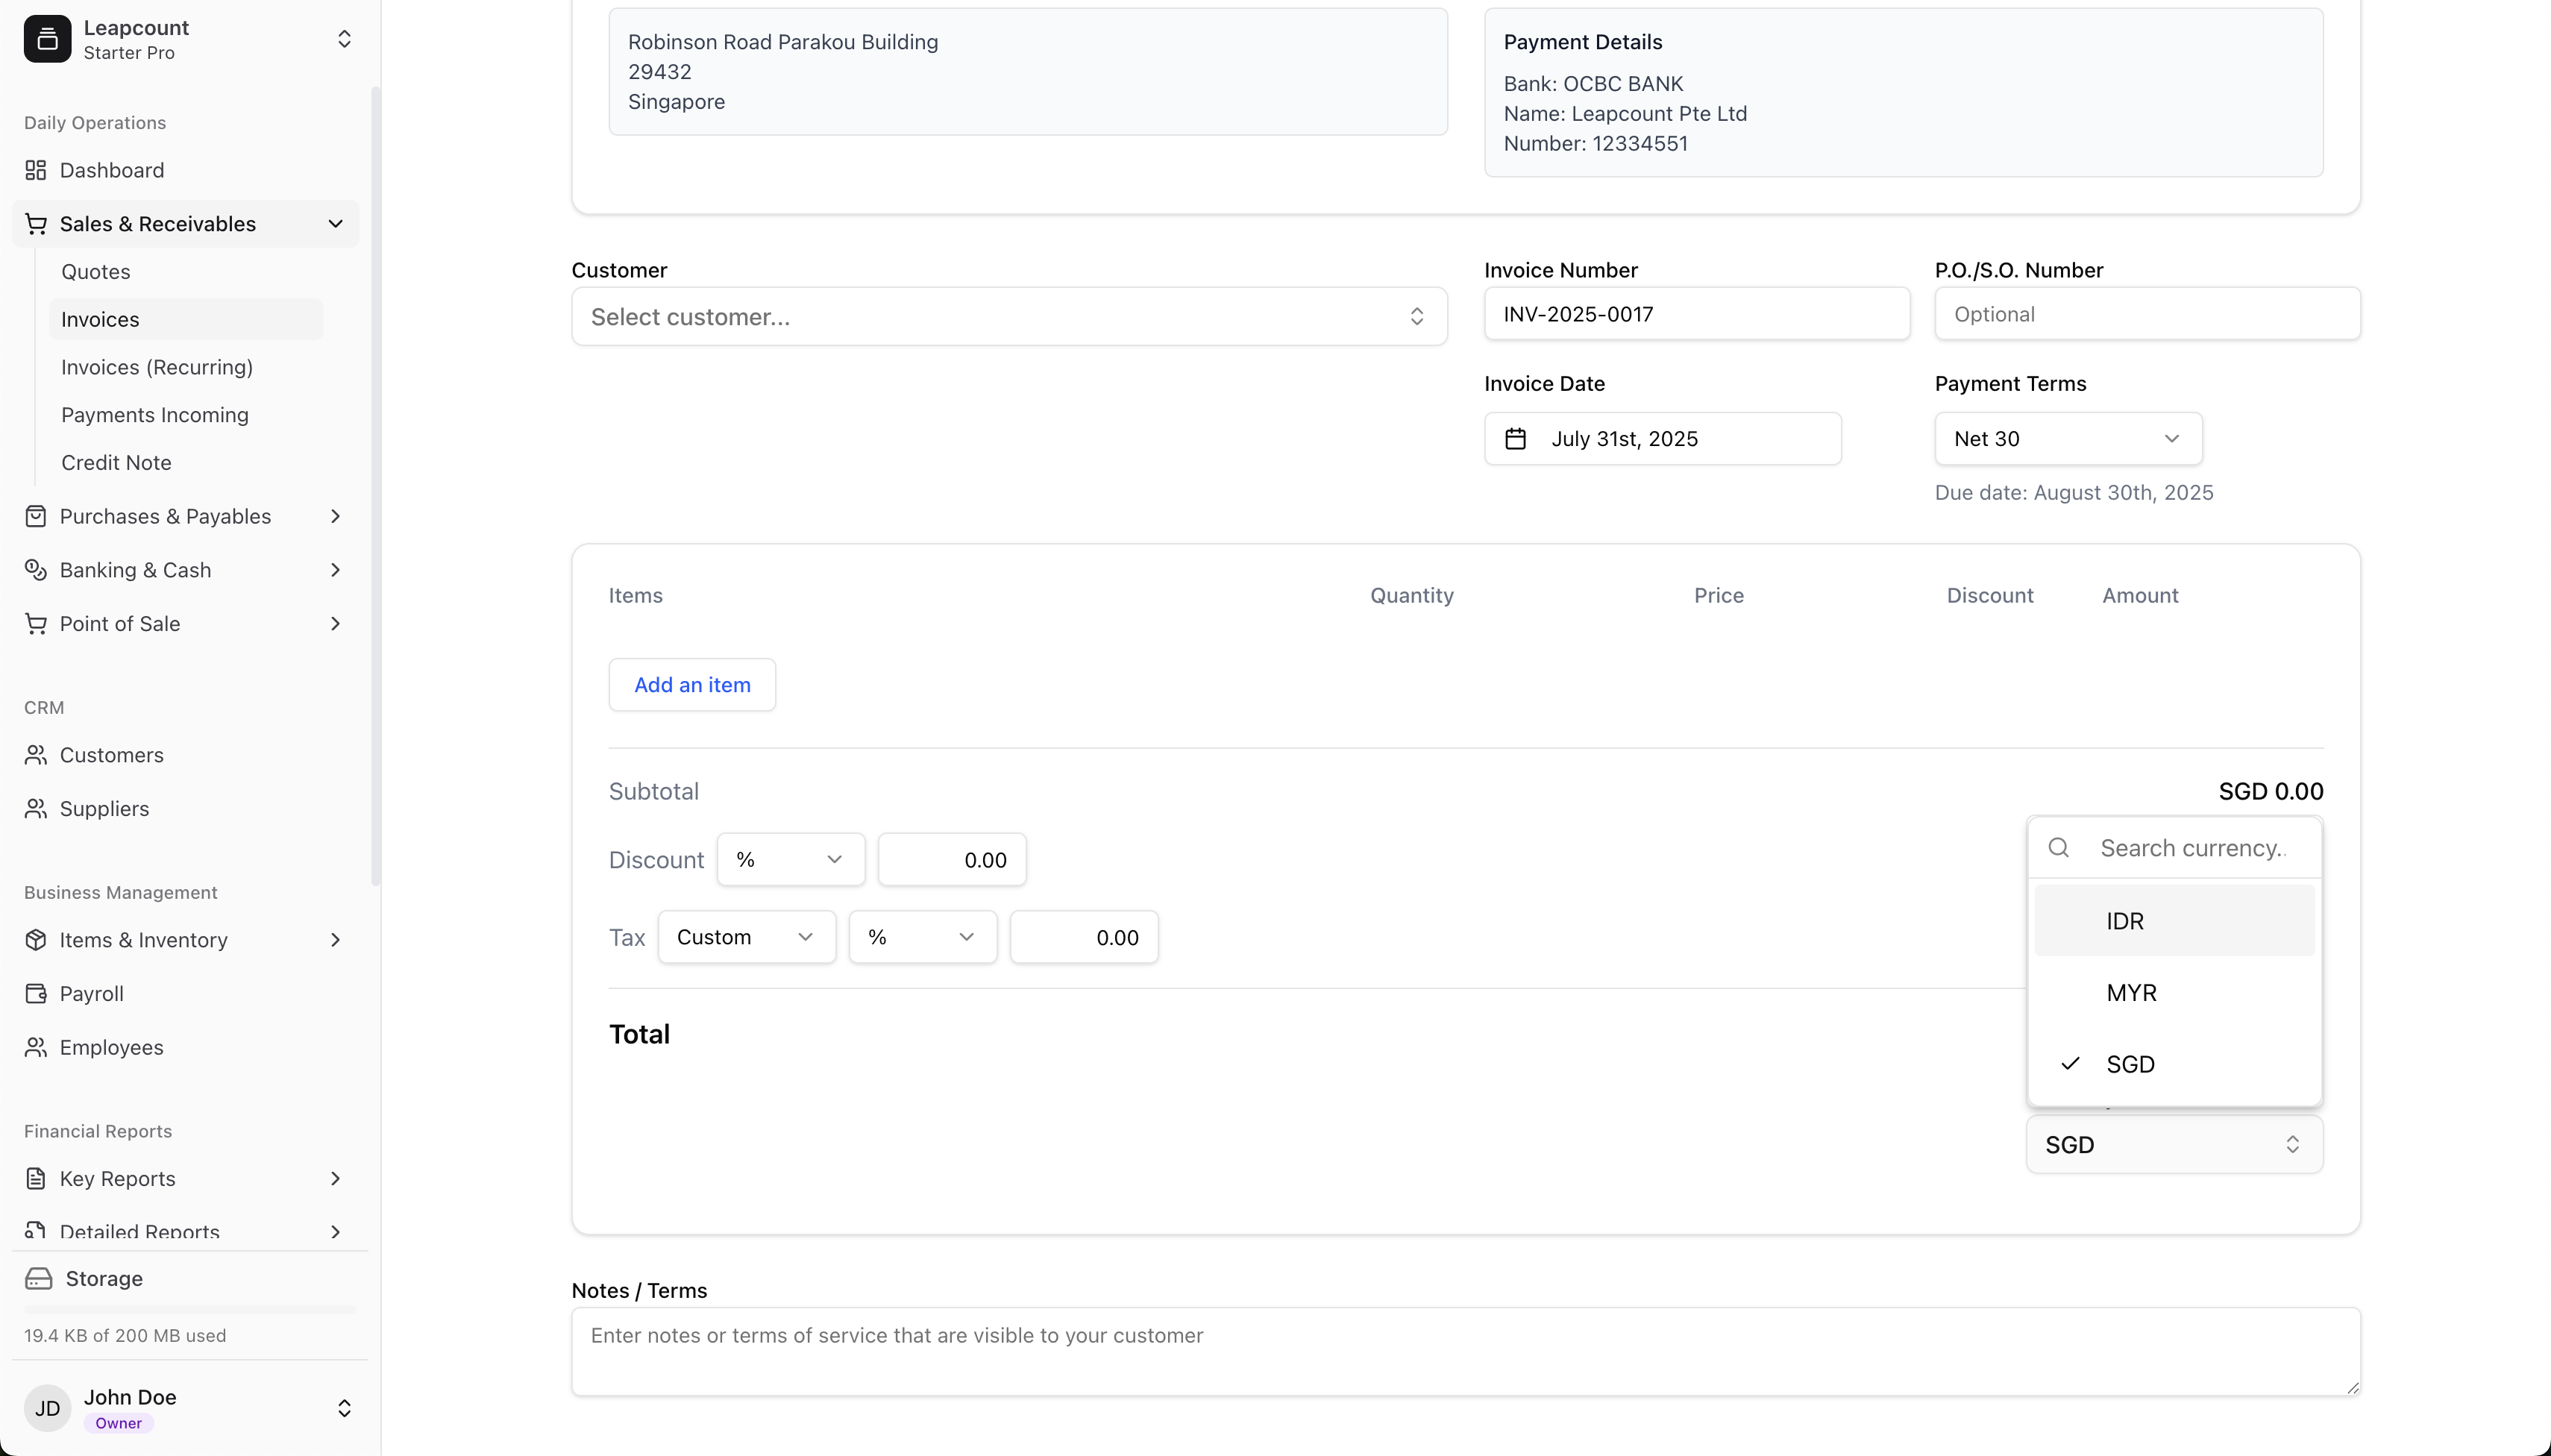
3. Handling Multi-Currency Invoicing
Leapcount robustly supports billing in foreign currencies.
- Currency: The dropdown defaults to your company's base currency (e.g., SGD). You can select any other enabled currency.
- Exchange Rate: When you select a foreign currency, the system displays the current exchange rate being used (e.g., 1 SGD = 12,800 IDR). This rate is pulled from your settings for the invoice date.
- Base Currency Value: For internal accounting, the system simultaneously calculates and stores the invoice's value in your base currency. This ensures your financial reports remain consistent.

Reviewing and Finalizing the Invoice
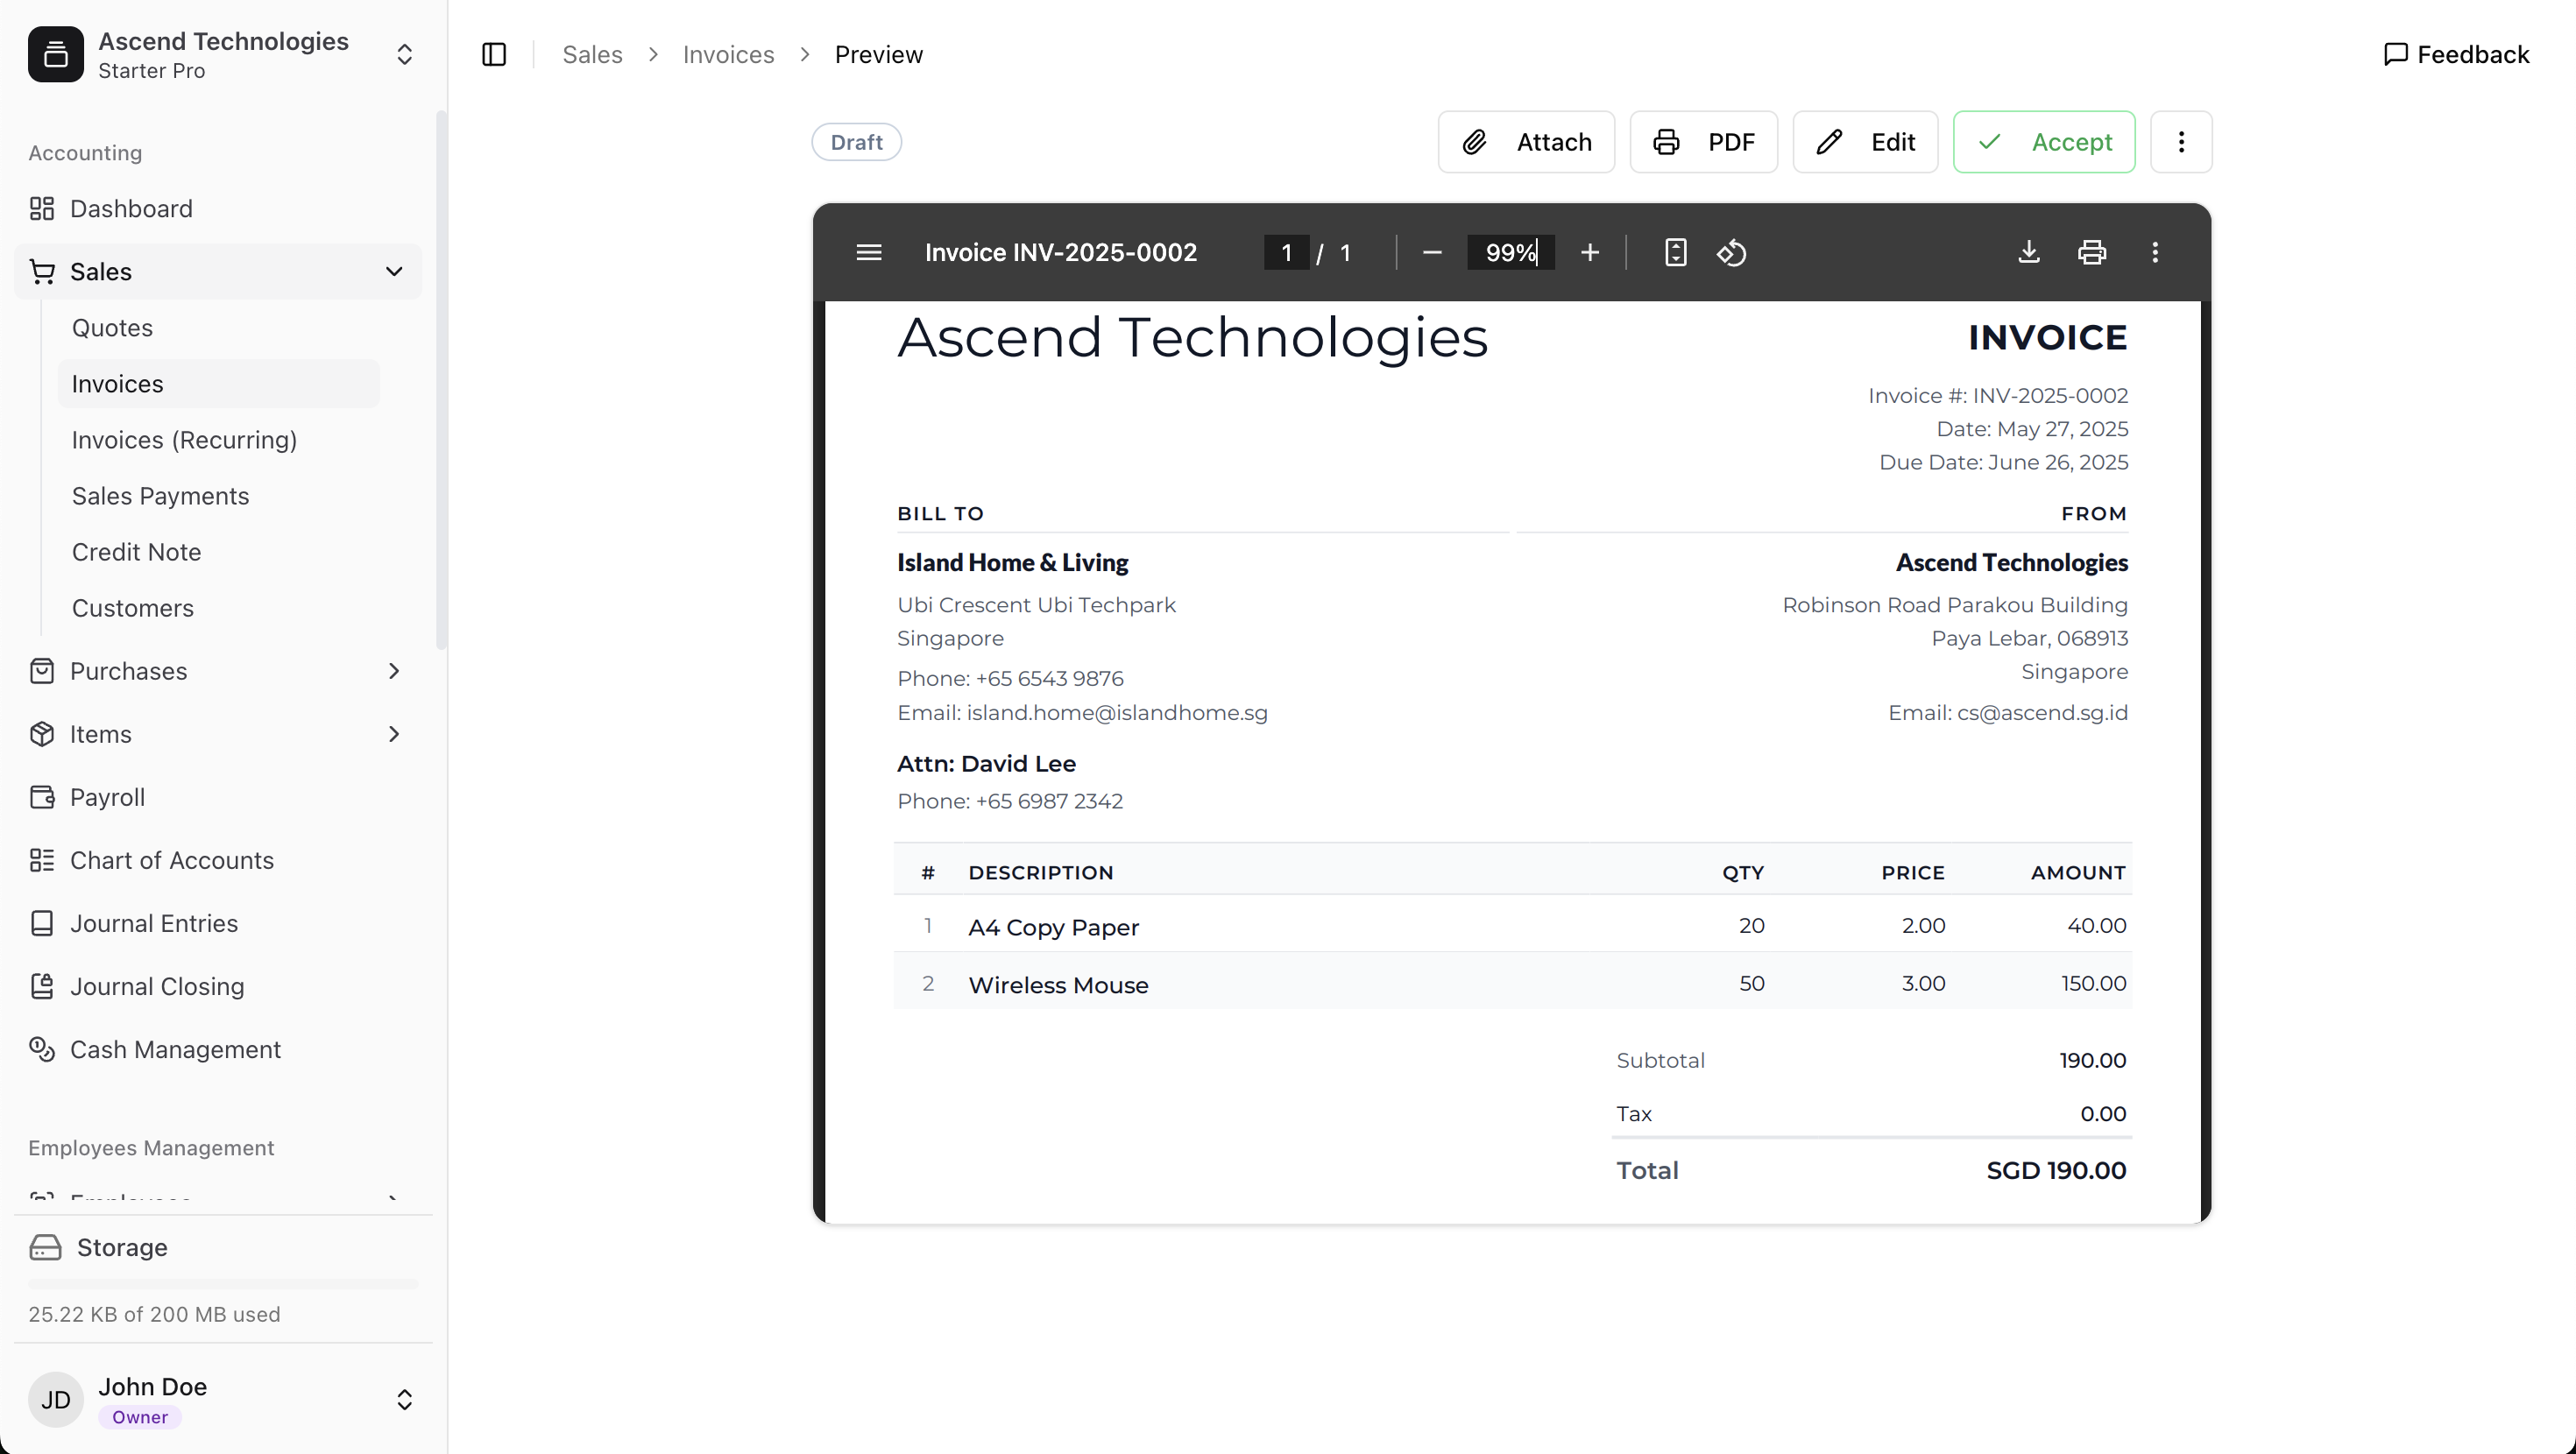
Previewing the Invoice
Before finalizing, it's essential to preview the invoice to see exactly what your customer will receive. The preview shows the layout, your company branding, and all the details you've entered.

Accepted and its Accounting Impact
Accepted an invoice is a critical step that transitions it from a draft to an official accounting record.
- Upon Accepted:
- The system automatically creates the corresponding journal entries:
- Debit to Accounts Receivable (increasing the amount owed to you).
- Credit to a Revenue account (recognizing the income).
- Debit to Cost of Goods Sold and Credit to Inventory (if you are selling inventory items).
- Credit to Finished Goods Inventory (if applicable, for inventory sales).
- Debit to Sales Tax Payable (if taxes are applied).
- Credit to any Discount Allowed account (if discounts were given).
- The system automatically creates the corresponding journal entries:
Special Considerations
- Changing Currency: Currency can be changed freely while the invoice is in the Draft stage. After finalization, you must issue a credit note to cancel the original invoice and create a new one with the correct currency.
- Foreign Currency Payments: When a customer pays a foreign currency invoice, the payment is recorded at the exchange rate on the date of payment. Any difference between the rate on the invoice date and the payment date is automatically calculated and posted to an Exchange Gain/Loss account.
Best Practices
- Review Before Finalizing: Always use the preview function to double-check all details—dates, items, amounts, and currency—before you finalize.
- Verify Exchange Rates: For high-value foreign currency invoices, confirm that the system's active exchange rate is acceptable before finalizing.
- Use Clear Notes: Add notes for the customer regarding payment instructions or terms of service to avoid confusion.
- Reconcile Promptly: Regularly match incoming payments to your open invoices to keep your receivables aging accurate.