Advanced Inventory and Warehouse Management
For businesses that manage physical stock across one or more locations—such as wholesalers, retailers with backrooms, or companies with multiple branches—LeapCount offers an advanced inventory management system.
Complete Walkthrough: Setting Up and Using Advanced Inventory Features
Step 1: Enabling Advanced Inventory
Activating this feature is a fundamental change to your inventory workflow. It is the essential first step to unlocking warehouse management and manual stock controls.
To enable this feature:
- From your main dashboard, navigate to Settings in the left-hand menu, then select Accounting Settings.
- Within Accounting Settings, click on the Inventory tab.
- You will see a warning about the permanence of this action. Read it carefully, then click the "Understand, enable it" button.
- Toggle the switch for "Enable Stock in Inventory Management" to the 'on' position.
- Click Save to confirm the change.
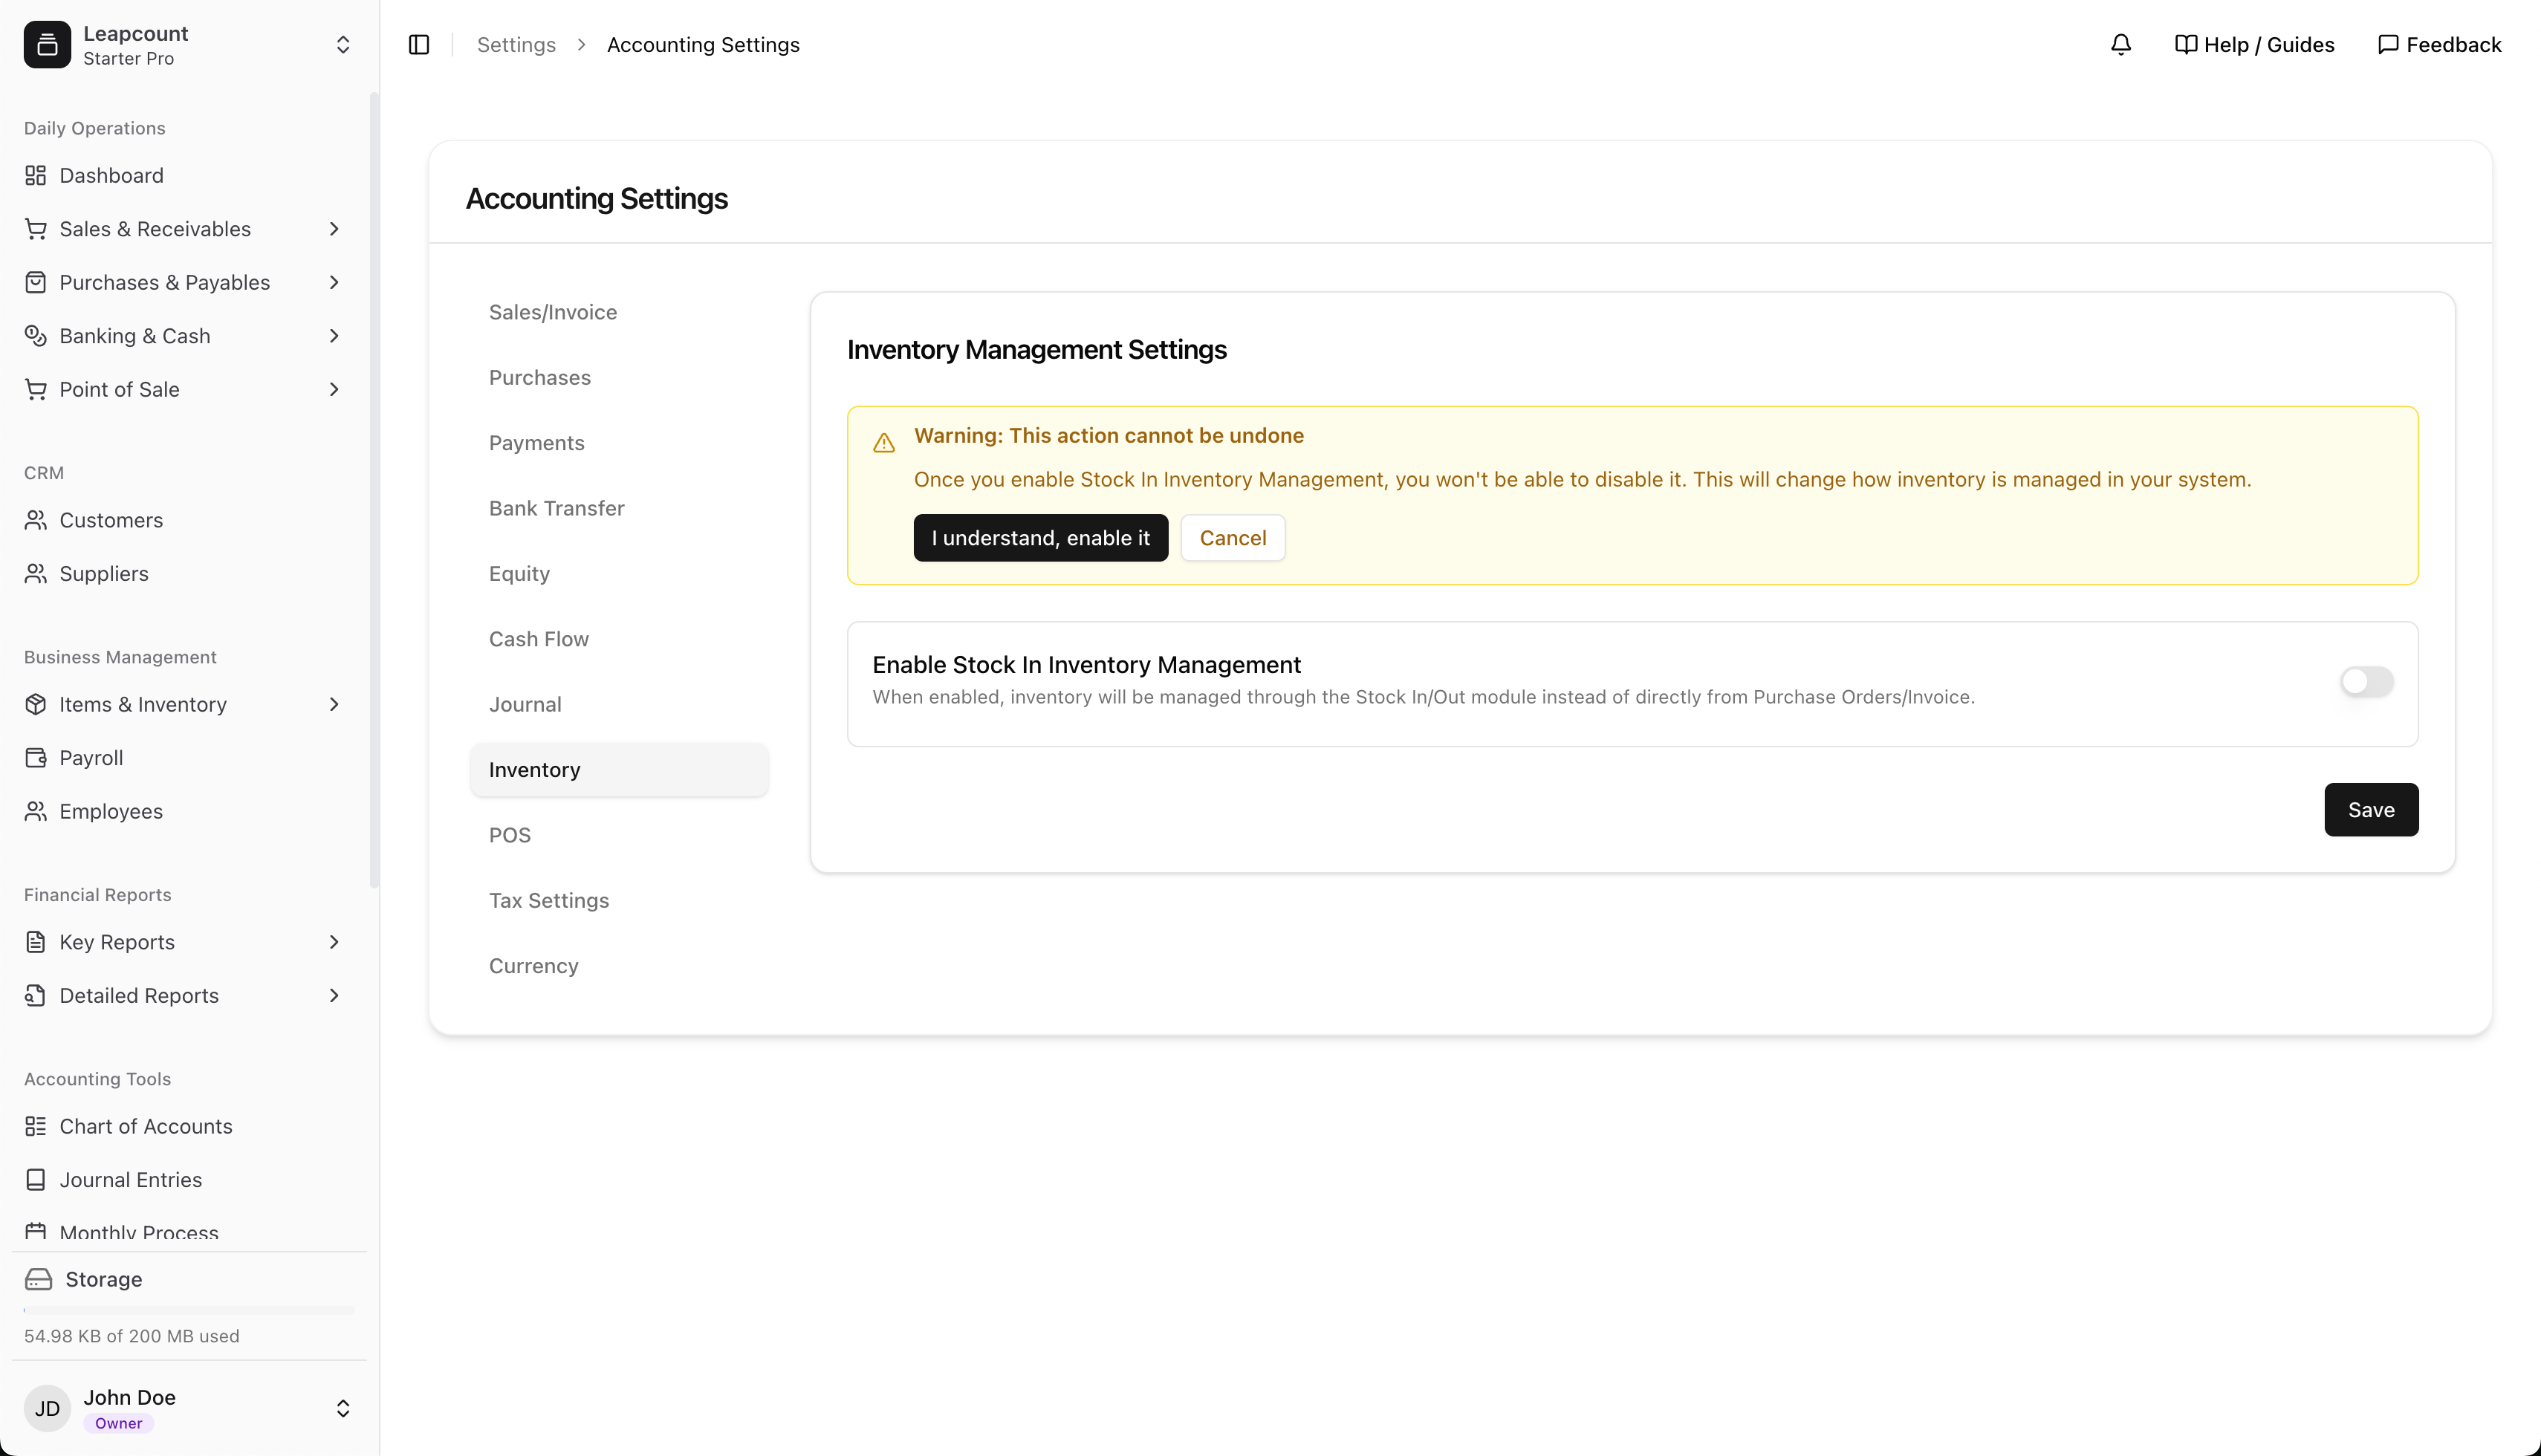
This action is irreversible. Once enabled, stock levels are no longer automatically adjusted by Invoices or Payables. For example, creating a Payable for 50 units will not add 50 units to your inventory. You must perform a corresponding Stock In to update your stock levels.
Step 2: Setting Up Your Warehouses
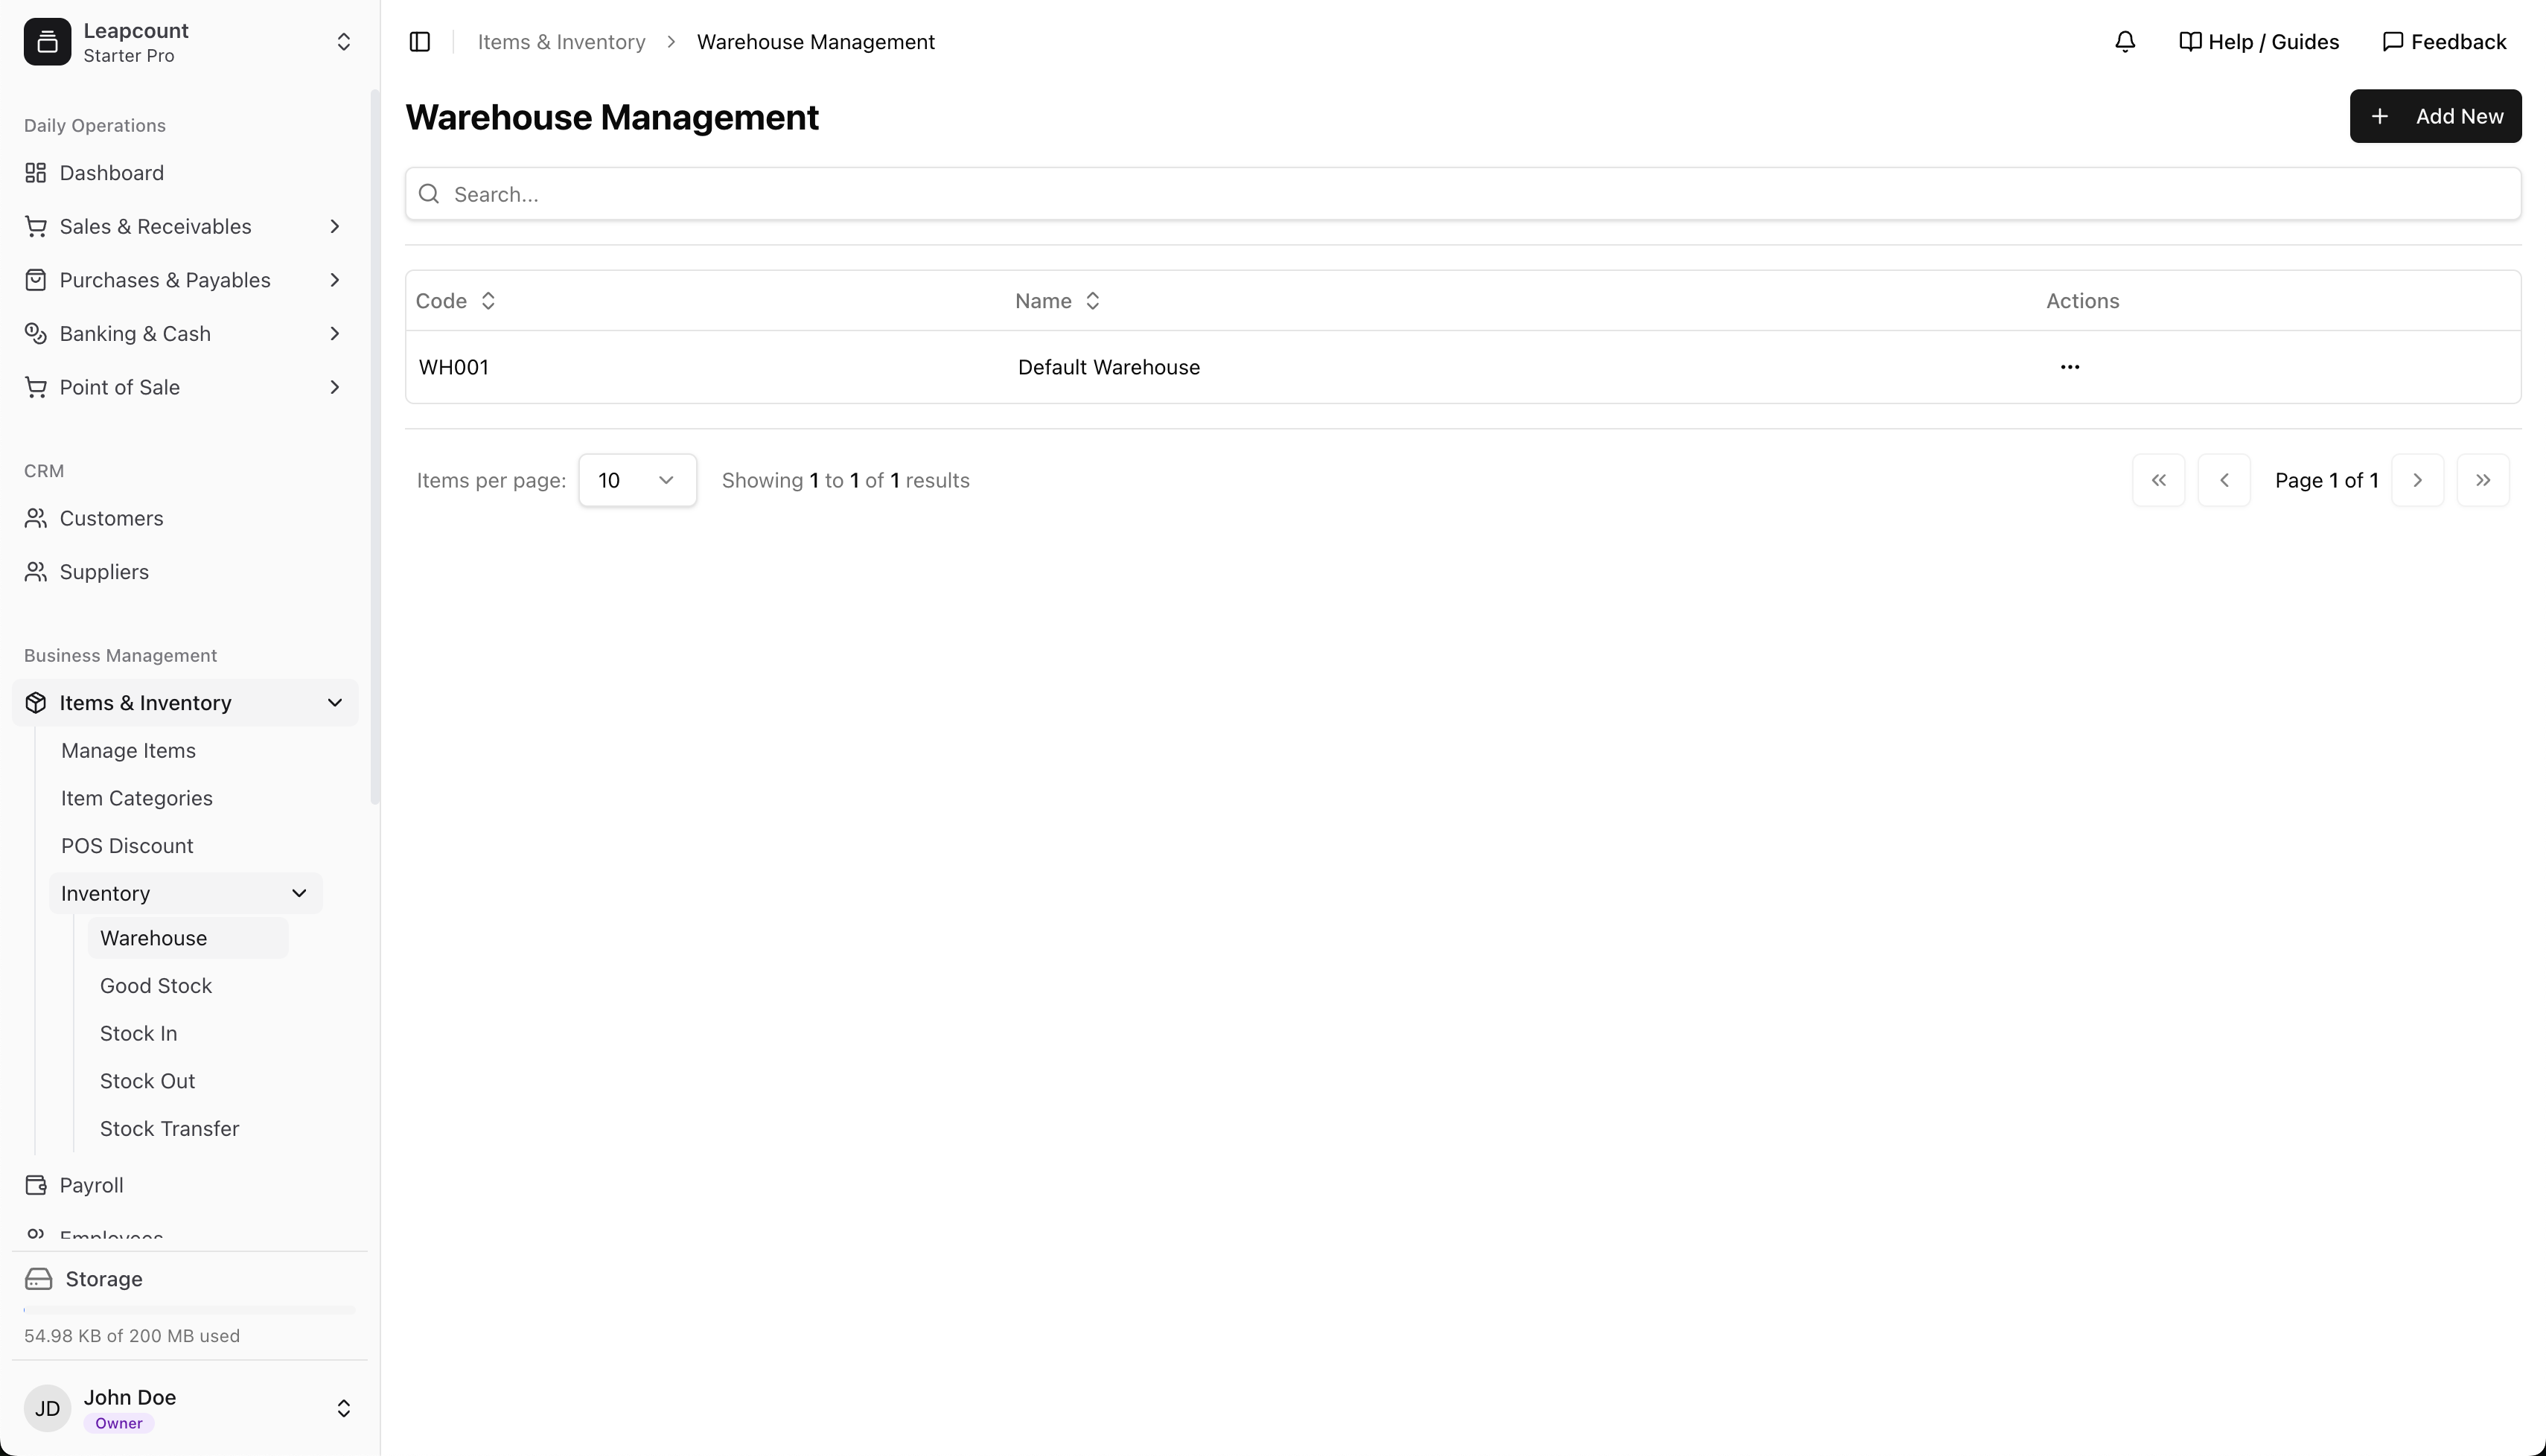
A "warehouse" in LeapCount is any distinct location where you store inventory. This could be a large distribution center, a retail storefront, a small backroom, or even a service vehicle. Creating warehouses is the foundation of managing multi-location inventory.
Navigate to Items & Inventory > Inventory > Warehouse and click the + Add New button to begin defining your locations. We recommend using clear, descriptive names and codes (e.g., "Main Warehouse - WH001", "Downtown Store - WH002").
Step 3: Assigning Items to Warehouses
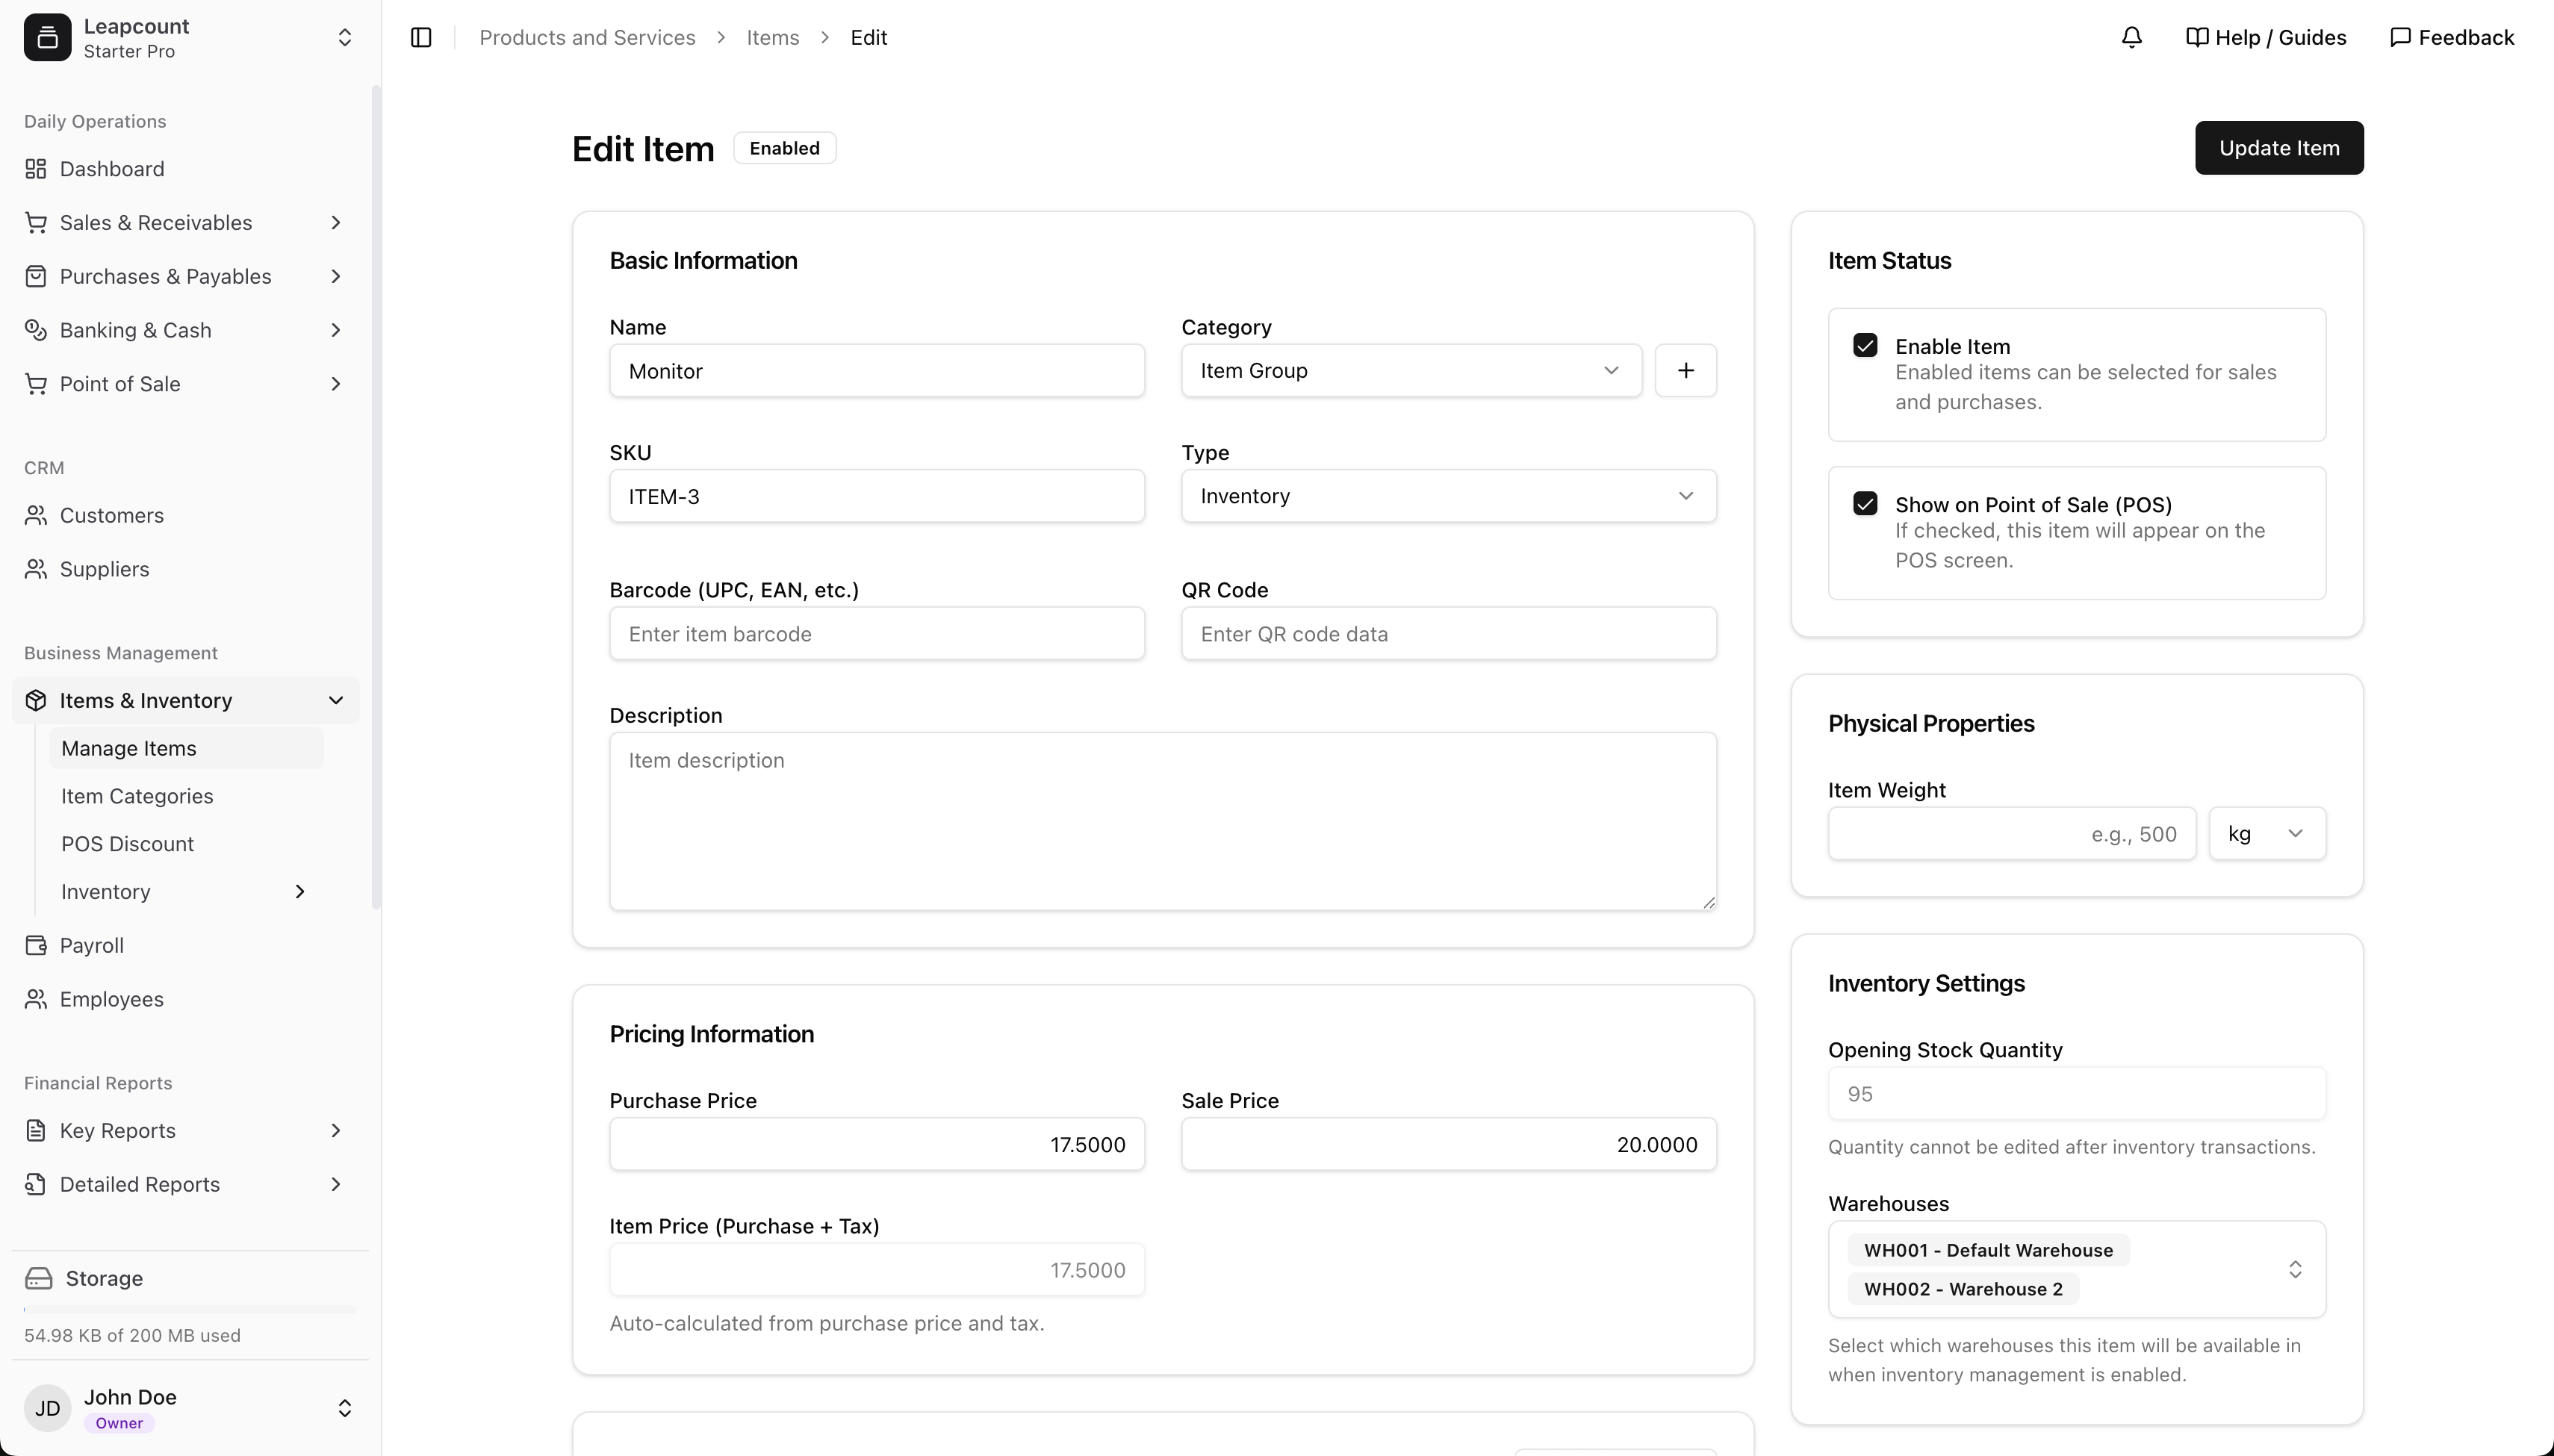
To maintain control and prevent errors, you must explicitly tell the system which items can be stored in which warehouses. This crucial step ensures that, for example, an item meant only for your main distribution center cannot be accidentally received into a retail branch.
- Go to Items & Inventory > Manage Items.
- Select an inventory item to edit.
- On the Edit Item page, scroll down to the Inventory Settings section.
- In the Warehouses field, click and select all the locations where this item can be legitimately stored and managed.
- Click Update Item to save your changes. You must repeat this for all inventory-tracked items.
Core Inventory Workflows
Once set up, your daily inventory tasks will revolve around three main actions: Stock In, Stock Out, and Stock Transfer.
Receiving Stock (Stock In)
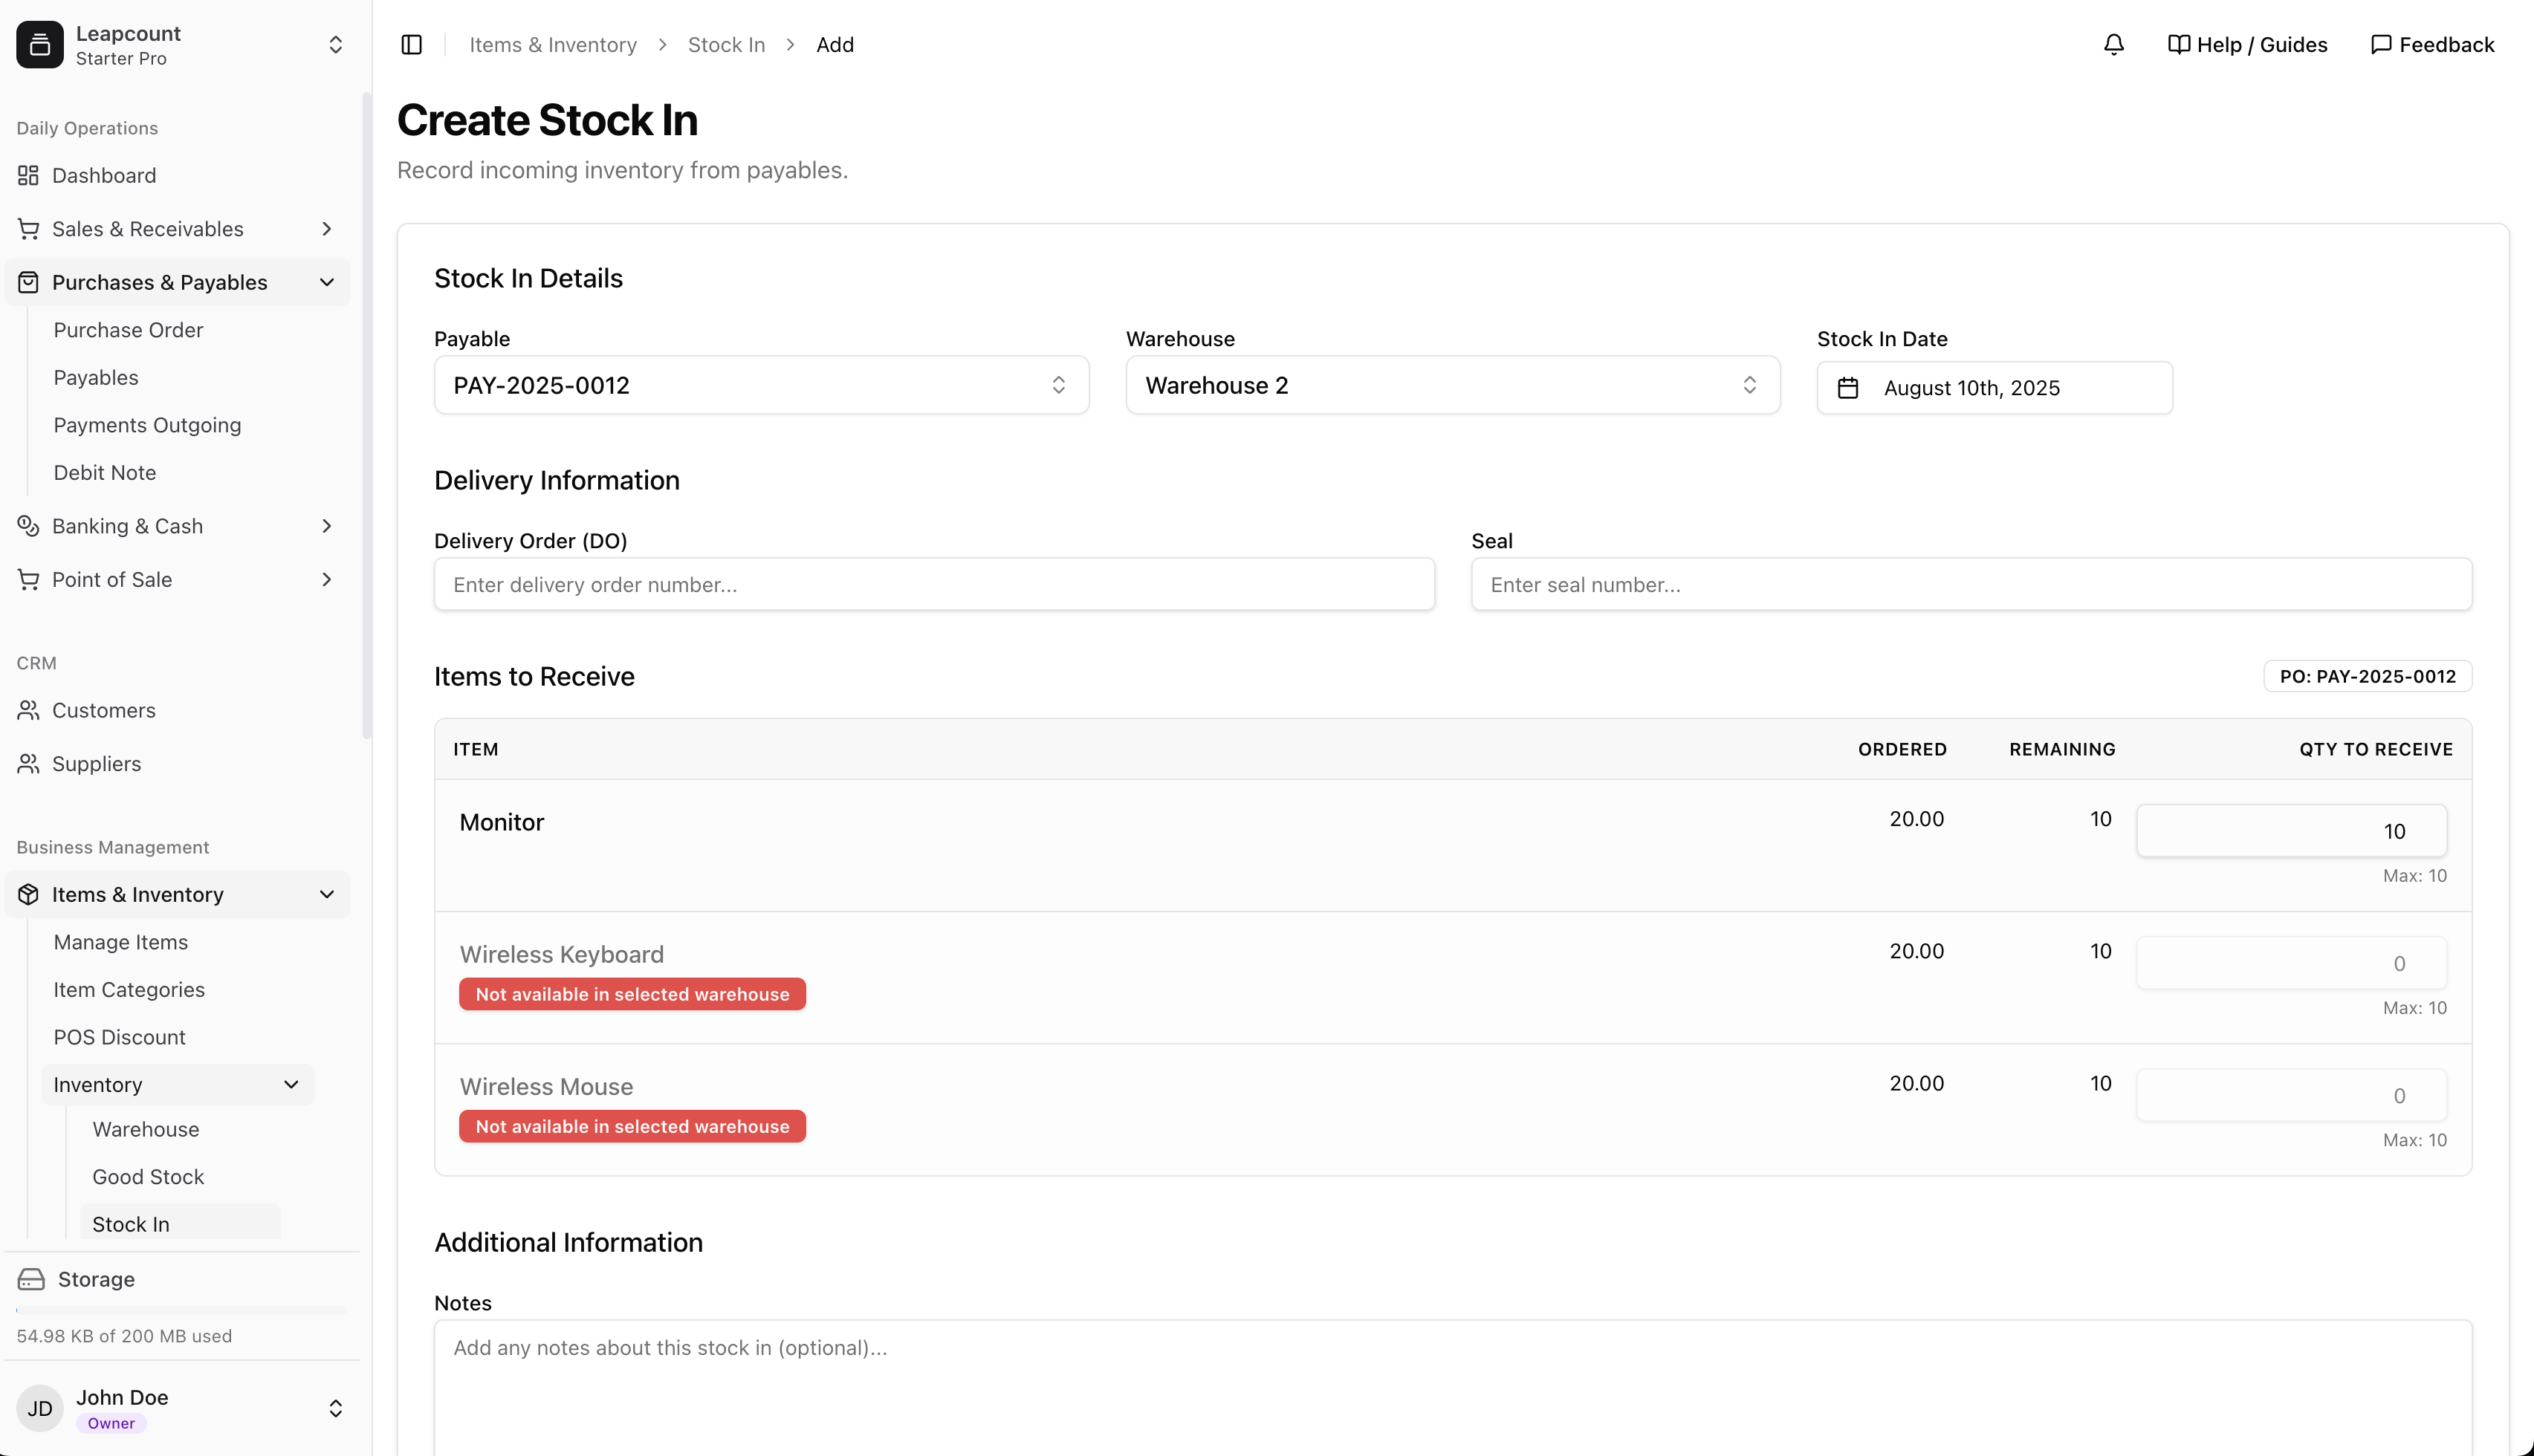
When goods arrive from a supplier, use Stock In to add them to a warehouse's inventory. This process typically follows the creation of a Payable.
When creating a Stock In, you link it to the original Payable and select the warehouse where the goods are being received. The system will then show you the items from that purchase order. If an item has not been assigned to the selected warehouse (as per Step 3), it will be marked as "Not available," preventing you from receiving it there.
Transferring Stock Between Warehouses
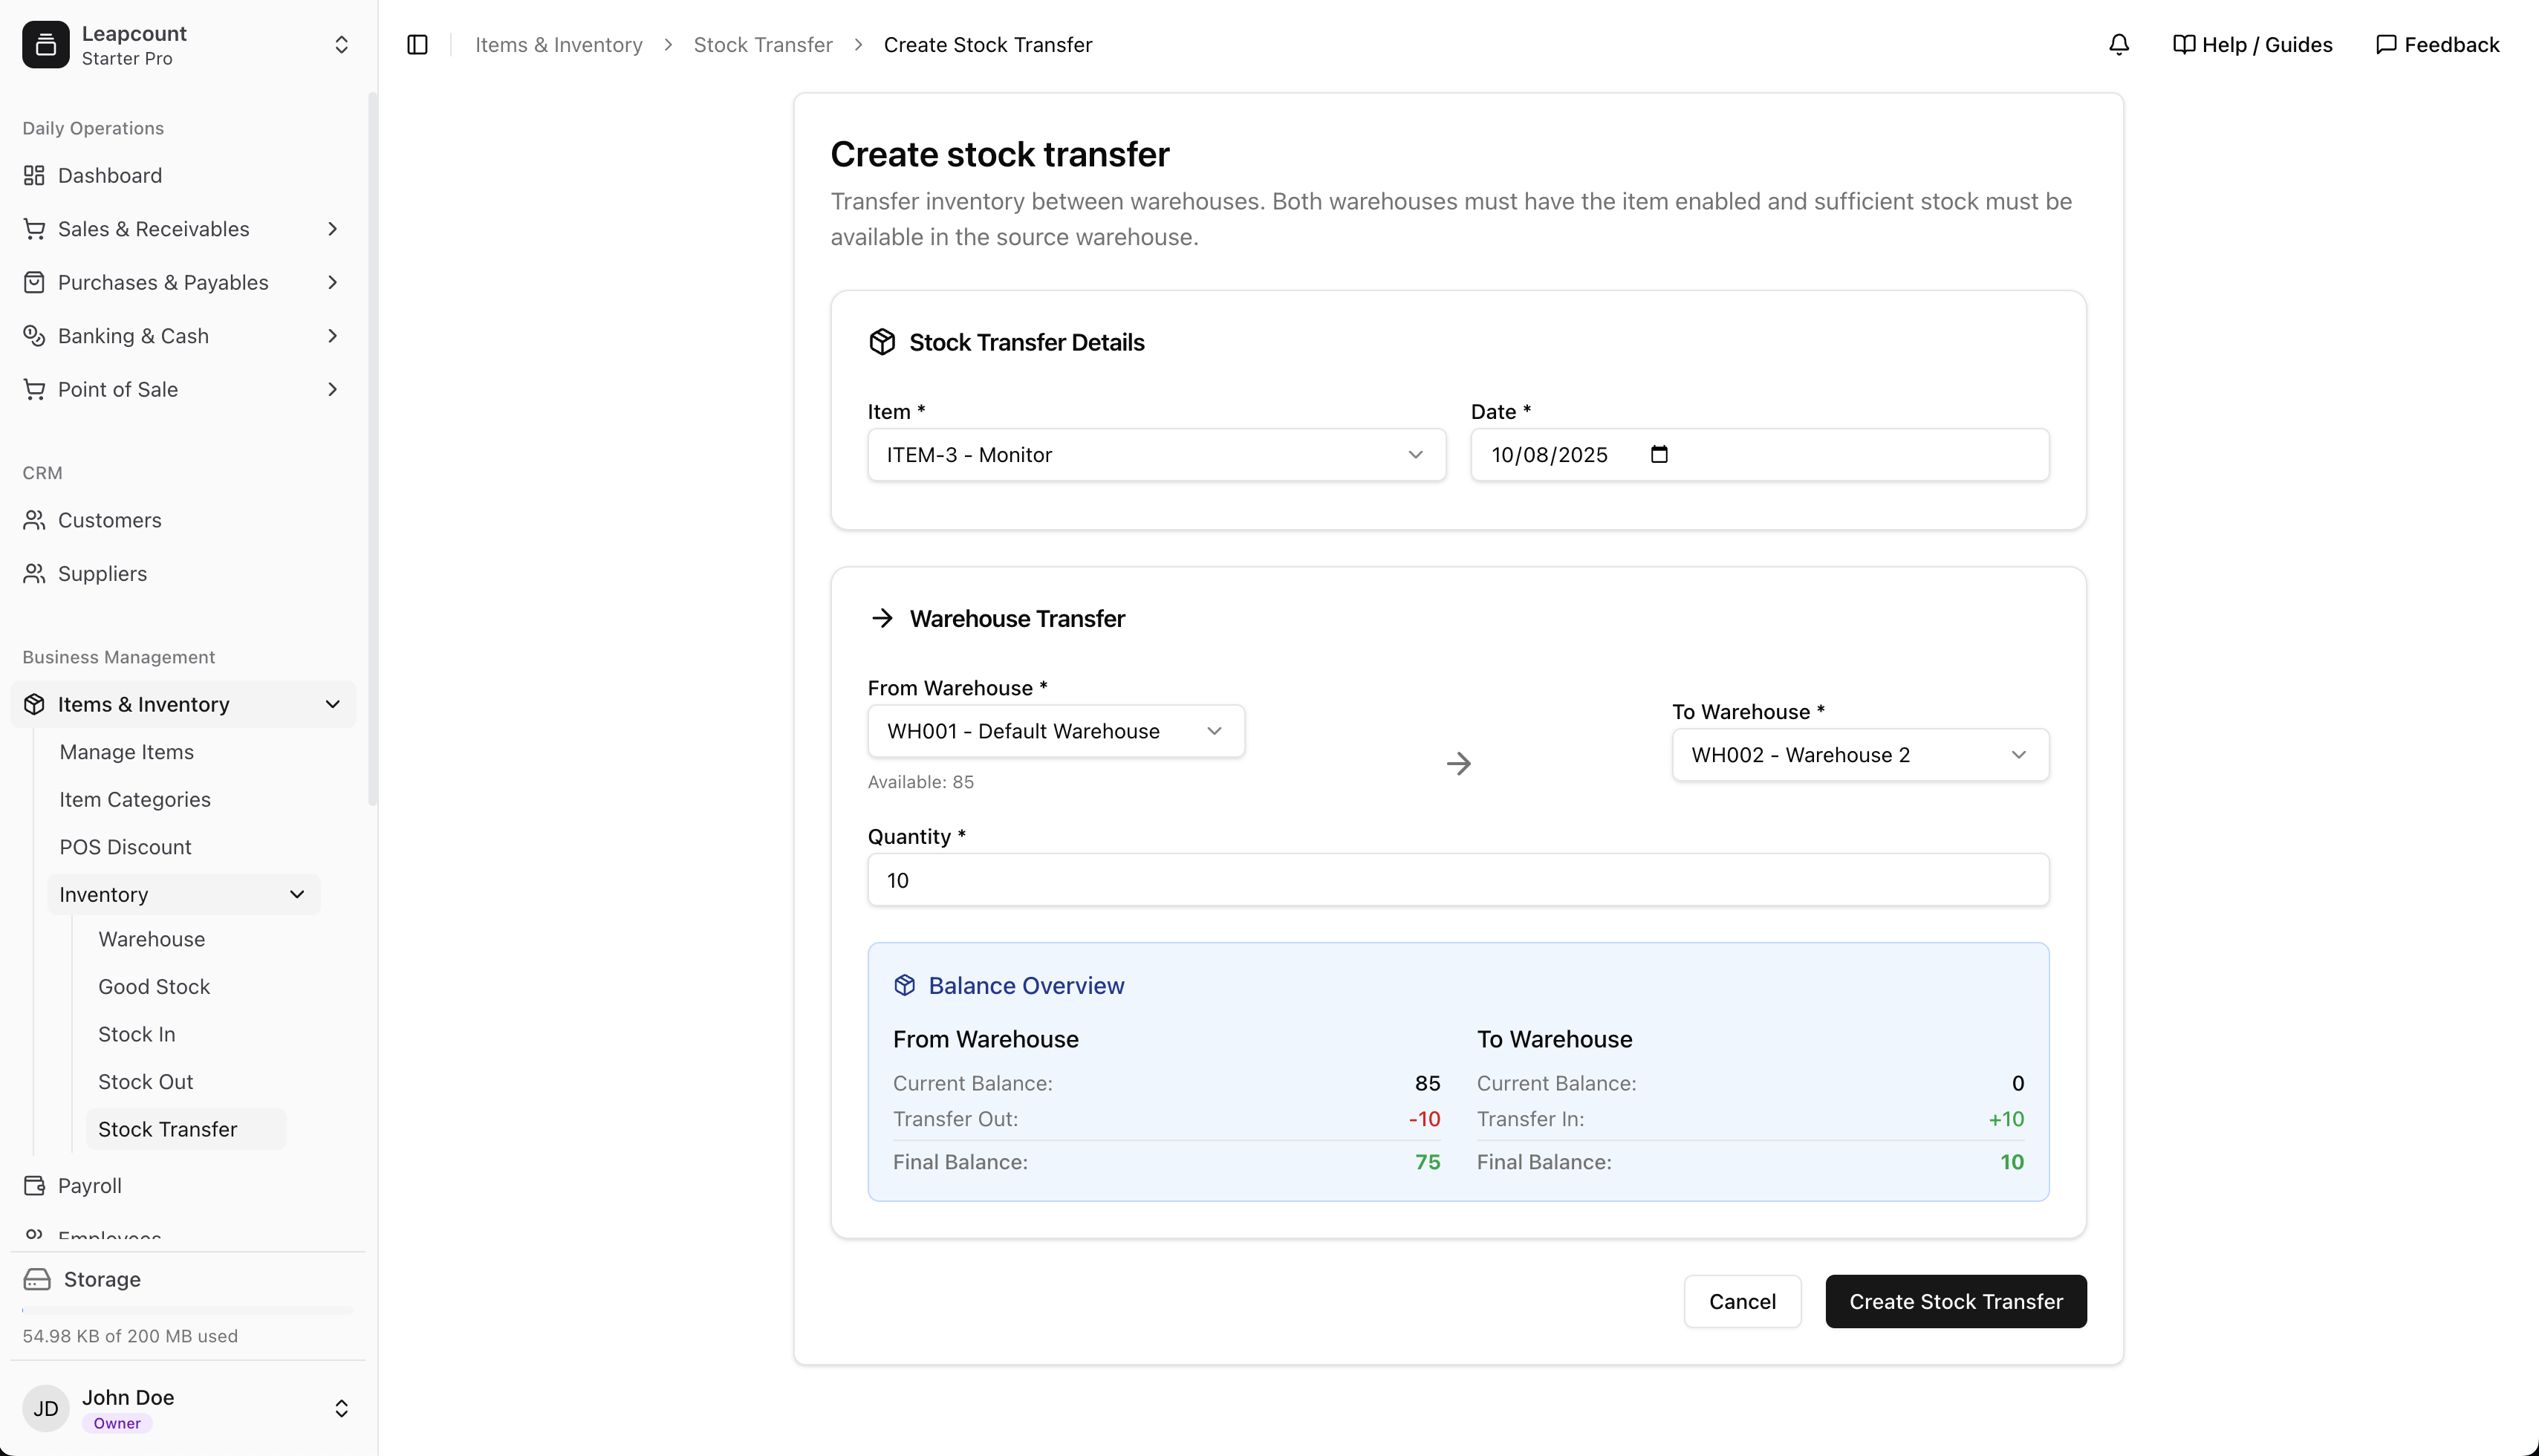
Use Stock Transfer to accurately record the movement of goods between your own locations. This is essential for replenishing storefronts from a depot, moving materials between sites, or rebalancing inventory across branches.
Navigate to Items & Inventory > Inventory > Stock Transfer. Here, you will specify the item, quantity, and the 'From' and 'To' warehouses. The system displays a balance overview, showing you the resulting stock levels at both locations before you finalize the transfer.
Recording Other Reductions (Stock Out)
A Stock Out is used to record inventory reductions that are not part of a customer sale. Common reasons for a stock out include:
- Writing off damaged or expired goods.
- Removing items for internal use (e.g., promotional samples, office use).
- Recording losses due to spoilage or theft.
This ensures your inventory counts remain accurate by accounting for all forms of stock depletion.
Auditing and Visibility: The Good Stock Report
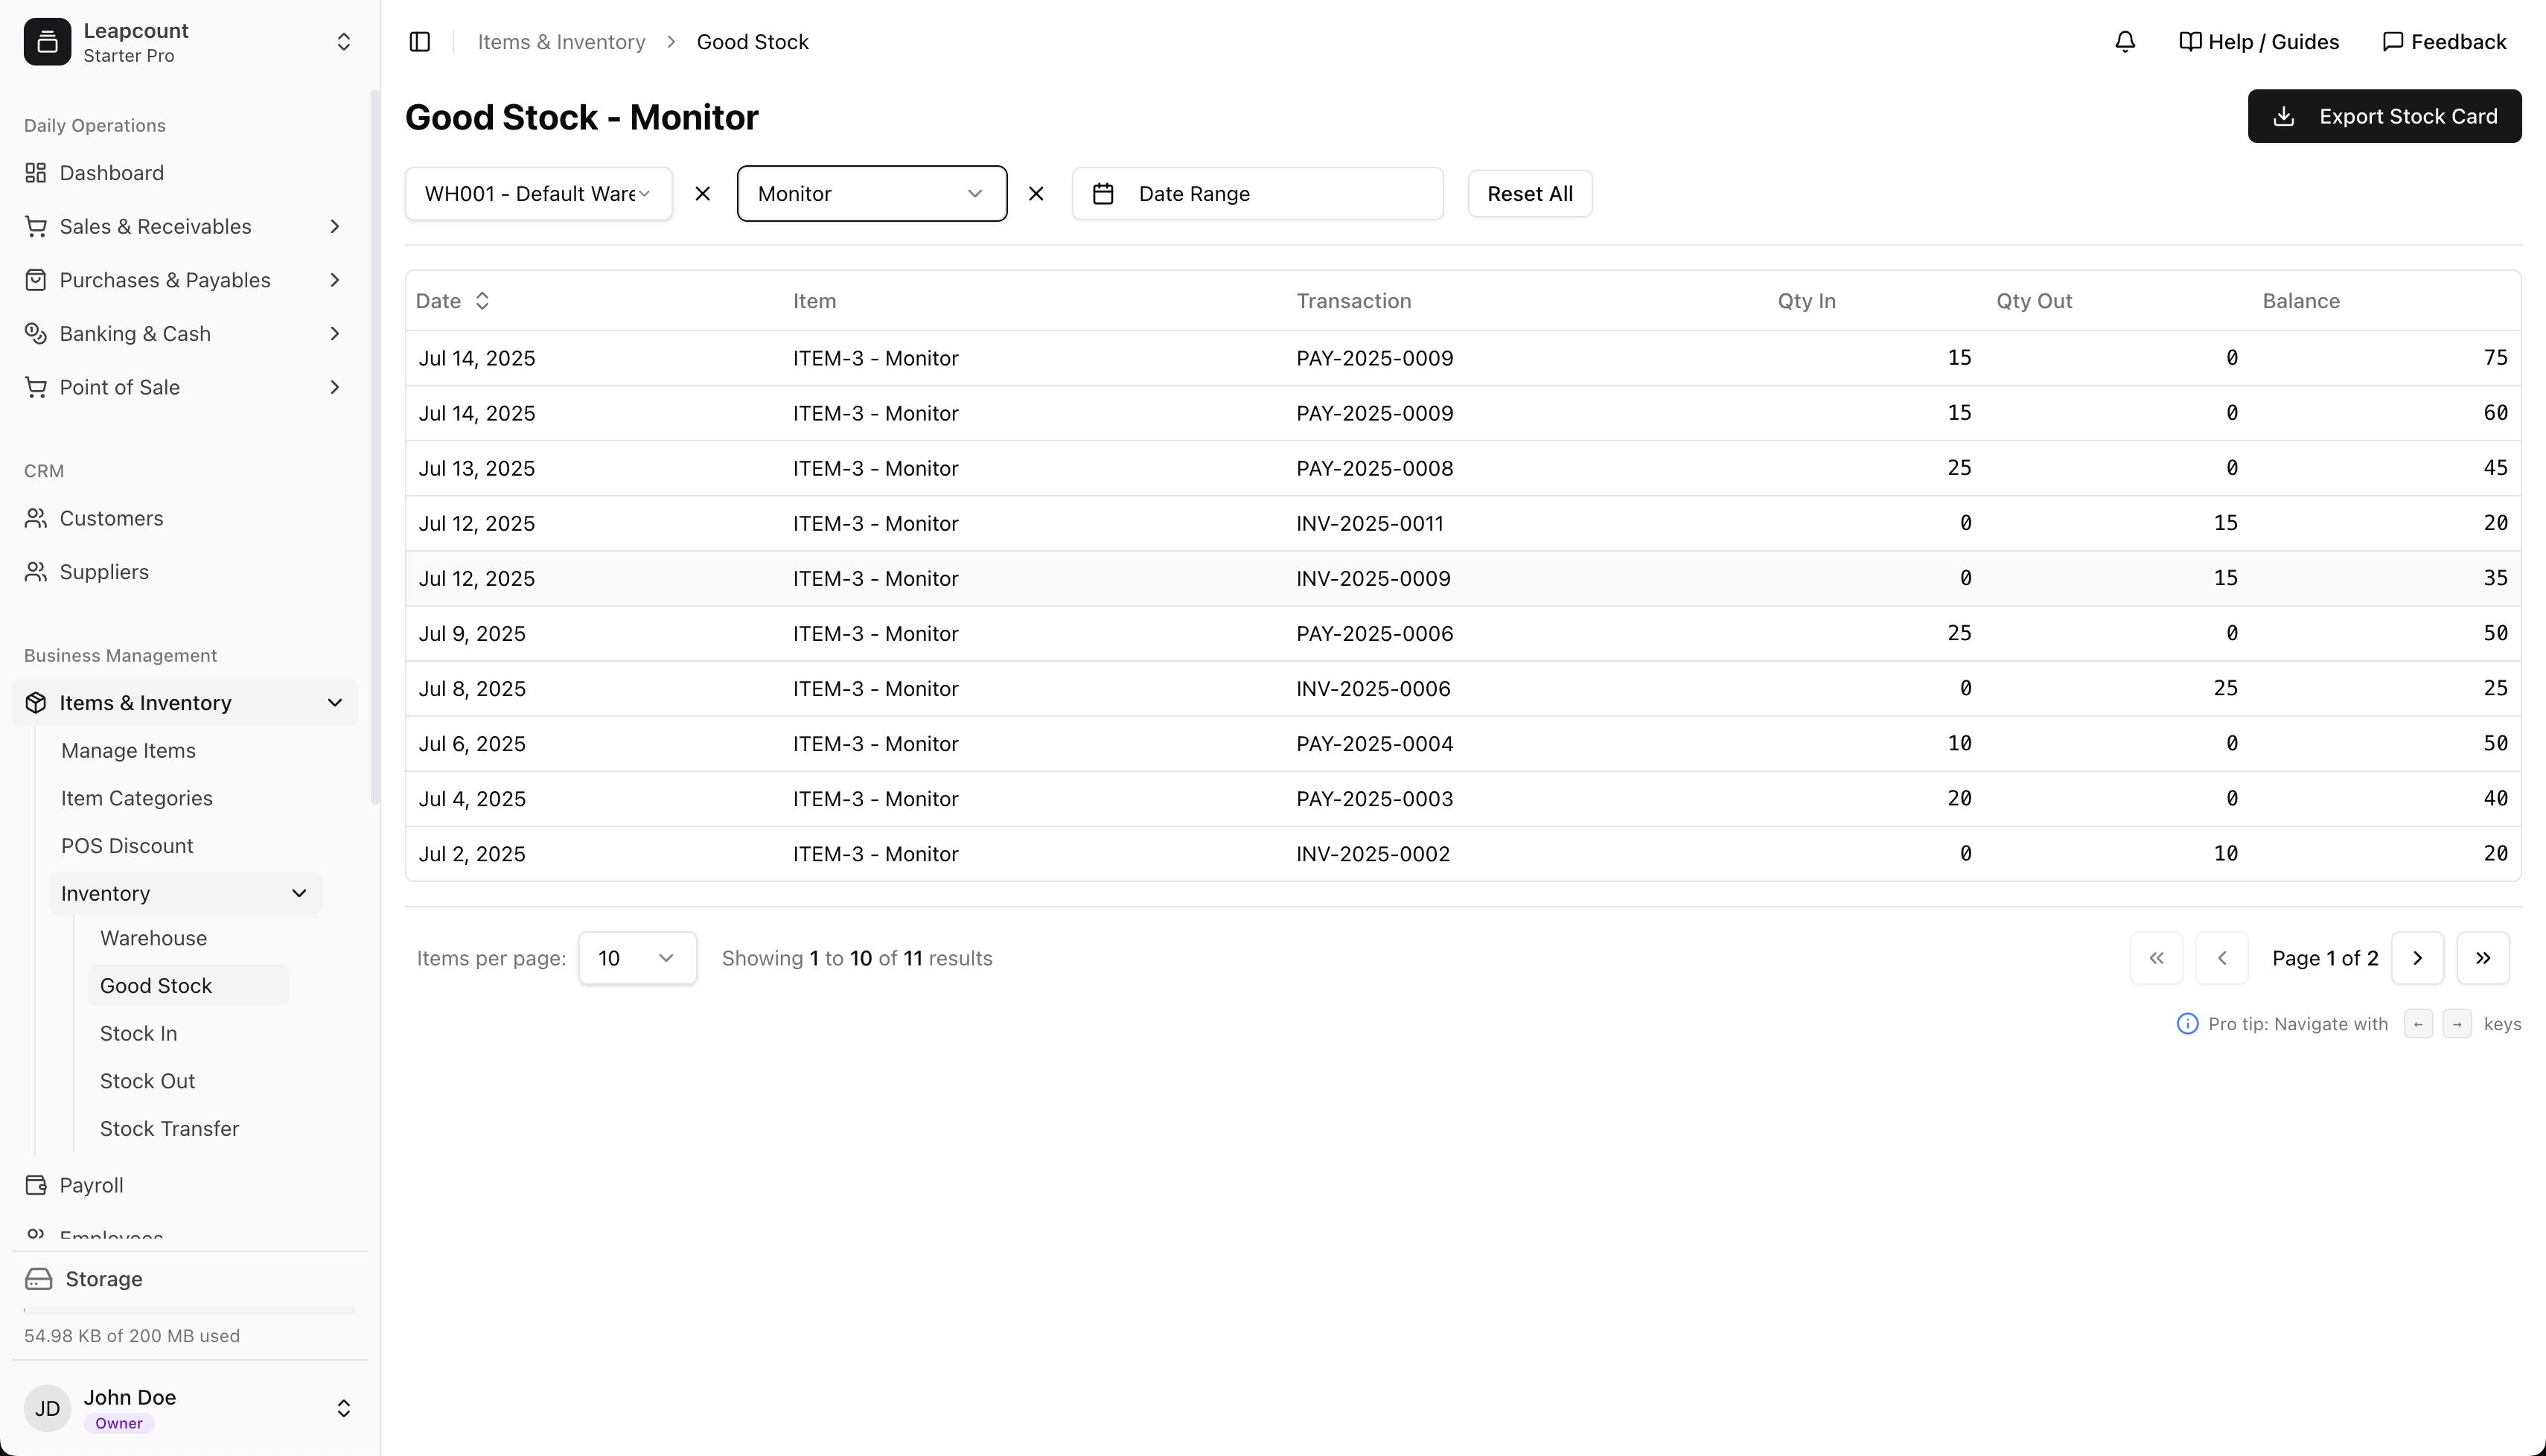
The Good Stock report (also known as a stock card or inventory ledger) is your primary tool for tracking and auditing. It provides a complete, chronological audit trail for any item in any warehouse.
By filtering by item and warehouse, you can see every transaction—Stock Ins, Stock Outs, Sales Invoices, and Transfers—that affected its quantity, along with a running balance. This is invaluable for troubleshooting discrepancies and understanding inventory flow.
What's Next?
- Configure your advanced inventory settings to enable detailed stock tracking.
- Create your first Invoice to start billing your customers.
- Create your first Payable to manage your supplier payments.