Creating Payables (Bills)
Effectively managing your Accounts Payable is crucial for maintaining good supplier relationships and controlling your cash flow. In Leapcount, a "Payable" or "Bill" is the document you create to record an invoice you've received from a supplier. This guide details how to enter payables, handle different currencies, and manage the approval and payment process.
The Payable Creation Workflow
The process for managing payables ensures proper recording and authorization before payment:
- Draft: A new payable is entered into the system. At this stage, it has no impact on your financial statements and can be freely edited.
- Accepted: Once approved, the payable is posted to the General Ledger. It is now a formal liability of the company.
- Paid: When payment is received, the invoice is marked as paid, and the cash account is updated accordingly.
- Partially Paid: If a partial payment is made, the invoice reflects the outstanding balance until fully settled.
Step-by-Step: Entering a New Payable
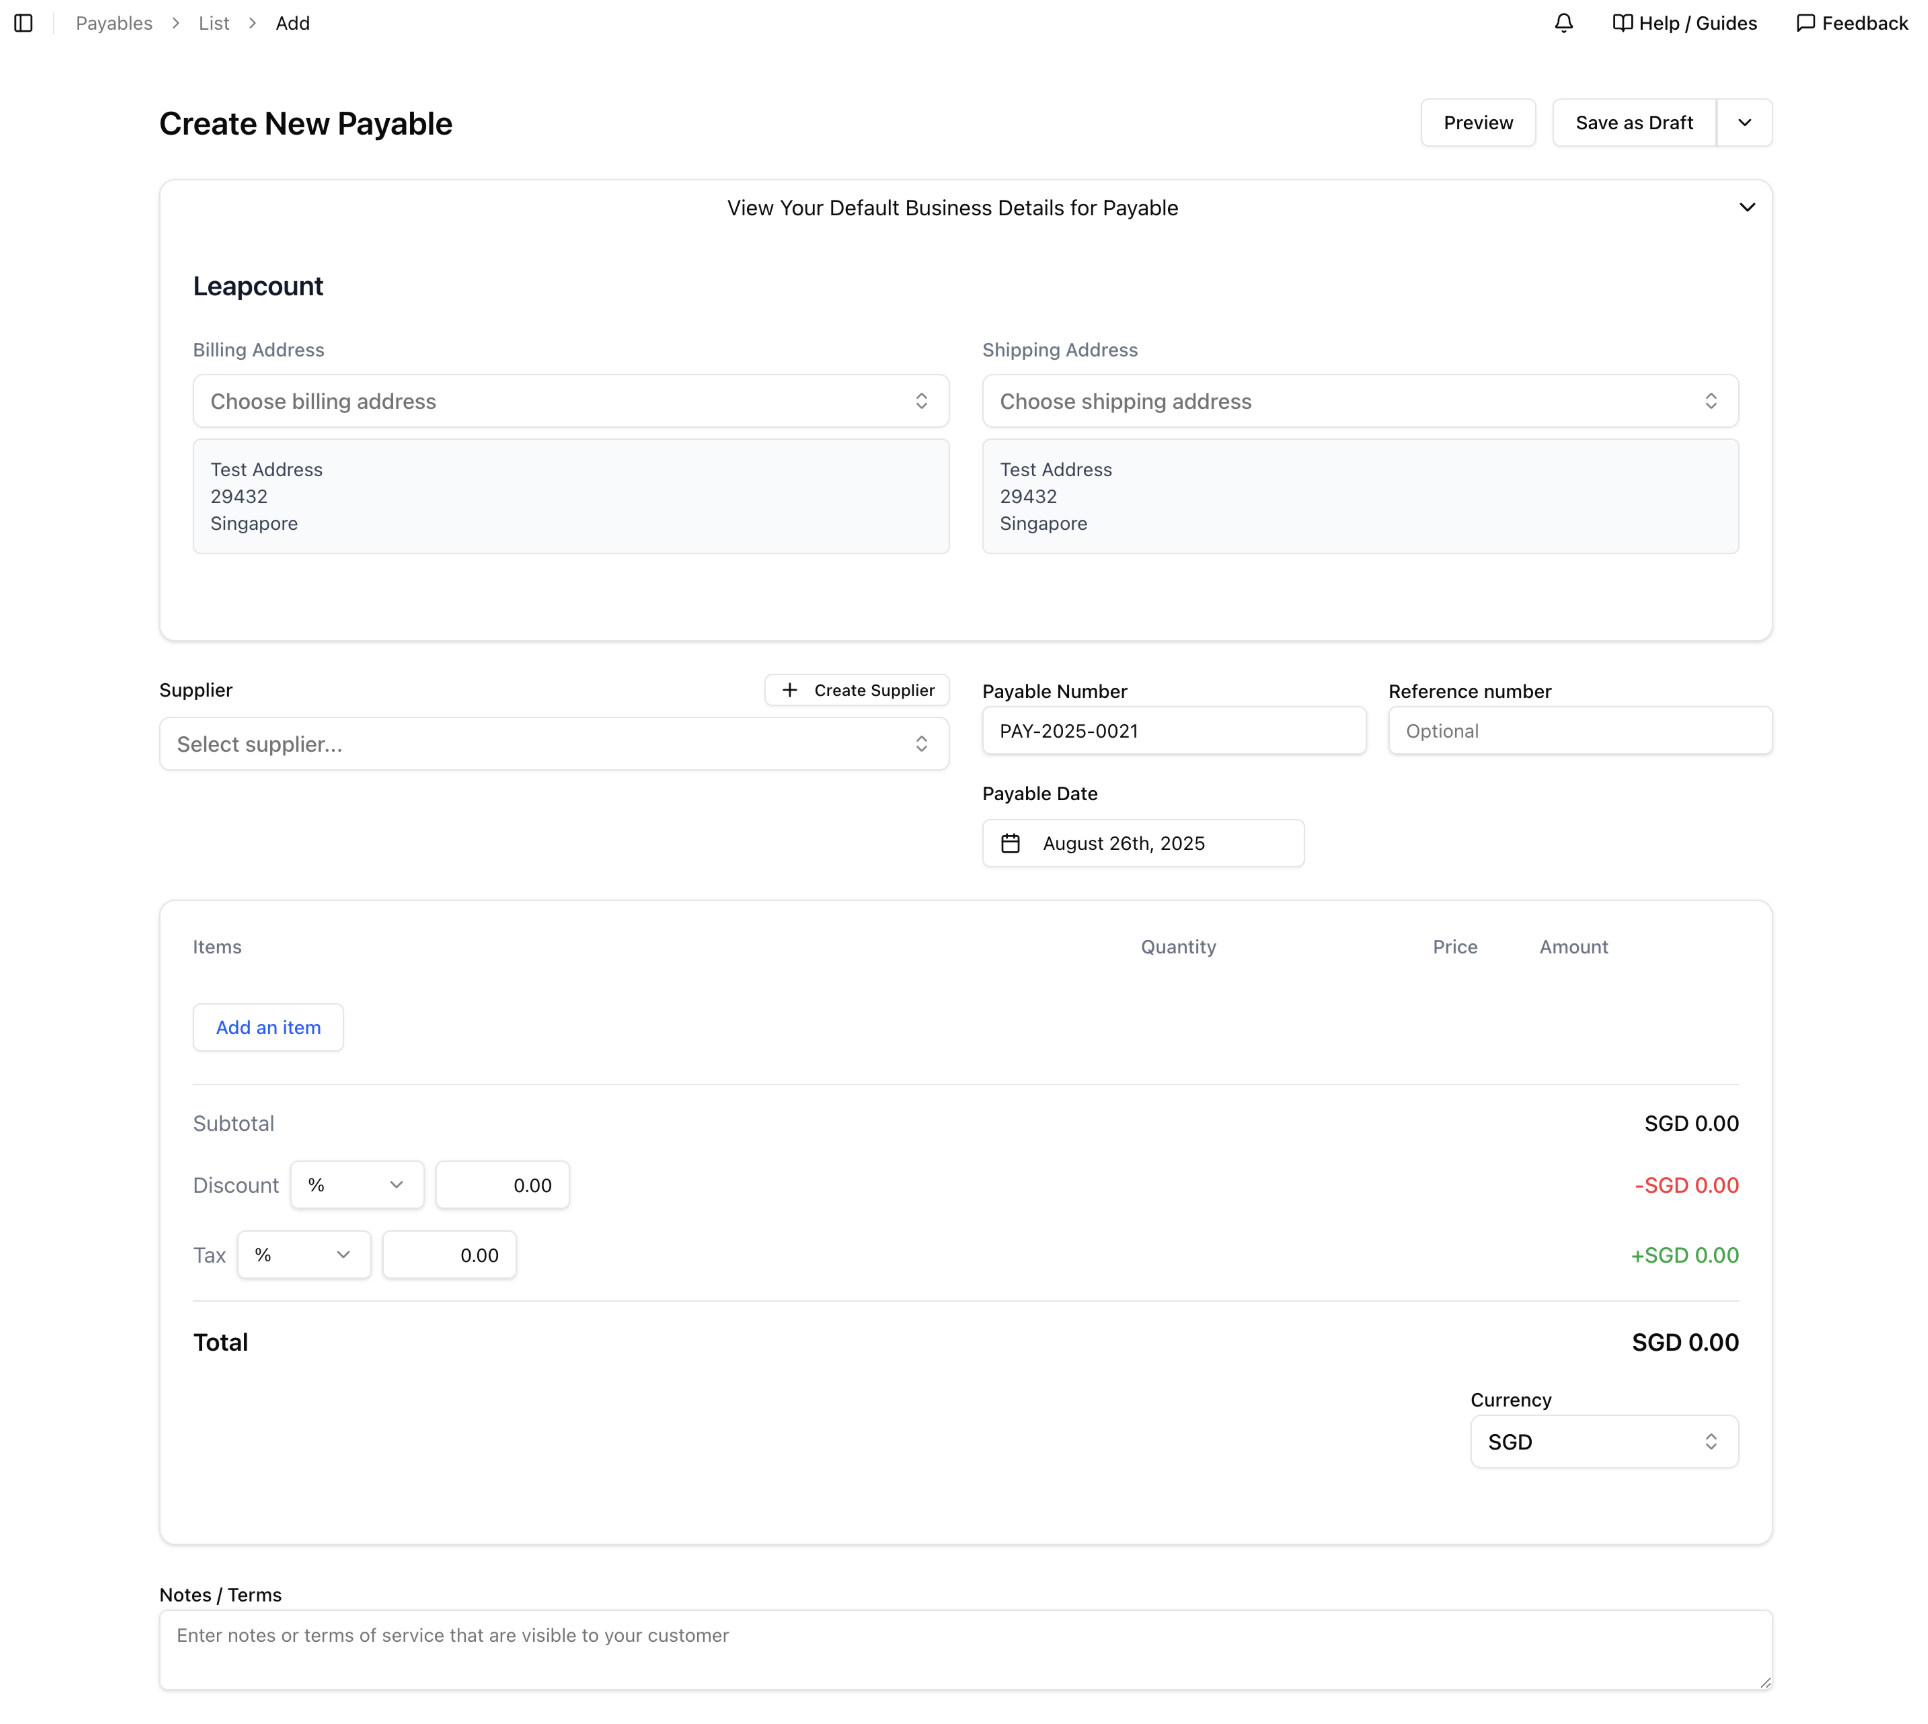
To begin, navigate to Purchases & Payables → Payables and click + Add New. The payable form is where you will transfer all the details from your supplier's invoice into the system.

1. Supplier and Payable Details
This section captures the essential information from the supplier's invoice.
- Supplier: Select the supplier from your database, or create a new one on the fly.
- Payable Number: This is an internal number generated by Leapcount (e.g.,
PAY-2025-0021) for tracking purposes. - Reference number: This is a critical field. Enter the supplier's own invoice number here. This helps prevent duplicate payments and is essential for reconciliation.
- Payable Date: Enter the date from the supplier's invoice. As it's currently August 26th, 2025, the form defaults to today. This date determines the posting period for the expense.
- Due Date: (Not shown in Figure 1, but part of the process) Specify the payment due date to help manage your cash flow.
2. Adding Line Items
Here, you detail the goods or services you purchased.
- Item/Account: You can select a predefined item or directly assign the cost to a specific expense account (e.g., "Office Supplies," "Marketing Expenses") or an asset account.
- Description: Provide a clear description for future reference.
- Quantity, Unit Price, Tax Rate: Enter these details exactly as they appear on the supplier's invoice.
- The system will calculate the total amount due, which you should verify against the supplier's document.
3. Handling Multi-Currency Payables
When you receive a payable in a foreign currency, Leapcount makes it easy to record it accurately.
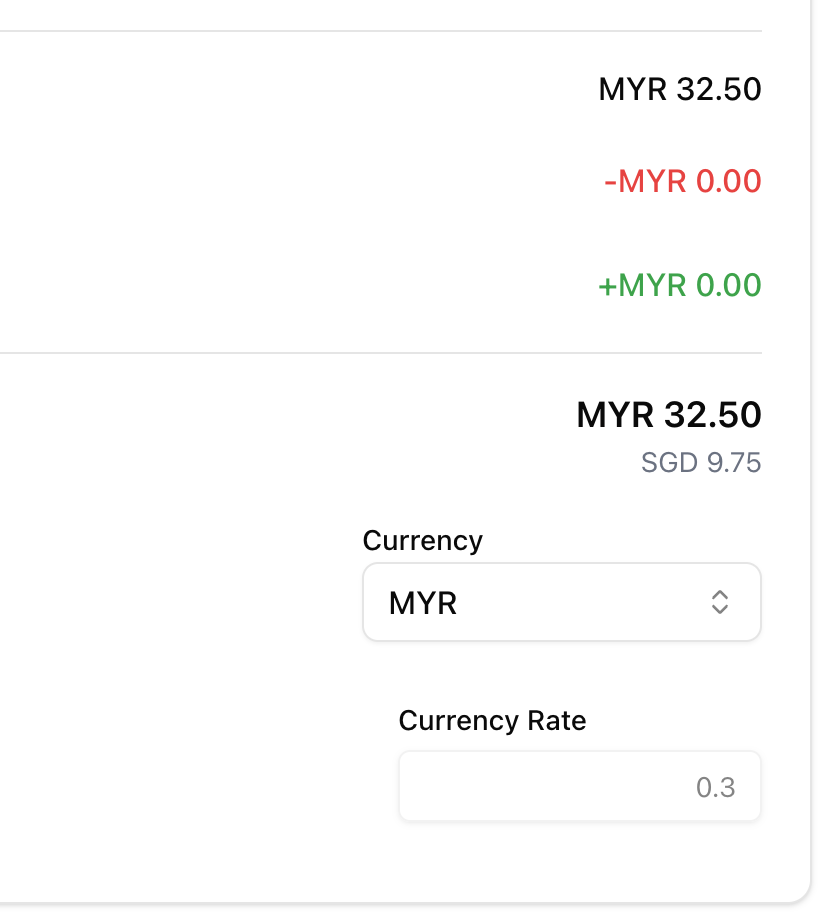
- Currency: Select the currency that matches the supplier's invoice.
- Currency Rate: The system will apply the active exchange rate for the Payable Date. You can view and, if you have the permissions, edit this rate.
- Dual-Currency Display: The form clearly shows the total in the foreign currency (e.g.,
MYR 32.50) and the calculated equivalent in your base currency (SGD 9.75). This ensures the payable is recorded correctly for both payment (in the foreign currency) and financial reporting (in your base currency).

4. Attachments and Notes
- Attachments: It is highly recommended to attach a digital copy (PDF or scan) of the original supplier invoice to the payable record. This provides an audit trail and makes verification during the approval process easy.
- Notes / Terms: Add any internal notes relevant to the payable, such as the purpose of the expense or approval details.
Reviewing and Approving the Payable
After saving a draft, the next step is to review and approve it. You can use the Preview button (visible in Figure 1) to see how the entered information will look on the final document.
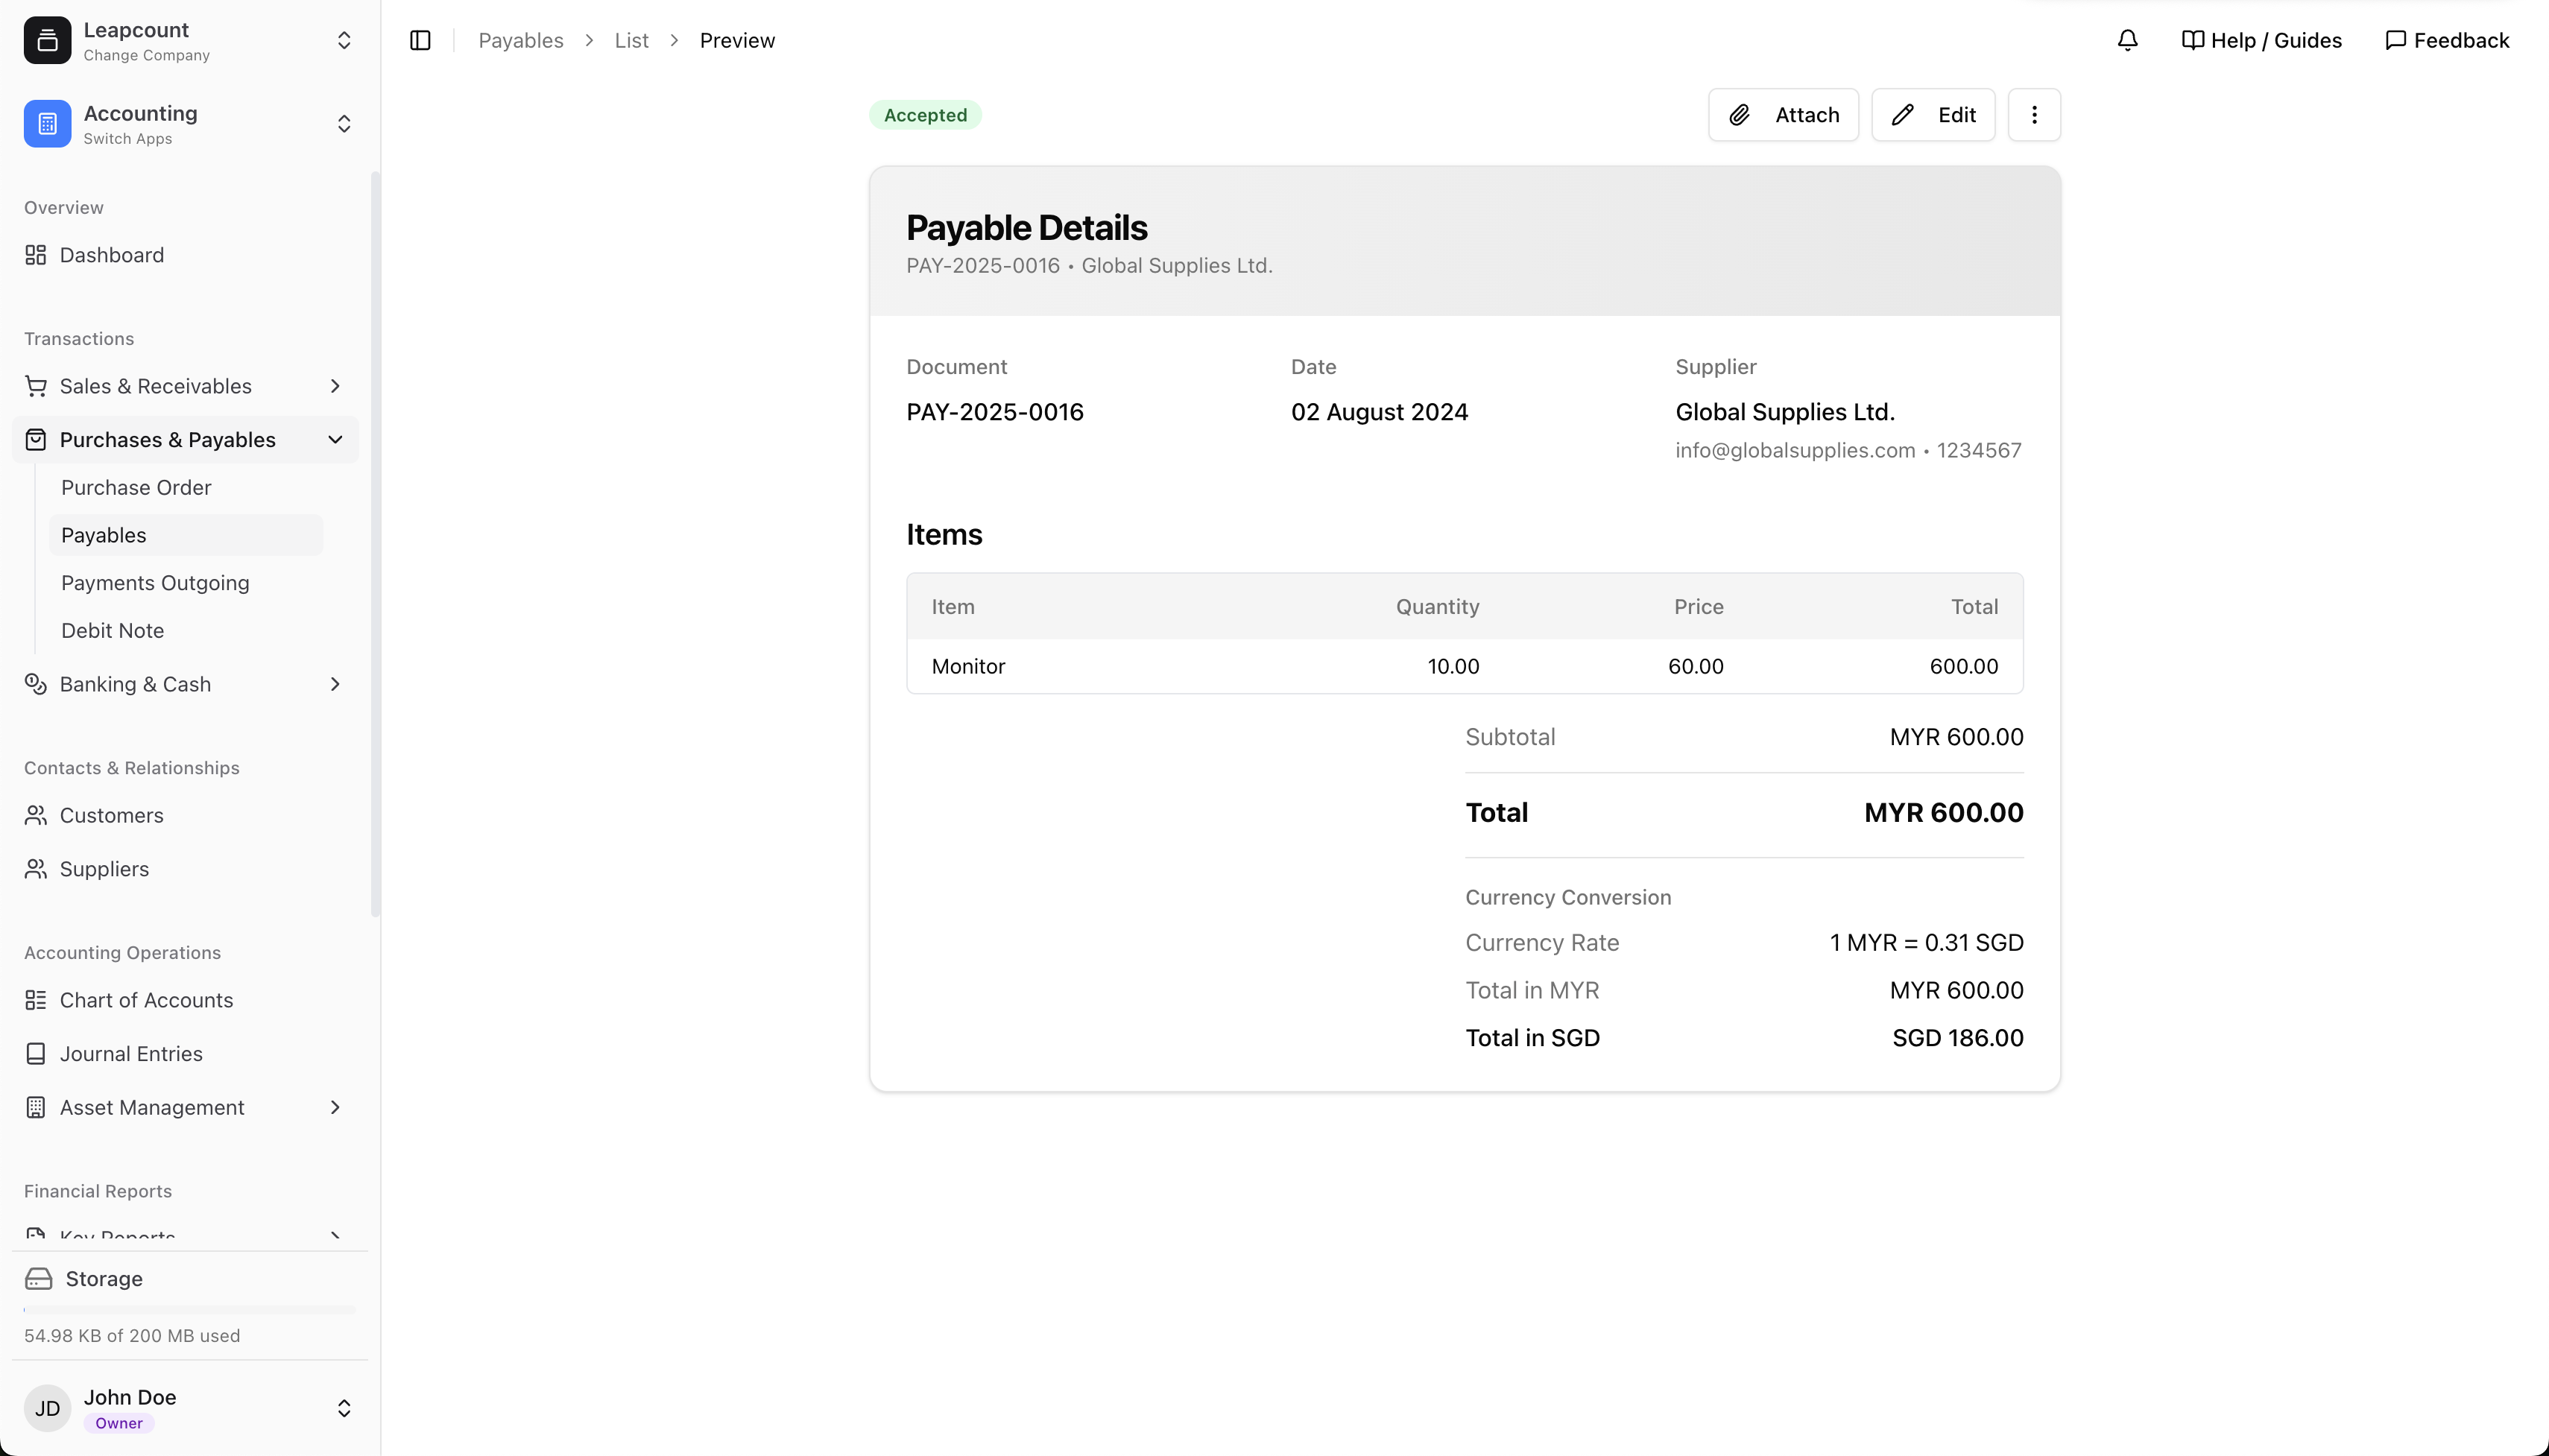
Once a payable passes the internal approval process, its status changes to Accepted. It is now a formal, un-editable record of a liability that is ready for payment.

Accounting Impact of Accepted
Finalizing a bill through accepted formally recognizes it as a debt owed by your company.
- Upon Accepted:
- The system automatically creates the corresponding journal entries:
- Debit to an Expense or Asset account (recording the purchase).
- Credit to Accounts Payable (increasing the amount you owe).
- Credit to Finished Goods Inventory (if applicable, for inventory purchases).
- Debit to Input Tax Credit (if taxes are applied).
- Credit to Sales Tax Payable (if applicable).
- The system automatically creates the corresponding journal entries:
Special Considerations
- Changing Currency: Currency can be changed freely while the invoice is in the Draft stage. After finalization, you must issue a credit note to cancel the original invoice and create a new one with the correct currency.
- Foreign Currency Payments: When a customer pays a foreign currency invoice, the payment is recorded at the exchange rate on the date of payment. Any difference between the rate on the invoice date and the payment date is automatically calculated and posted to an Exchange Gain/Loss account.
Best Practices
- Attach the Source Document: Always attach the original supplier invoice. This is the single most important best practice for a strong accounts payable process.
- Verify, Verify, Verify: Before submitting for approval, carefully match every detail on your screen—supplier, reference number, date, and amounts—to the attached document.
- Enter Payables Promptly: Record payables as soon as you receive them. This ensures your financial statements accurately reflect your liabilities and helps you avoid late payment fees.
- Use Due Dates for Cash Management: Monitor the due dates of your approved payables to plan your cash outflows effectively.